Loading ...
Loading ...
Loading ...
80
SIGNATURE RAILING
NOTE: Construction methods are always improving. Please refer to www.trex.com for the most up-to-date installation requirements.
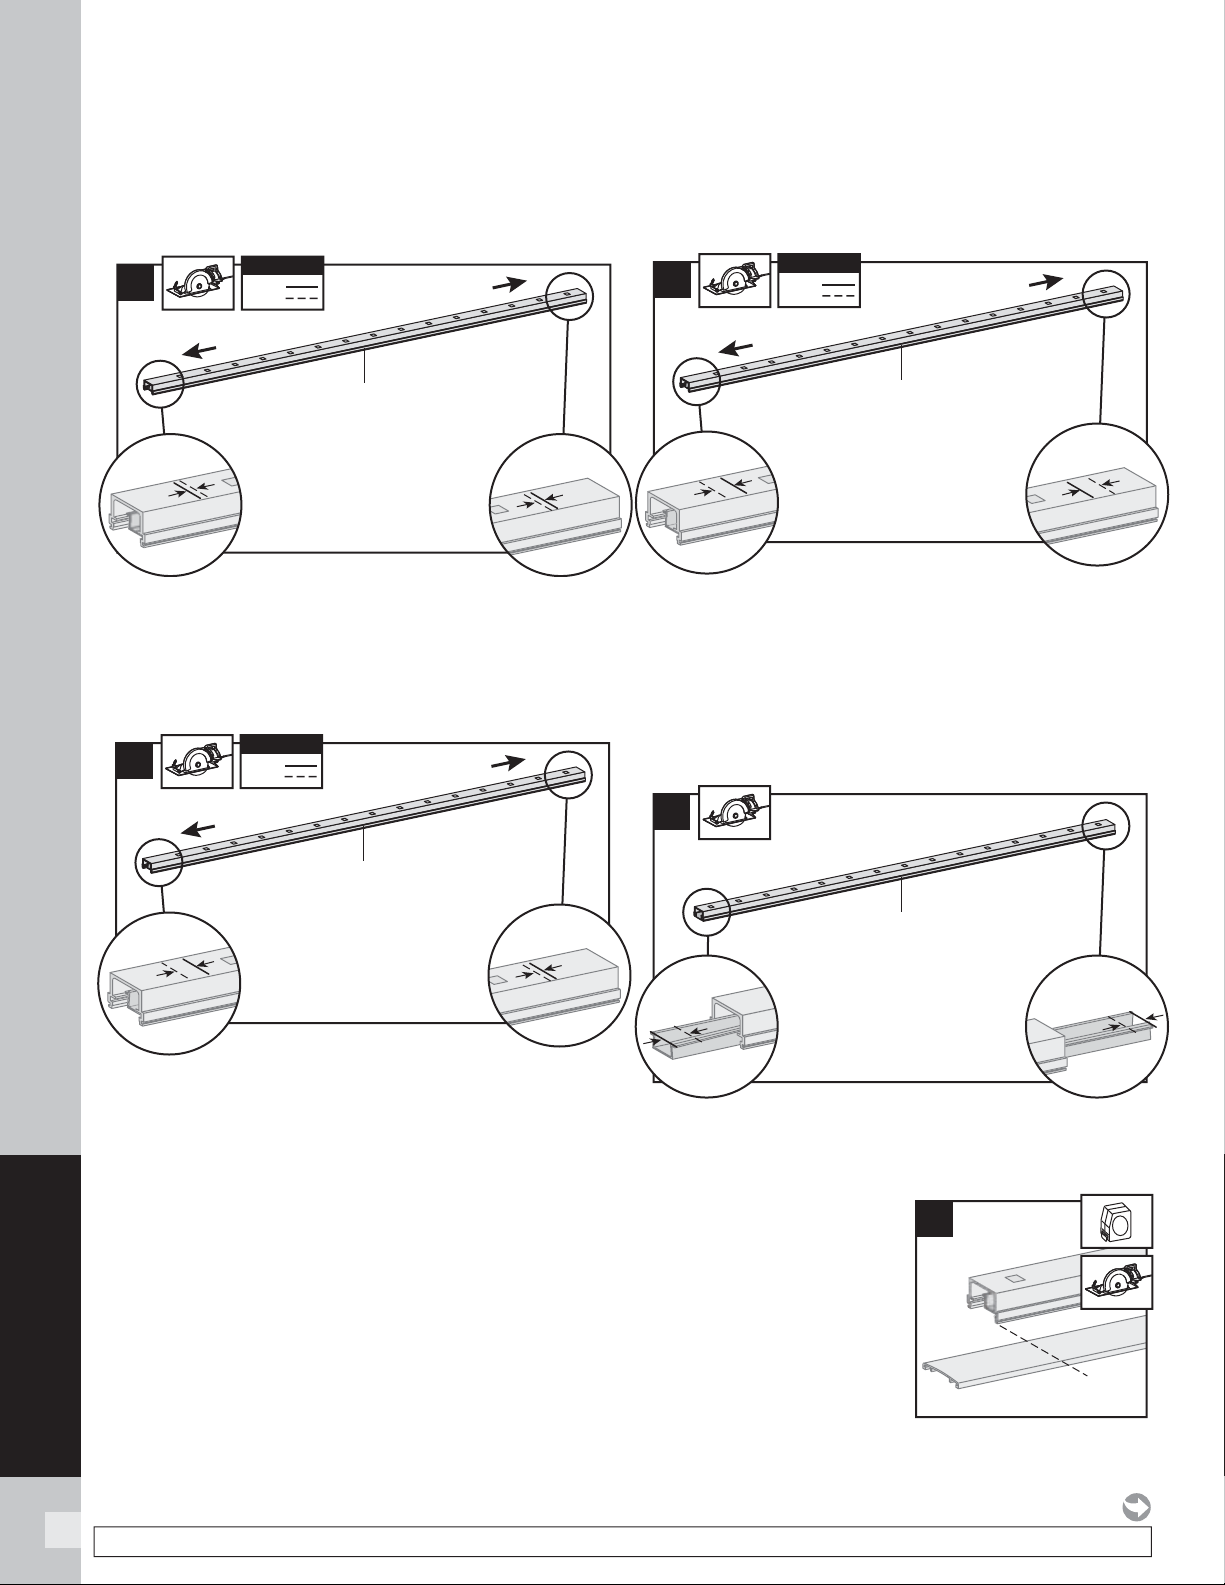
Cutting Top Rail
Option 1:
For Post-to-Post Configuration
5a. Cut each end of top rail 1/4" (0.6 cm) shorter than
mark to allow for fi t into top rail brackets.
Cutting Top Rail
Option 2:
For Post-to-Crossover-Post Configuration
5b. Top rail must be cut differently on each side of the
rail. Railing side that attaches to standard post
should be cut 1/4" (0.6 cm) shorter than the mark
to allow for fi t into top rail bracket. Railing side that
attaches to the crossover post should be cut
3/4" (1.9 cm) LONGER than the mark to allow for fi t
into the crossover post bracket.
Cutting Top Rail
Option 3:
For Crossover-Post-to-Crossover-Post Confi guration
5c. Cut each end of top rail 3/4" (1.9 cm) LONGER
than the mark to allow for fi t into the crossover post
bracket on each side.
Cutting Top Rail Insert and Cover
6. Slide rail insert out and cut 3/4" (1.9 cm) FROM
EACH SIDE of insert, then slide back inside rail
and center.
7. Mark and cut top rail
cover same length as
top rail for all top rail
confi gurations.
HOW TO INSTALL HORIZONTAL RAILING/CONTINUED
TREX SIGNATURE
STANDARD
7
5a
1/4"
(0.6 cm)
1/4"
(0.6 cm)
1/4"
(0.6 cm)
1/4"
(0.6 cm)
KEY
Mark
Cut
KEY
Top rail
Standard post
Standard post
5c
3/4"
(1.9 cm)
3/4"
(1.9 cm)
3/4"
(1.9 cm)
3/4"
(1.9 cm)
KEY
Mark
Cut
KEY
Top rail
Crossover post
Crossover post
5b
1/4"
(0.6 cm)
1/4"
(0.6 cm)
3/4"
(1.9 cm)
3/4"
(1.9 cm)
KEY
Mark
Cut
KEY
Top rail
Crossover post
Standard post
6
3/4"
(1.9 cm)
3/4"
(1.9 cm)
3/4"
(1.9 cm)
3/4"
(1.9 cm)
Top rail
Loading ...
Loading ...
Loading ...