Loading ...
Loading ...
Loading ...
82
SIGNATURE RAILING
NOTE: Construction methods are always improving. Please refer to www.trex.com for the most up-to-date installation requirements.
Attach Upper Railings
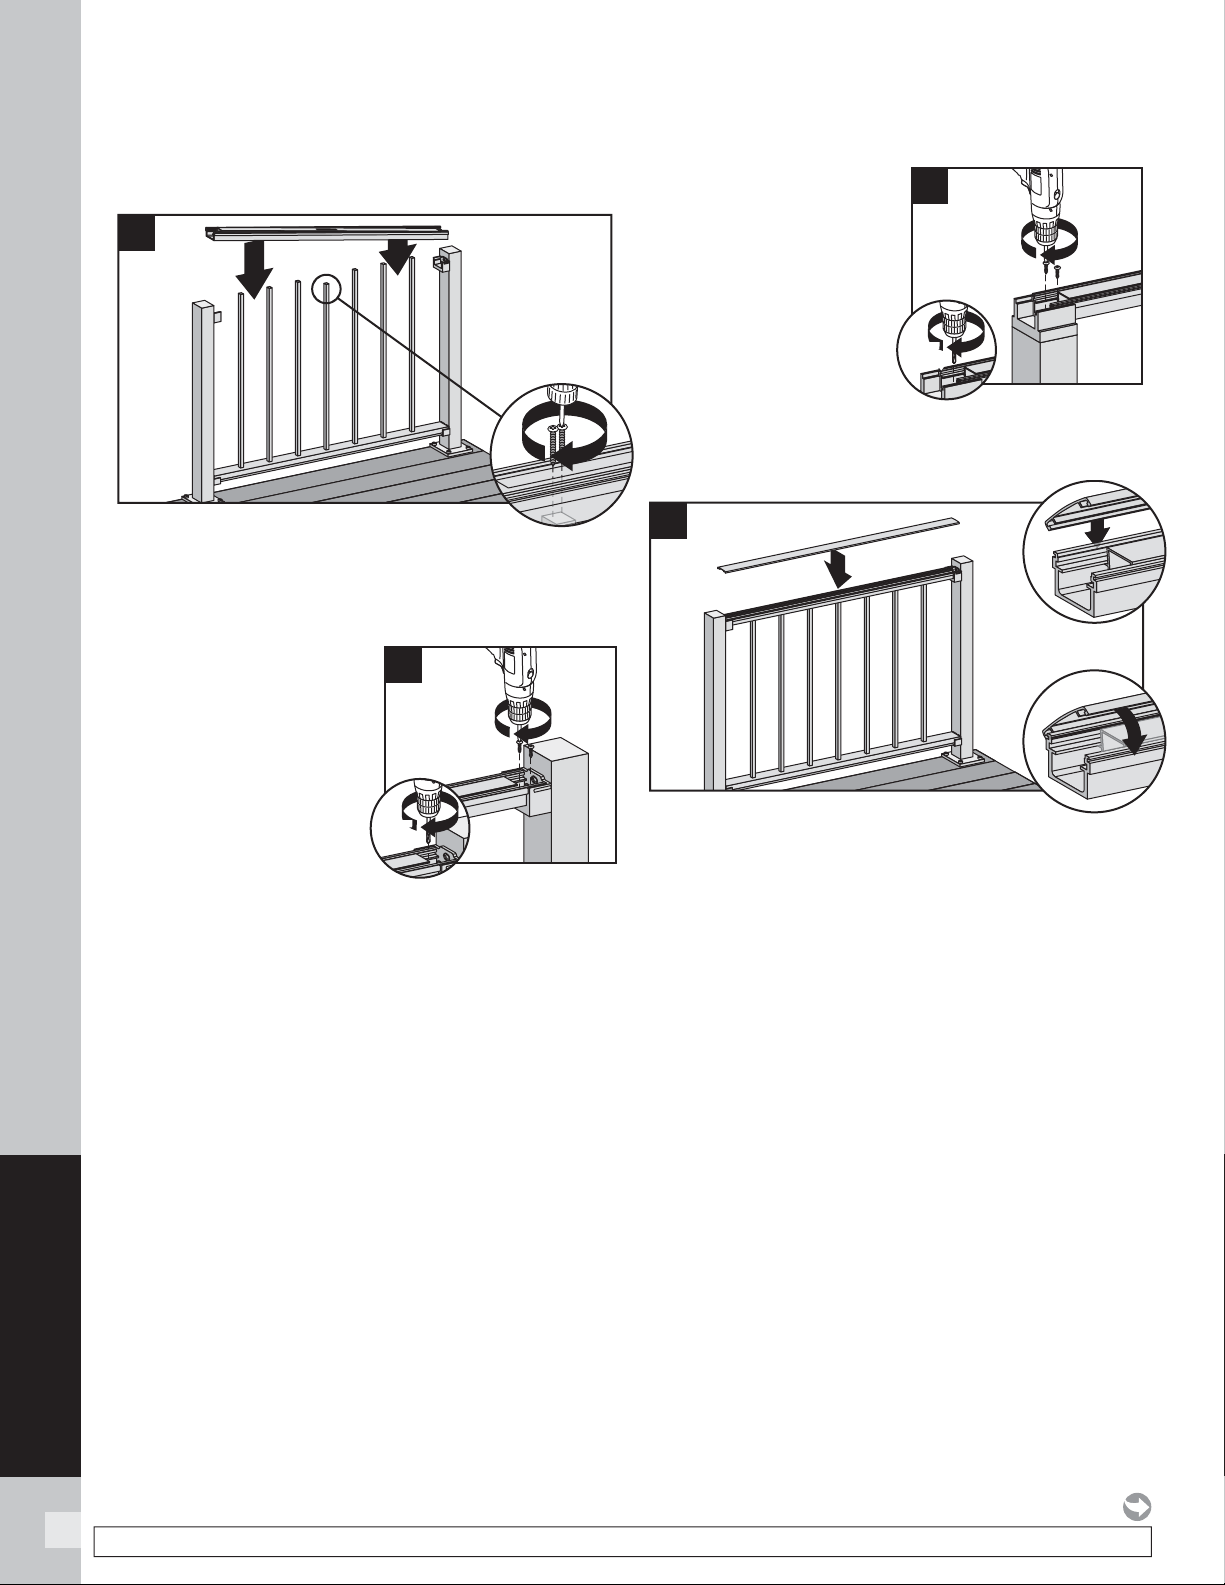
13. Working from one end of upper rail, snap balusters
into upper rail working down length of rail. Fasten
center baluster into center slot using two #8 x 1-1/4"
(3.2 cm) screws (provided).
14. For post-to-post
confi guration, fasten
upper rail to each
bracket by installing
screws diagonally
through upper rail into
bracket using two self-
tapping screws each
side (provided).
NOTE: Pre-drilling is recommended (7/64" [0.28 cm]
drill bit) for attachment of railing to bracket.
15. For crossover post
confi guration, fasten
upper rail to crossover
post by installing
screws diagonally
through upper rail
into post using two
self-tapping screws
each side (provided).
NOTE: Pre-drilling is recommended (7/64" [0.28 cm]
drill bit) for attachment of railing to post.
16. Attach “crowned” upper rail cover to upper rail
by aligning cover on one side of rail. Then starting
from one end of rail, snap cover onto opposing slot
working down length of rail. A rubber mallet may
facilitate the fastening using GENTLE tapping.
HOW TO INSTALL HORIZONTAL RAILING/CONTINUED
TREX SIGNATURE
STANDARD
1
16
3
2
2
15
1
7/64"
(.28 cm)
7/64"
(.28 cm)
2
14
1
7/64"
(.28 cm)
7/64"
(.28 cm)
1
1
13
2
Loading ...
Loading ...
Loading ...