
Loading ...
Loading ...
Loading ...
EMBROIDERING TUTORIAL
49
2
■ Hooping fabric in the small
embroidery frame
The procedure for hooping fabric in the small
embroidery frame is described below.
The same procedure is used to hoop the fabric in the
medium embroidery frame.
For details on hooping fabric in the other included
embroidery frames, refer to “Hooping the Fabric” on
page 93.
b
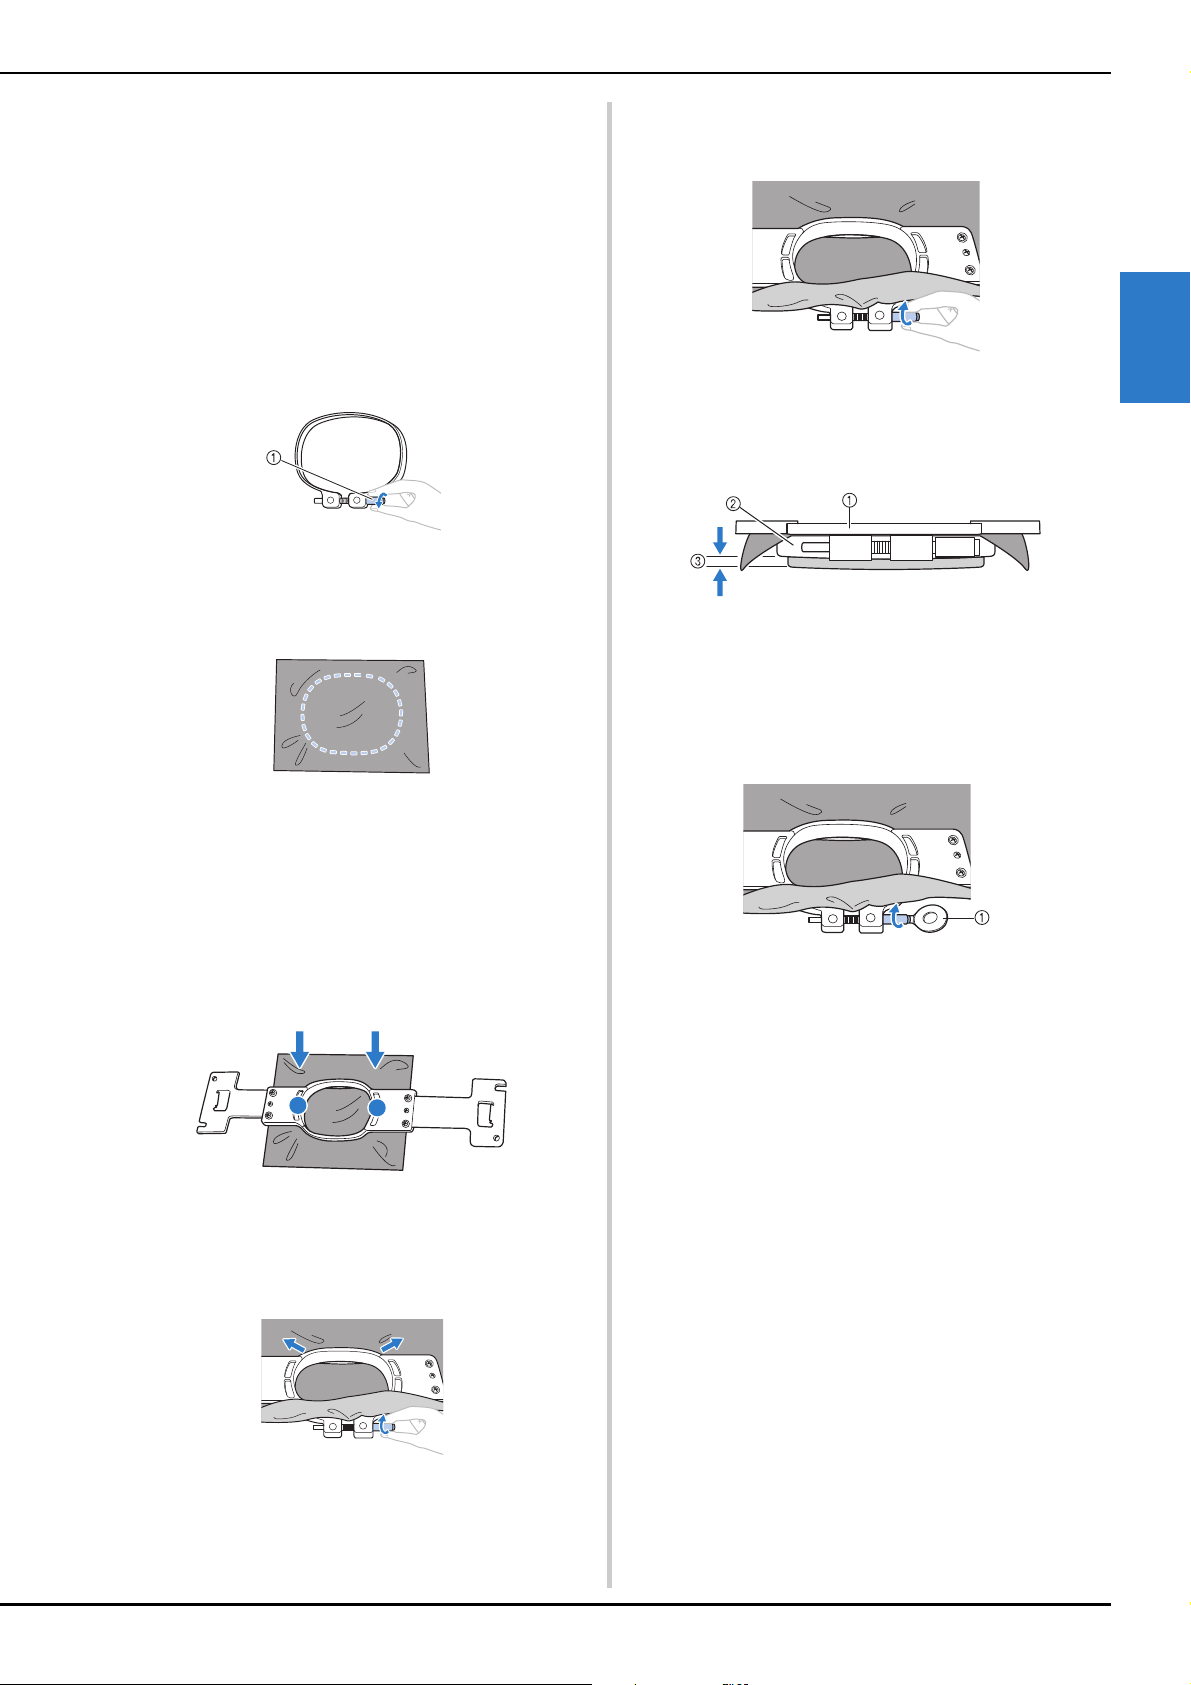
Loosen the screw on the outer frame.
1 Screw
c
Place the fabric with the right side up on
top of the outer frame.
• The outer frame does not have a front or back side.
Either side can be used as the front.
• In order to prevent shrinkage of the stitching or
misaligned patterns, we recommend that iron-on
stabilizer (backing) be used for embroidering. (Refer
to “Attaching Iron-On Stabilizer (Backing) to Fabric”
on page 92.)
d
Press the inner frame into the outer frame.
• Be sure that there are no wrinkles in the fabric after it
is positioned in the embroidery frame.
e
Lightly tighten the screw, and then pull the
edges of the fabric.
f
Securely tighten the screw, and then check
to make sure that the fabric is taut.
• After securing the fabric, lightly tapping it should
produce a drum-like sound.
• Firmly clamp together the inner and outer frames so
that the bottom of the inner frame is lower than the
bottom of the outer frame.
1 Inner frame
2 Outer frame
3 Bottom of inner frame
• Using the included disc-shaped screwdriver, firmly
tighten the screw.
1 Disc-shaped screwdriver
The amount that the fabric is stretched and the use
of stabilizer material differ depending on the type
of fabric being embroidered. Try various methods
to achieve the best embroidering results. (Refer to
“Hooping techniques” on page 253.)
Loading ...
Loading ...
Loading ...