Loading ...
Loading ...
Loading ...
BASIC SETTINGS AND HELP FEATURE
223
6
■ Page 7
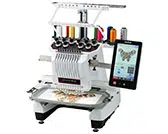
S Background Image Display
Select whether or not the fabric is displayed in the
background.
For details, refer to “Aligning the Embroidering
Position” on page 102.
T Fabric Thickness Check
When the fabric is scanned and displayed as a
background image, the thickness of thick fabric
can be checked to ensure that the camera
correctly detects the fabric.
For details, refer to “Positioning the pattern on
thick fabric” on page 104.
U A blue box can be displayed in the embroidering
settings screen to indicate the area detected by
the camera.
V Grid line can be displayed in the camera screen to
support setting the pattern at the desired angle.
Details of each of the settings are described in the
following sections. After specifying the desired
settings, touch to return to the screen that
was displayed before the settings screen was
displayed.
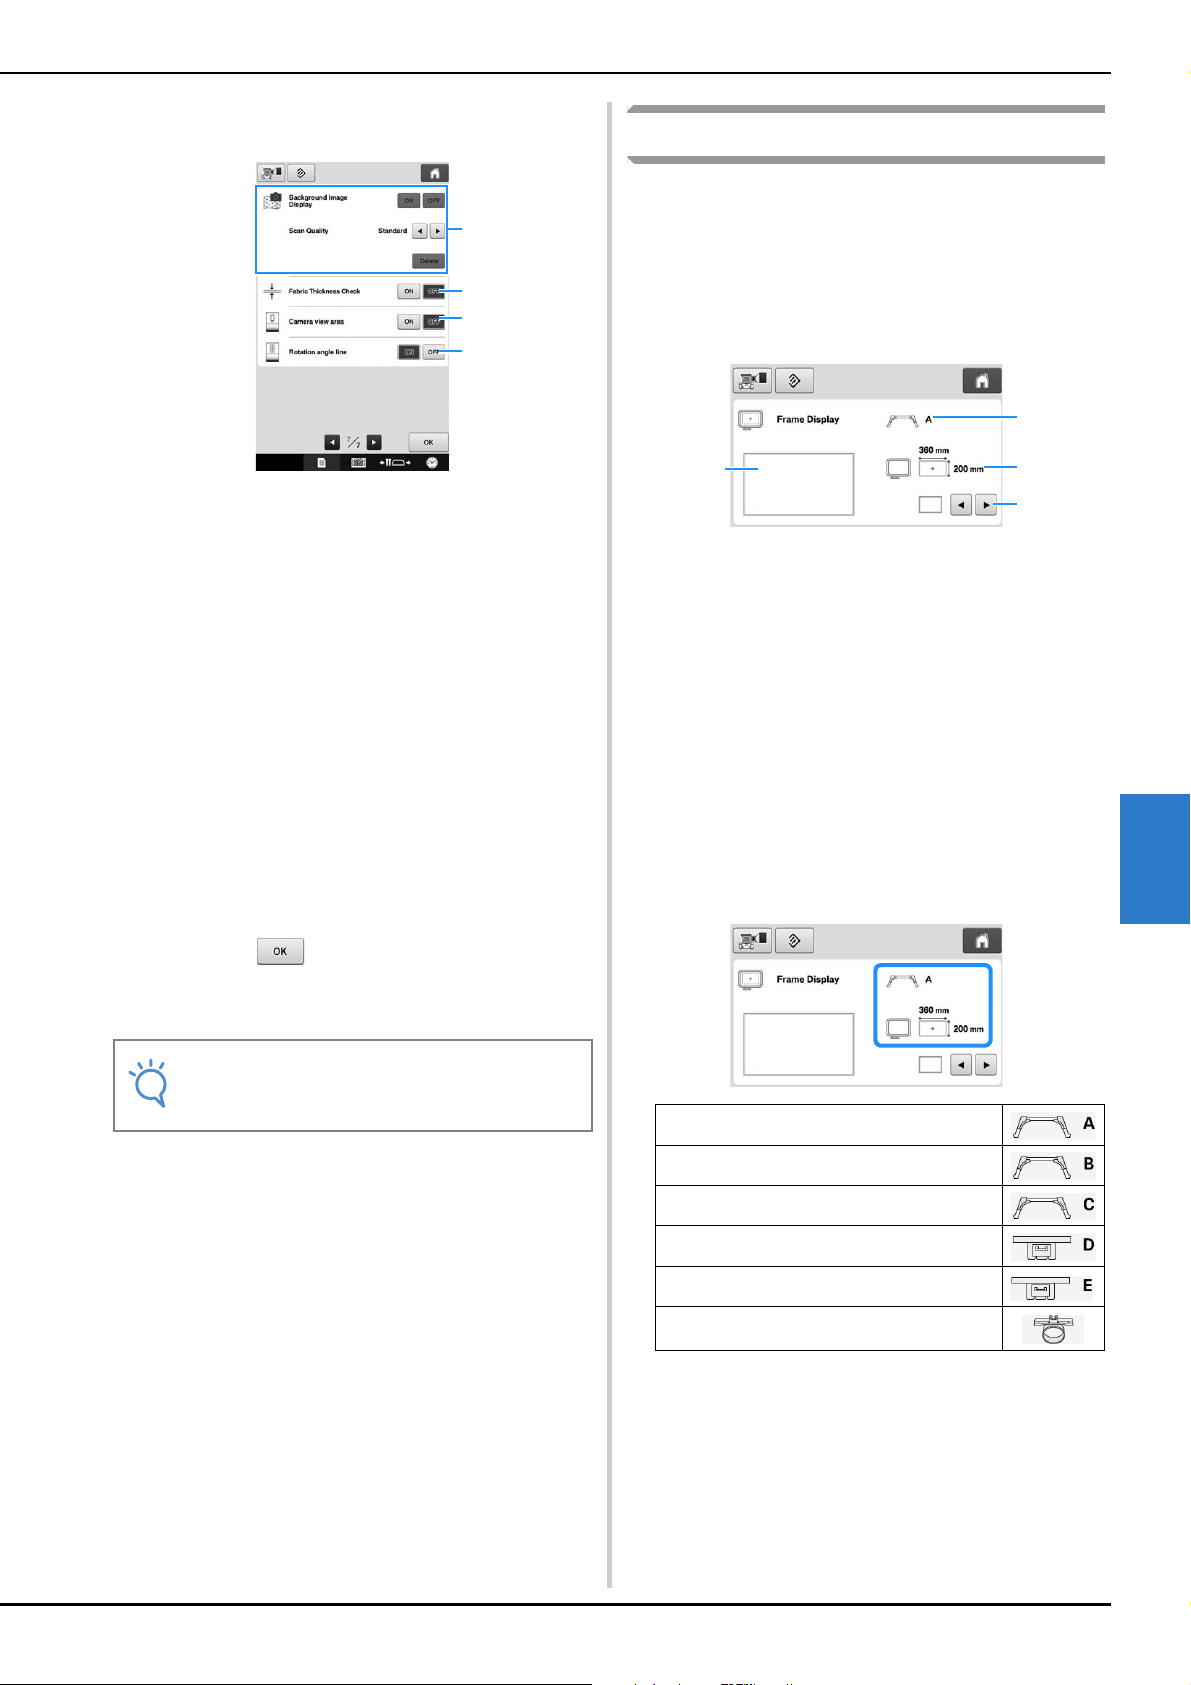
Changing the display guides
The guides in the pattern display area can be set.
The machine automatically detects the type of
embroidery frame holder and embroidery frame
that are installed and displays them.
The guide settings can be specified from page 1 of
the settings screen.
1 How the guides will appear with the specified
settings can be previewed here.
2 Type of embroidery frame holder
Displays the type of the embroidery frame holder.
3 Area
Displays the size of the embroidery frame that is
actually installed.
4 Centerpoint marker or grid lines
Select the type of the centerpoint marker and the
grid lines, and whether or not to display them.
■ Type of the embroidery frame holder
The machine automatically detects the type of
embroidery frame holder that is installed.
If no embroidery frame holder is specified, the
setting for “Cap frame/Cylinder frame” is displayed.
Refer to “Types of embroidery frames/frame holders
and their applications” on page 89 to 91.
Note
• Some settings cannot be changed while
sewing.
S
T
U
V
Embroidery frame holder A (included)
Embroidery frame holder B (included)
Embroidery frame holder C (Optional)
Embroidery frame holder D (Optional)
Embroidery frame holder E (Optional)
Cap frame/Cylinder frame (Optional)
1
4
3
2
Loading ...
Loading ...
Loading ...