Loading ...
Loading ...
Loading ...
106
i
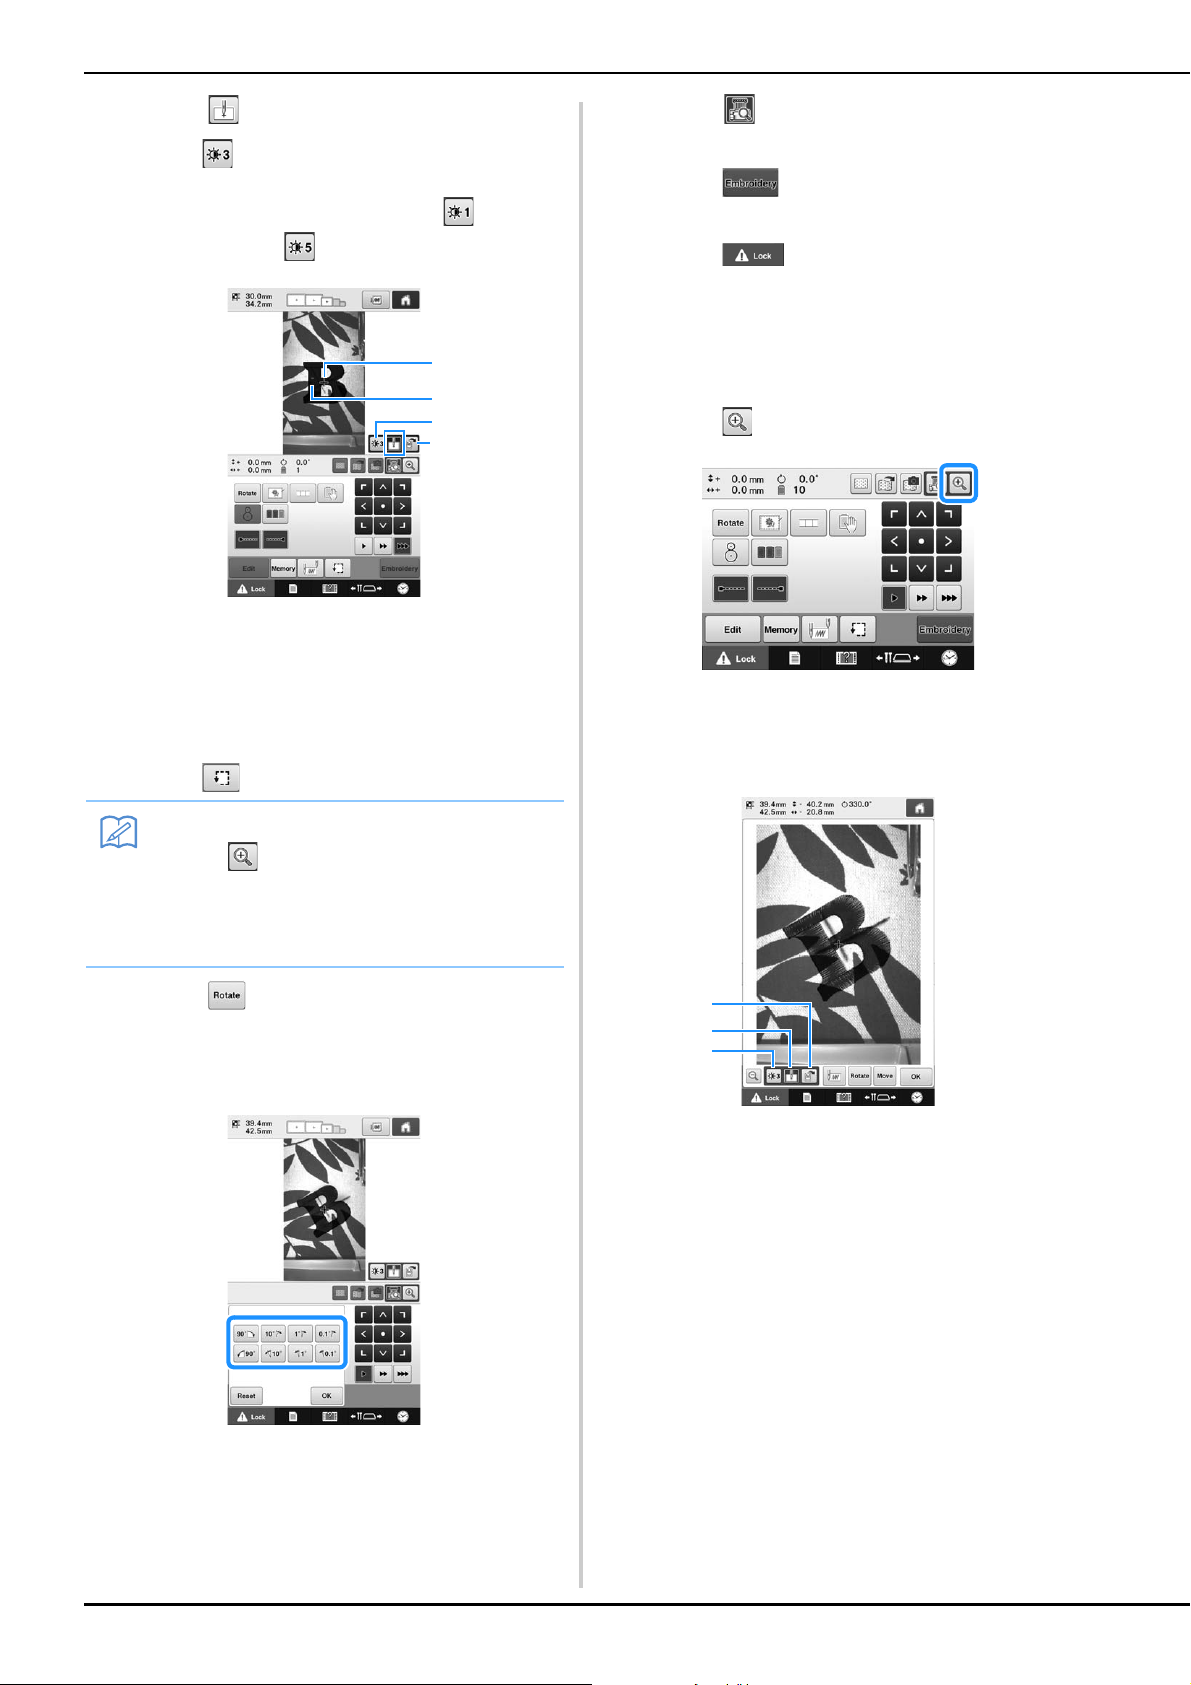
Touch to display the needle drop point.
• Touch to change the brightness of the camera
image. The embroidering position can more easily be
checked by making the image darker ( ) on lighter
fabrics or lighter ( ) on darker fabrics.
1 Needle drop point
2 Chalk mark on the fabric
3 Each touch of this key changes the brightness of
the camera image.
4 Touch to save the camera image on the external
device.
• Touch to check the embroidering position.
j
Touch and adjust the orientation of the
pattern until the pattern is parallel with the
chalk mark drawn on the fabric. (Refer to
“Adjusting the angle” on page 99.)
• Touch the positioning keys to move the embroidery
frame until the pattern in the camera view window is
aligned with the chalk mark drawn on the fabric.
k
Touch to return to the previous screen.
l
Touch .
m
Touch , and then press the start/stop
button to start embroidering.
■ Enlarging the camera image
a
Touch .
b
The camera image is displayed enlarged.
• You can change the display settings that is specified
in the normal camera image display.
1 Touch to save the camera image on the external
device.
2 Touch to specify the needle drop point mark on or
off.
3 Each touch of this key changes the brightness of
the camera image.
Memo
• Touch to enlarge the camera view. By
enlarging the camera view, you can make a
close adjustment for the center point of the
pattern moving the embroidery frame little
by little.
1
2
3
4
1
2
3
Loading ...
Loading ...
Loading ...