Loading ...
Loading ...
Loading ...
266
e
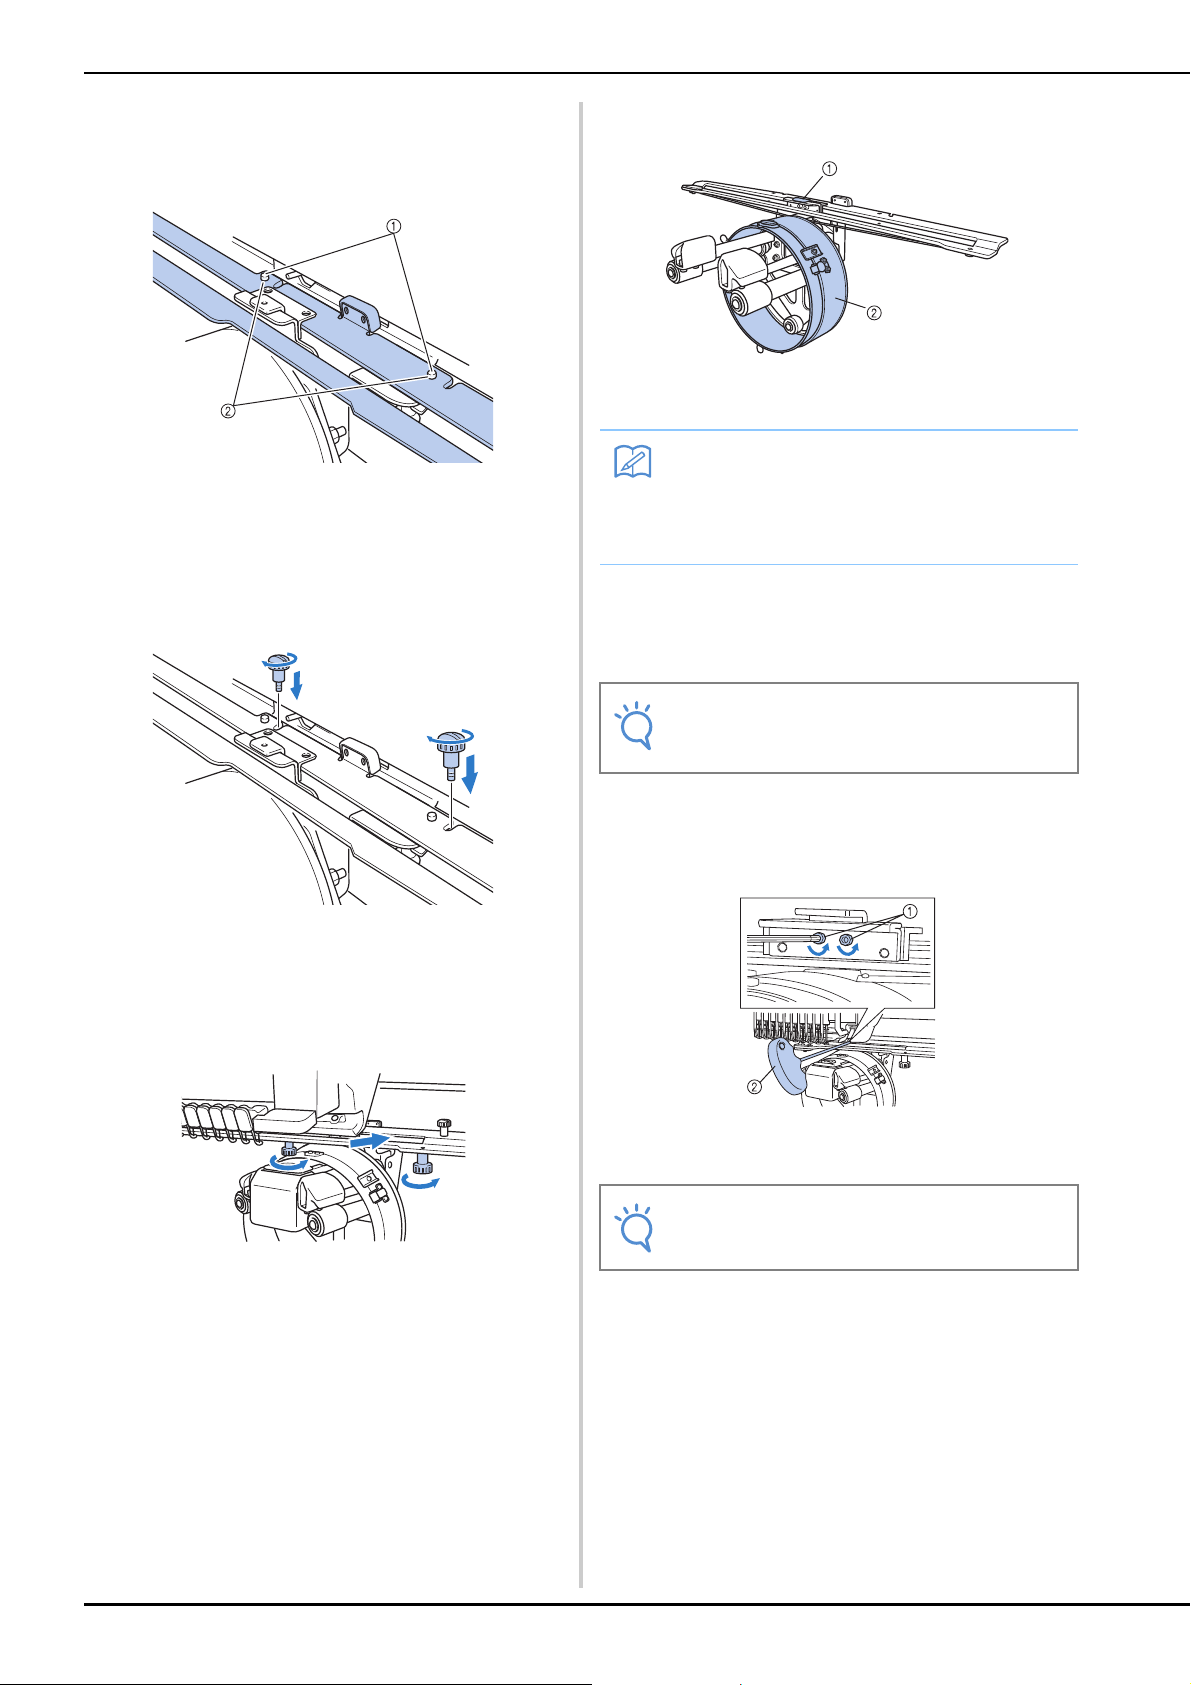
Insert the pins on the frame-mounting plate
of the carriage into the holes in the
mounting plate of the cap frame driver.
1 Pins on the frame-mounting plate of the carriage
2 Holes in the mounting plate of the cap frame driver
f
Insert and tighten the two upper thumb
screws in outer holes of mounting plate of
cap frame driver.
g
While pushing in the cap frame driver
toward the machine so that it is fully
inserted, tighten the two lower thumb
screws to secure the cap frame driver.
→ This completes the installation of the cap frame
driver.
■ Adjusting the cap frame driver
1 L-shaped bracket
2 Ring
a
Turn on the machine. After the carriage
moves to its initial position, turn off the
machine.
b
Using the Allen screwdriver (medium),
loosen the two hexagonal screws. Loosen
the screws only by about one turn.
1 Hexagonal screws
2 Allen screwdriver (medium)
Memo
• If the same machine is being used, the
adjustment to the cap frame driver is only
required the first time that the machine is
used.
Note
• Be sure to adjust the cap frame driver with
the carriage at its initial position.
Note
• Do not loosen them too far.
Loading ...
Loading ...
Loading ...