Loading ...
Loading ...
Loading ...
GETTING READY
27
1
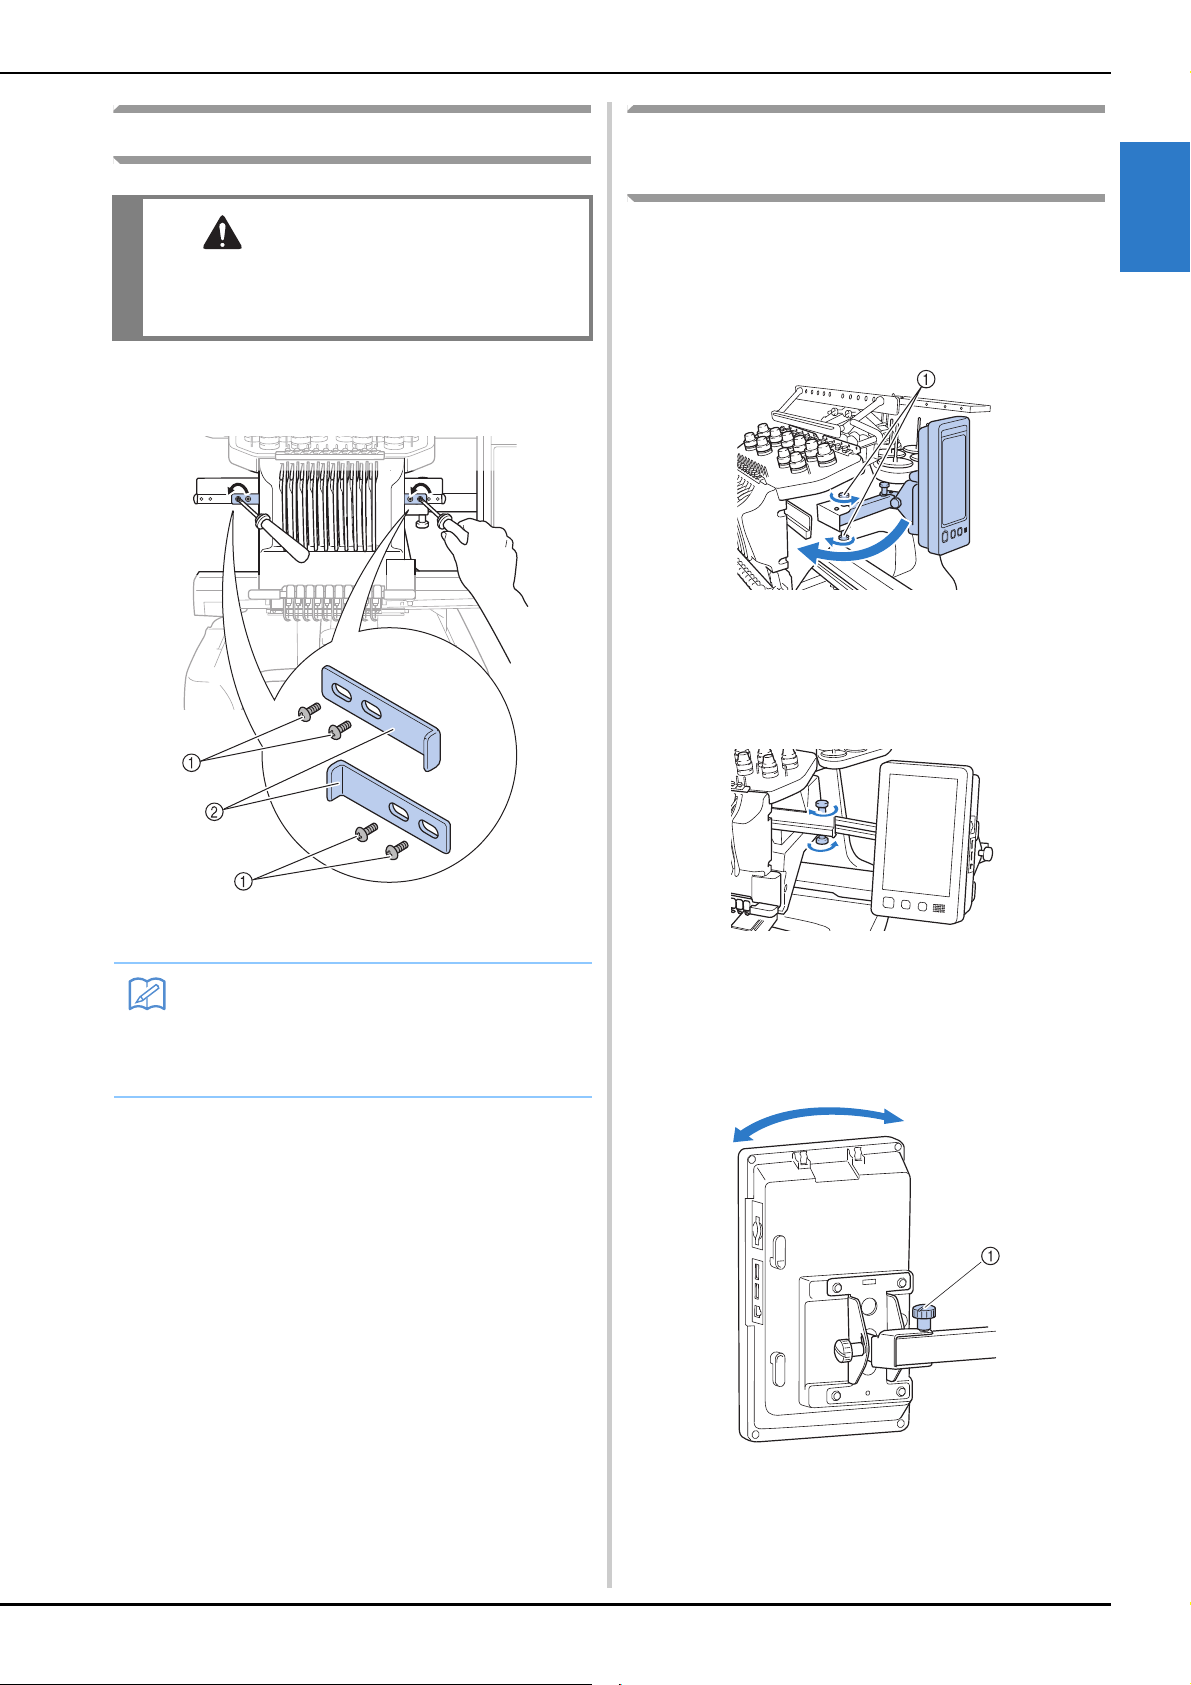
Remove the fixing plates
a
Using the included Phillips screwdriver,
remove each of screws on the fixing plates.
1 Screws
2 Fixing plates
Adjusting the operation panel
position
Adjust the orientation and angle of the operation
panel so it can easily be operated.
a
Loosen 2 thumb screws to bring the
operation panel forward.
1 Thumb screws
b
Adjust the operation panel to an easy-to-
operate position, and then tighten the
thumb screws.
c
Adjust the orientation of the operation
panel.
Loosen the thumb screw, adjust the operation panel to
an easy-to-view orientation, and then tighten the
thumb screw.
1 Thumb screw
CAUTION
• Remove the fixing plates before turning on the
machine, otherwise the machine may
malfunction.
Memo
• After removing the fixing plates, be sure to
keep them to be used again. Before
transporting the machine, consult your
authorized Brother dealer.
Loading ...
Loading ...
Loading ...