
Loading ...
Loading ...
Loading ...
212
s
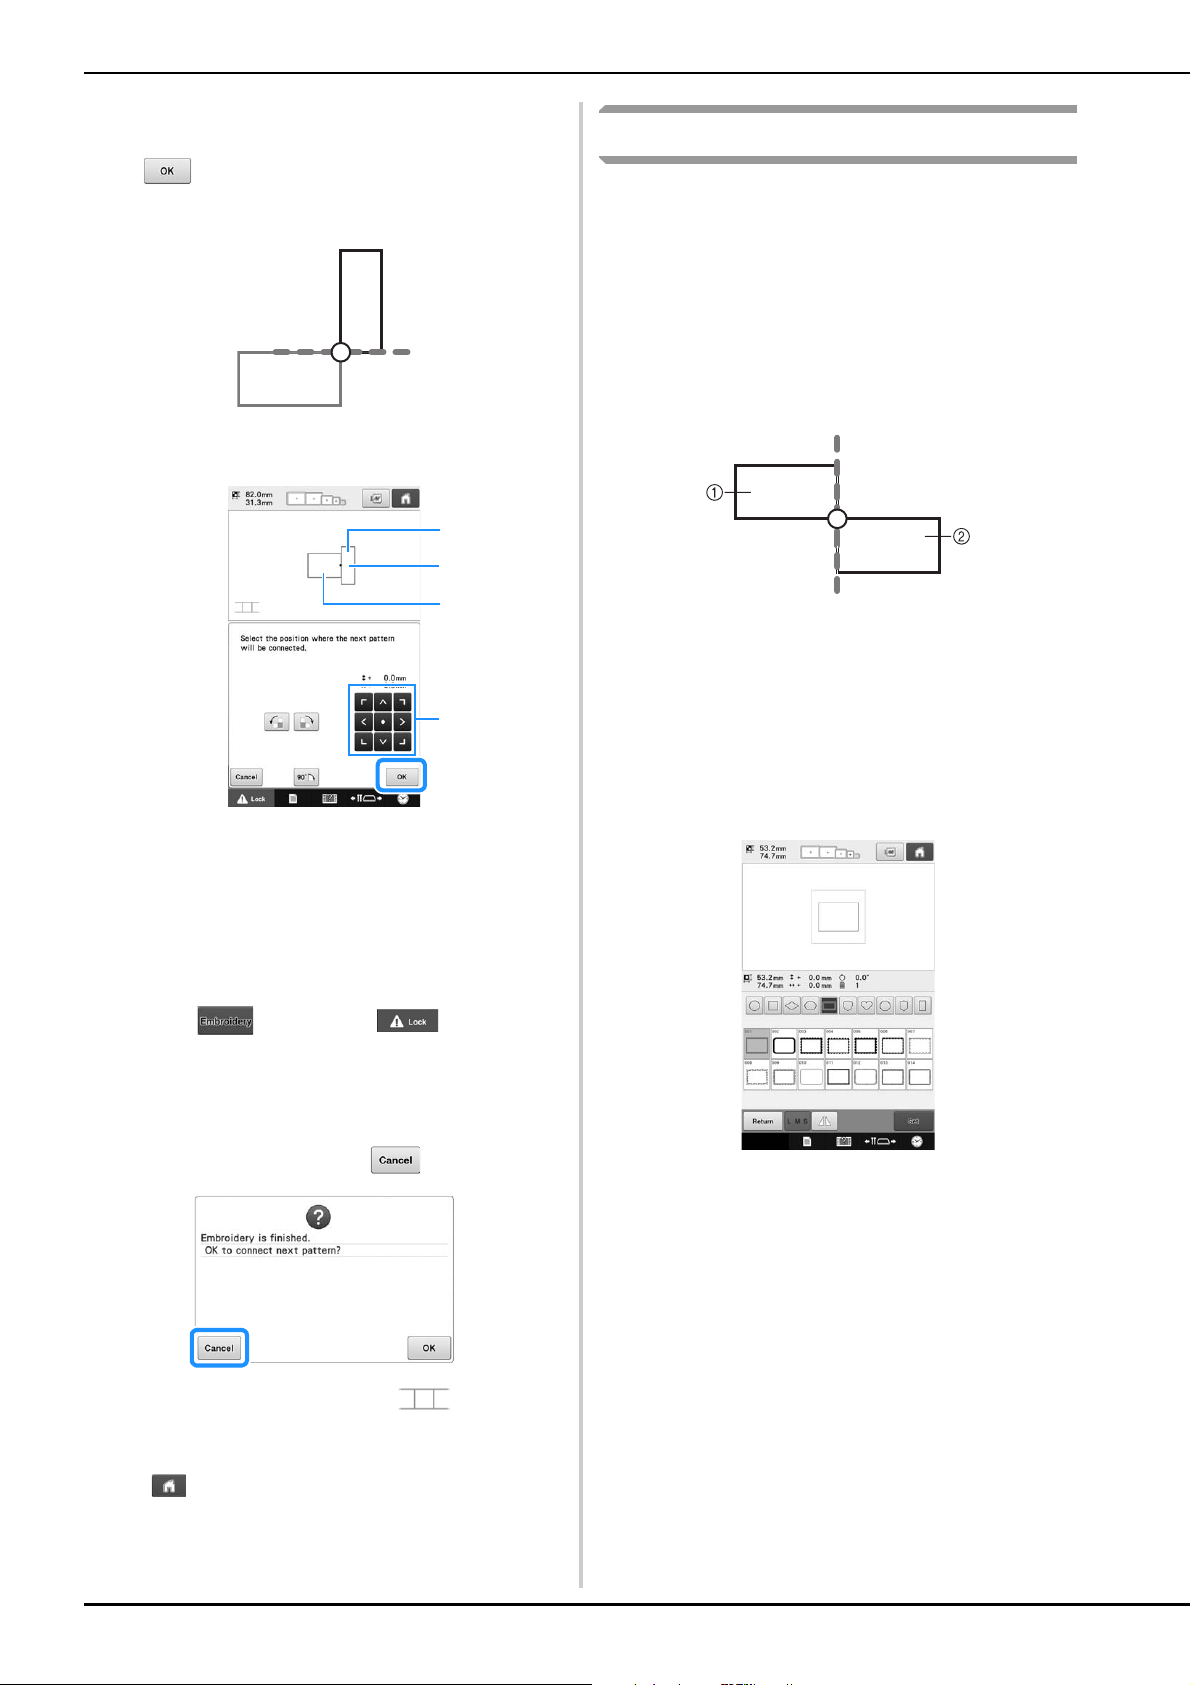
Touch the position for the third pattern will
be connected on the screen, and then touch
. In this example, touch the upper
right side of the second pattern.
• Pattern rotates automatically when corner position is
selected.
1 Touch the connecting area
2 Third pattern C
3 Second pattern B
4 Touch to move the third pattern.
t
Follow the on-screen instruction to perform
steps
j to n.
u
Press , then touch and then
press the start/stop button to embroider the
third pattern.
→ After embroidering of the third pattern is finished,
the following message appears. When finished
connecting patterns, touch .
→ After embroidering is finished, at the top left
side of the screen disappears.
The three patterns have been connected.
Touch to clear the pattern.
Changing the position of a sticker
If the selected pattern or positioning stickers for
connecting the next pattern do not easily fit in the
embroidering area, follow the on-screen
instructions that appear after step
l on page 209
in order to move the positioning stickers.
For an example, the on-screen instruction appears
when you use the embroidery frame with a size of
10 cm × 10 cm (4 inches × 4 inches) to connect
patterns as shown below.
1 Pattern A
2 Pattern B
a
Refer to steps a through l of Connecting
three patterns using the embroidery frame
with a size of 10 cm × 10 cm (4 inches × 4
inches) to embroider the first pattern and to
connect the second pattern.
2
1
3
4
Loading ...
Loading ...
Loading ...