Loading ...
Loading ...
Loading ...
262
By using the optional cap frame, patterns can be embroidered onto caps and hats. The procedures for
using the cap frame are described below.
Cap frame and its accessories
The cap frame driver and the mounting jig are required in order to use the cap frame.
Using the Optional Cap Frame
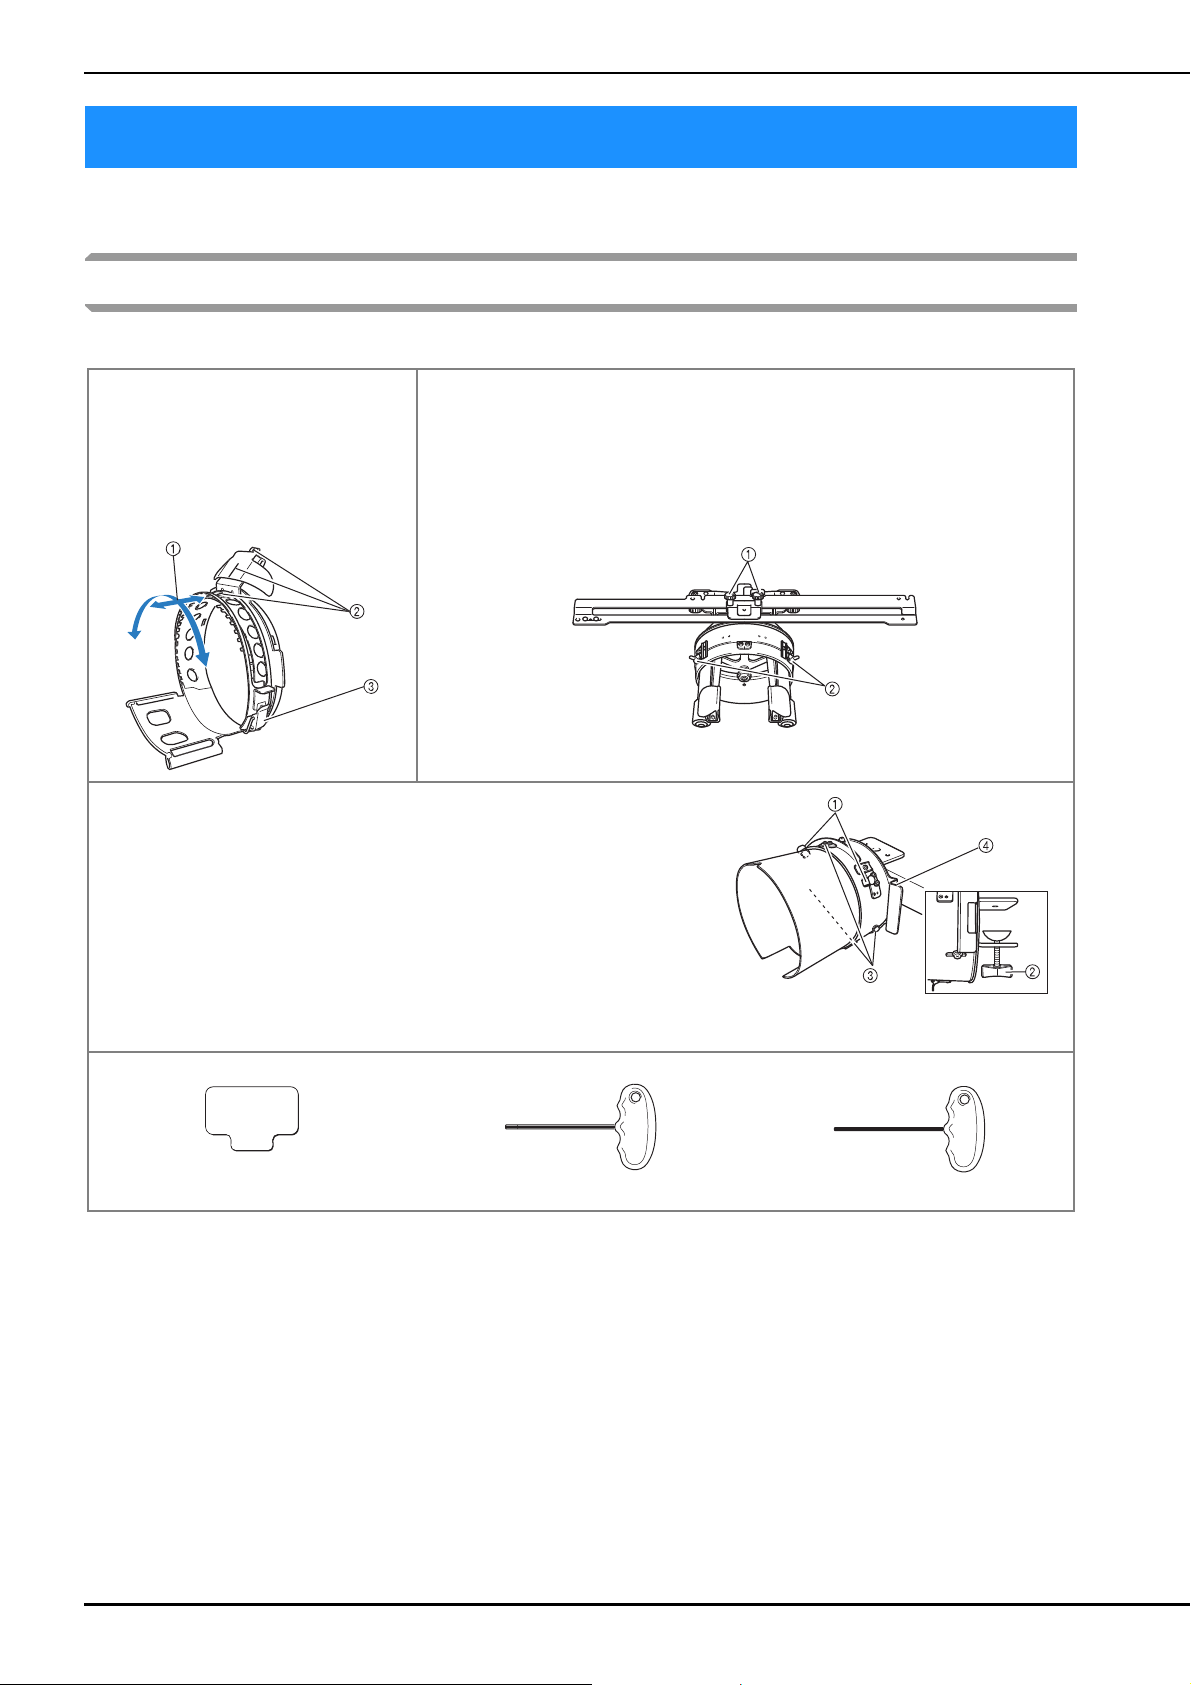
Cap frame
1 Embroidering area:
60 mm (H) × 360 mm (W)
(2-3/8 inches (H) × 14 inches (W))
2 The mark indicates the center of the
embroidering area.
3 Snap lock
Cap frame driver and 4 thumb screws
In order to attach the cap frame to the carriage, remove the embroidery frame
holder, and then attach this cap frame driver to the carriage of the machine.
1 Insert the thumb screws into these holes and tighten the screws to secure the
movable section. Use these holes when storing this cap frame driver.
2 Holding Spring
The cap frame is secured by the two holding Springs.
Mounting jig
Use when framing a cap in the cap frame.
1 Holders
The cap frame is secured by the three holders.
2 Mounting bracket
Tighten thumb screw to secure to mounting surface.
3 Screws
Adjust the size of the mounting jig according to the type of cap being
embroidered.
4 Lever
Rotate the cap frame to the location easier to frame the fabric, by pulling
the lever.
Pad Allen screwdriver (large) Allen screwdriver (medium)
• Use when adjusting the ring of the cap frame driver and the height of the L-shaped bracket. (Refer to page 266.)
Loading ...
Loading ...
Loading ...