Loading ...
Loading ...
Loading ...
Emergencies
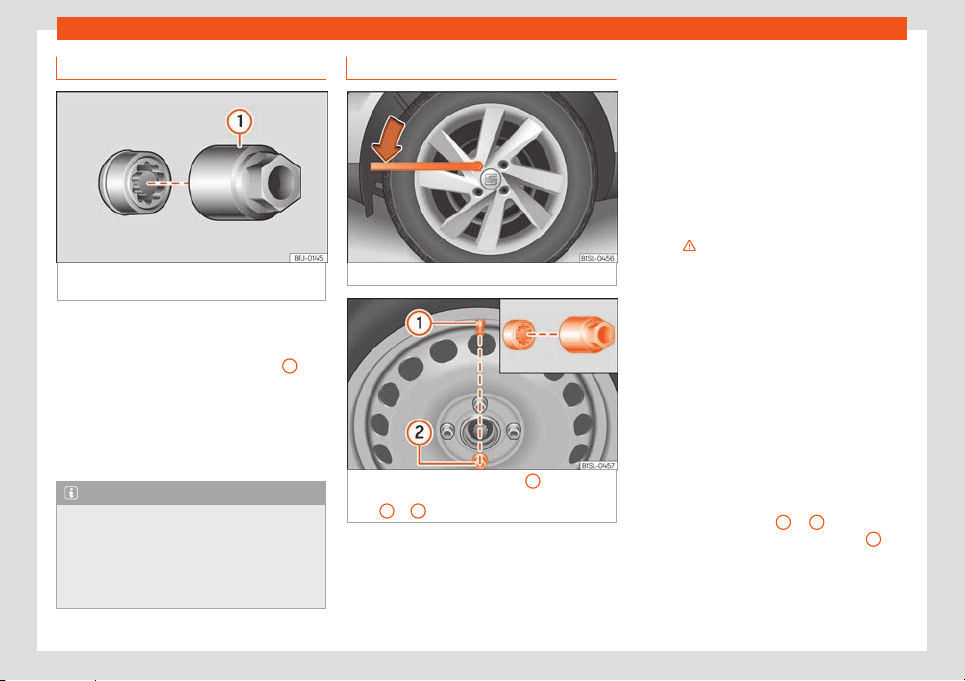
Anti-theft wheel bolts
Fig. 32
Anti-theft wheel bolt with cap and
adapt
er
.
Loosening the anti-theft wheel bolt
●
Remove the wheel cover* or the cap*.
●
Insert the special adapter
›
›
›
Fig. 32
1
(ve-
hicl
e t
ools
›››
page 35) onto the anti-theft
wheel bolt and push it on as far as it will go.
●
Insert the wheel brace (vehicle tools) onto
the adapter as far as it will go.
●
Remove the wheel bolt
›››
page 40.
Note
Make a note of the code number of the an-
ti-theft wheel bolt and keep it in a saf
e
place, but not in your vehicle. If you need a
new adapter, you can obtain it from the
SEAT Official Service, indicating the code
number.
Loosening wheel bolts
Fig. 33
Tyre change: slacken the wheel bolts.
Fig. 34
Tyre change: tyre valve
1
and the
corr
ect position f
or the anti-theft wheel locking
bolt
2
or
3
.
Use only the wheel wrench belonging to the
car t
o l
oosen the wheel bolts.
Loosen the wheel bolts only about one turn
before raising the vehicle with the jack.
If the wheel bolt is very tight, carefully push
on the end of the wheel wrench with your
foot. Hold on to the vehicle for support and
take care not to slip during this operation.
Loosening wheel bolts
●
Fit the box spanner into the bolt as far as it
will go
›››
Fig. 33.
●
Hold the wrench at the end and rotate the
bolt approximately one turn anticlock-
wise
›››
.
Impor
t
ant information about wheel bolts
Factory-fitted rims and wheel bolts are spe-
cially matched during construction. There-
fore, if different rims are fitted, the correct
wheel bolts with the right length and heads
must be used. This ensures that wheels are
fitted securely and that the brake system
functions correctly.
In certain circumstances, you should not even
use wheel bolts from vehicles of the same
model.
On wheels with integral hubcaps, the anti-
theft wheel locking bolt must be screwed in
the positions
›››
Fig. 34
2
or
3
, taking as
r
ef
erence the position of the tyre valve
1
.
Otherwise it will not be possibl
e t
o mount the
hubcap.
40
Loading ...
Loading ...
Loading ...