Loading ...
Loading ...
Loading ...
25
Tutorial
Tutorial
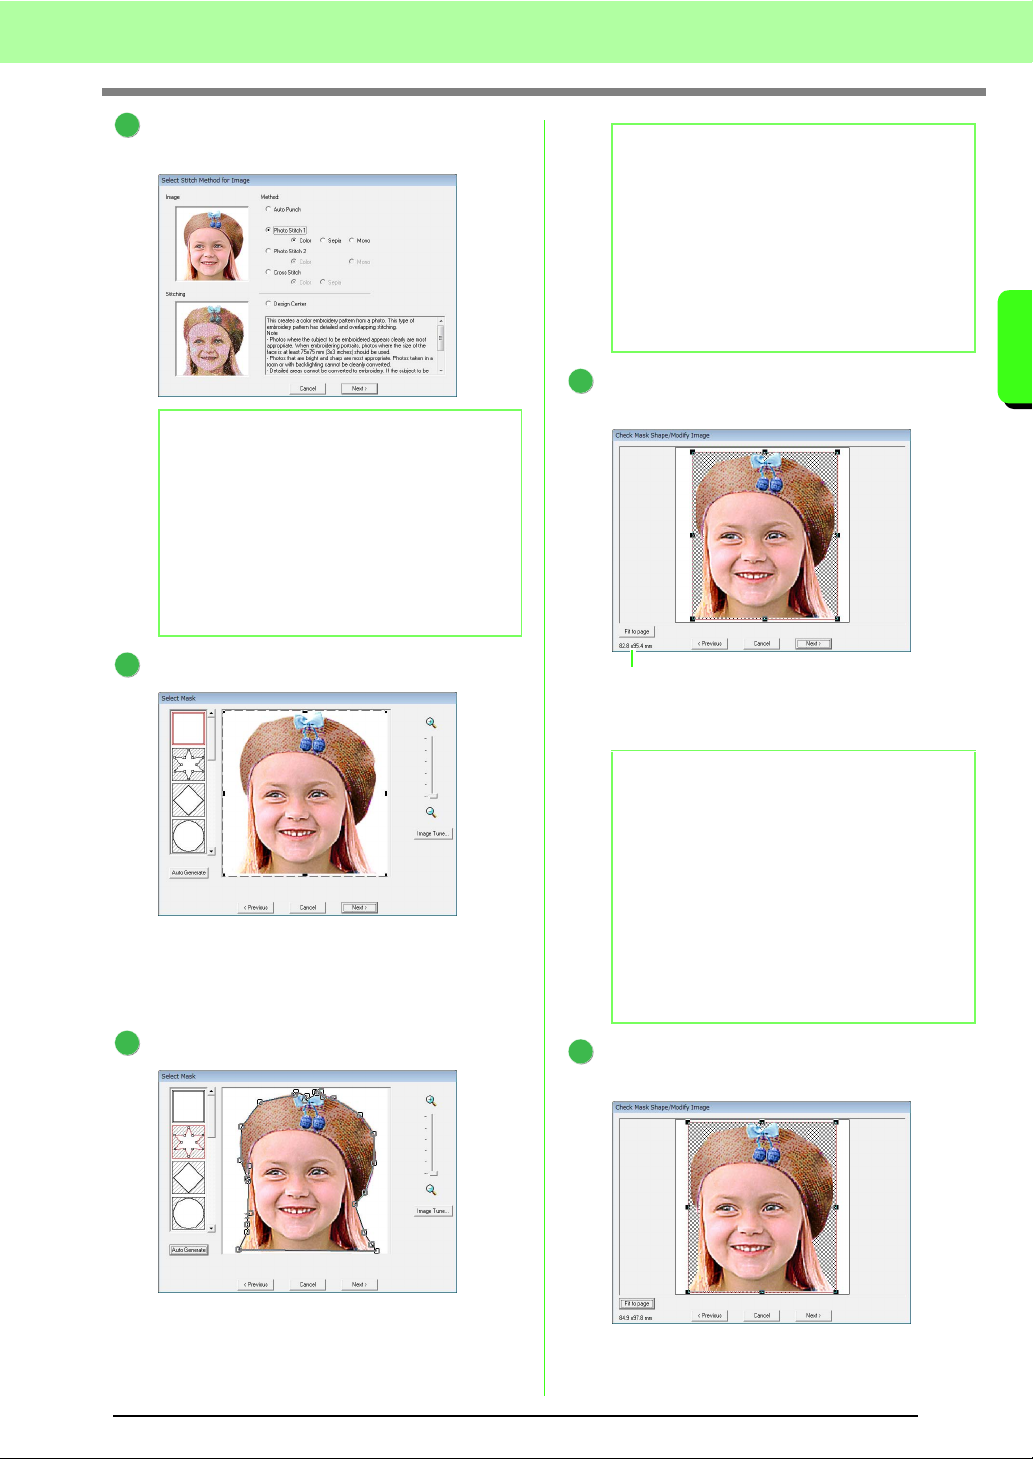
Click Photo Stitch 1, then Color, and then
click Next.
Click Auto Generate.
→ With a single-colored background, as in
this example, click Auto Generate to
automatically detect the outline of the
image.
Click Next.
Click Fit to page to change the final finishing
size.
→ This is a size where the design fills the
entire design page.
Check the preview of the area to be converted
then click Next.
b Memo:
The Sepia choice means you can create sepia
tone or grayscale tone embroidery. The
selection of mono is for black-and-white
monotone embroidery.
c
“If Photo Stitch 1 (Sepia) is
selected” on page 129, “If Photo
Stitch 1 (Mono) is selected” on
page 130.
2
3
4
b Memo:
• The shape of the mask line can be edited by
moving, adding or deleting the point of the
mask line.
• It is also possible to select the mask shape
from various template shapes already
available.
c
“If Photo Stitch 1 (Color) is
selected” on page 127.
b Memo:
• The size of the embroidery pattern appears
in the lower left corner of the dialog box. The
user can change the size freely with this
display.
• For best results, change the size of the
embroidery pattern to the sizes listed below.
• Face only: 100 × 100 mm
• Head and shoulders: 130 × 180 mm
c
“If Photo Stitch 1 (Color) is
selected” on page 127.
5
Embroidery pattern size
6
Loading ...
Loading ...
Loading ...