Loading ...
Loading ...
Loading ...
153
Manually Creating Embroidery Patterns From Images (Design Center)
Manually Creating Embroidery Patterns From Images (Design Center)
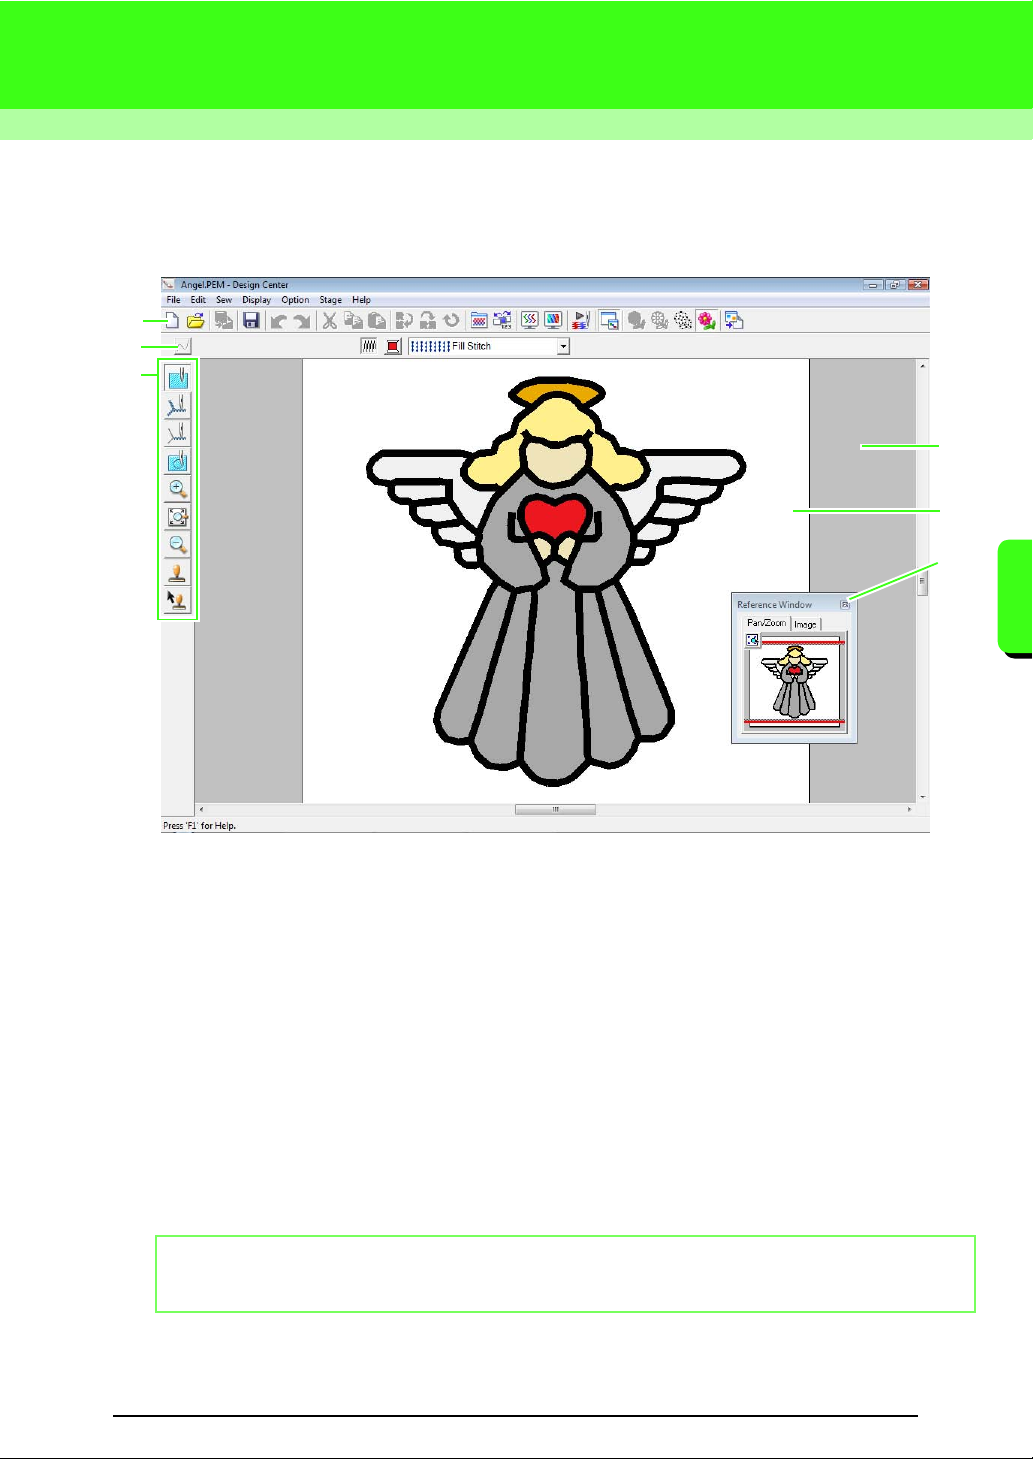
Design Center Window
1 Toolbar
Provides shortcuts for the menu commands.
2 Sewing Attributes bar
Sets the sewing attributes (color and sew type) of the lines and regions in the pattern
(only in the Sew Setting stage)
3 Tool Box
Used to select and edit the image or pattern. Original Image Stage has no Tool Box; the other stages all
have a different tools in the Tool Box. (The window for the Sew Setting Stage is shown on this page.)
4 Reference Window
Displays all outlines and patterns in the work area, giving you an overview while you work on a detailed
area.
c
“Viewing outlines in the Reference Window” on page 161.
5 Design Page
The actual part of the work area that can be saved and sewn.
6 Work area
b Memo:
The default value for the design page size in this example is 100 × 100 mm (4 × 4 inches).
5
3
6
4
2
1
Loading ...
Loading ...
Loading ...