Loading ...
Loading ...
Loading ...
Emergencies
The table corresponds to a right-hand traffic
v
ehicl
e
. The position of lights may vary ac-
cording to the country.
Rear bulbs (in the side panel)
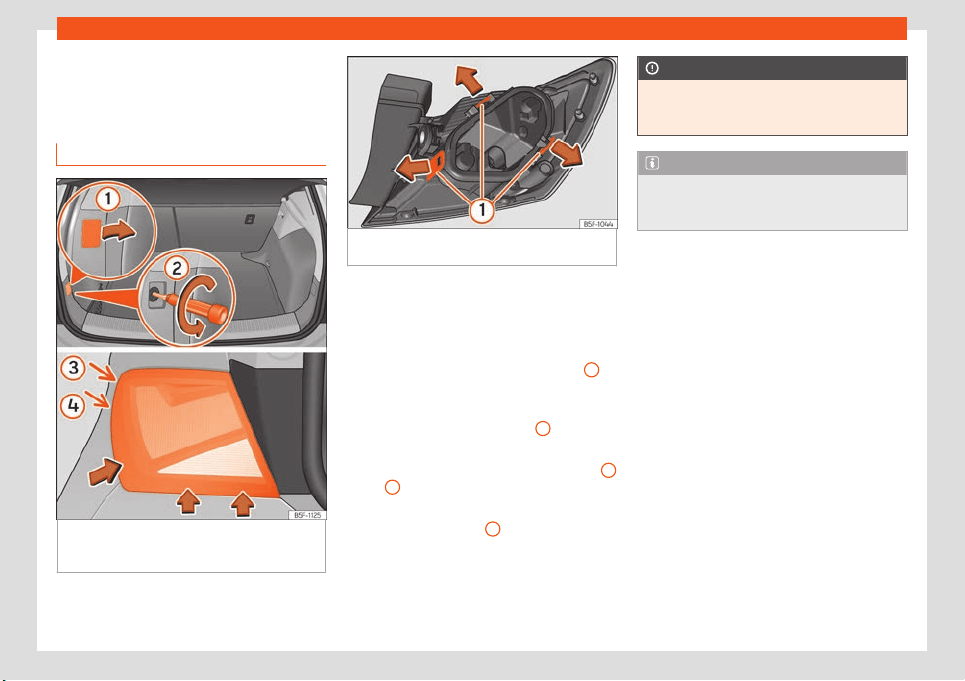
Fig. 115
Trunk: location of the bolt securing the
t
ail light unit. R
emo
ve the rear light unit from
side panel.
Fig. 116 Retaining tabs on reverse side of tail
light.
–
Check which of the bulbs is defective.
–
Open the rear lid.
–
Remove the cover by prying the flat side of
a scr
e
w
driver into the recess and remove
the cover from the opening
›››
Fig. 115
1
.
–
Carefully loosen the screw located behind
the co
v
er with a scr
ewdriver, turning it anti-
clockwise (arrows)
›››
Fig. 115
2
.
–
Tilt the light in the direction of the arrows
until it comes out of its housing (positions
3
and
4
)
›
›
›
Fig. 115.
–
Remove the bulb holder
›››
Fig. 116 unlock-
ing the retaining tabs
1
.
–
Change the damaged bulb.
–
To refit follow the steps in reverse order, tak-
ing special car
e when fitting the bulb hol
d-
er
. The securing tabs must click into place.
CAUTION
Take care when removing the rear light unit
to make sur
e there is no damage to the
paintwork or any of its components.
Note
Make sure you have a soft cloth ready to
place under the glass on the r
ear light unit,
to avoid any scratches.
96
Loading ...
Loading ...
Loading ...