Loading ...
Loading ...
Loading ...
5-17
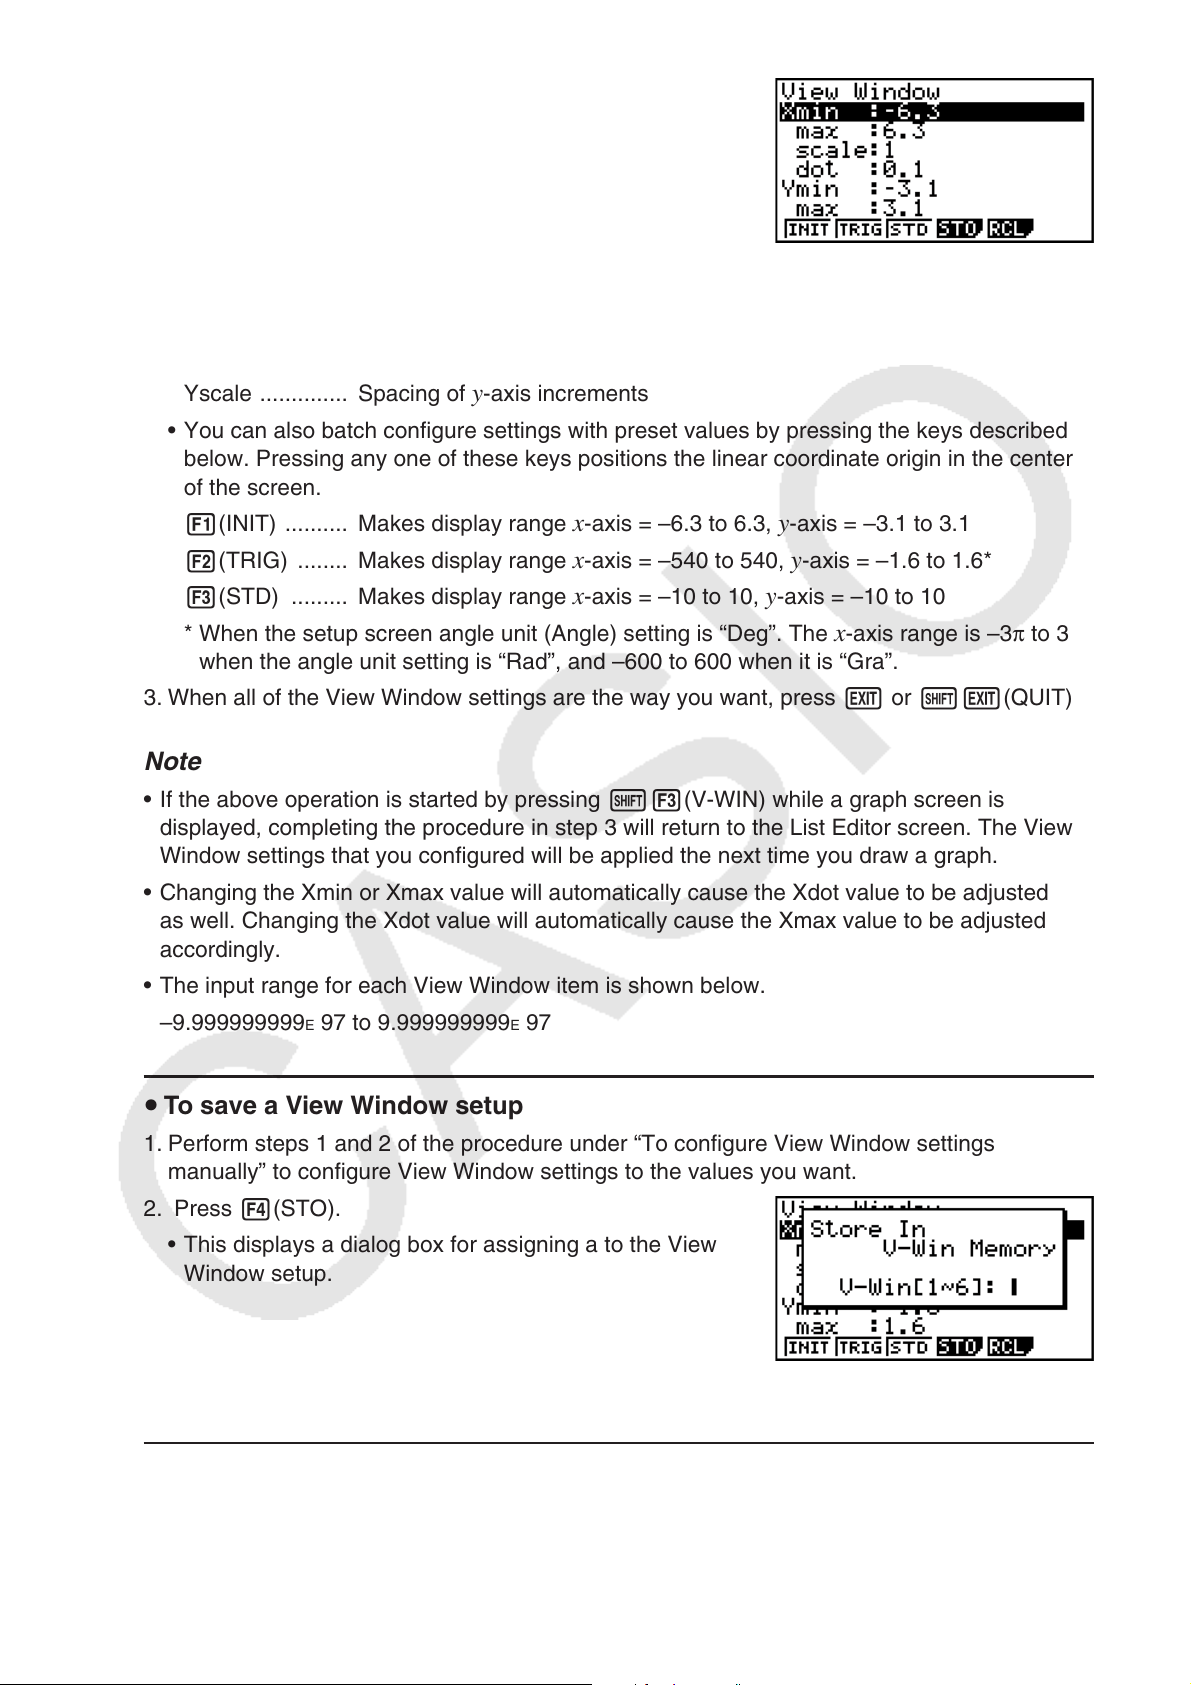
2. On the View Window setting screen that appears,
configure the settings as desired.
• Use c and f to move the highlighting to the item
whose setting you want to change, enter the desired
value, and then press w.
Xmin/Xmax ...... Minimum/maximum
x-axis value
Xscale .............. Spacing of
x-axis increments
Xdot ................. Value that corresponds to one
x-axis dot
Ymin/Ymax ...... Minimum/maximum
y-axis value
Yscale .............. Spacing of
y-axis increments
• You can also batch configure settings with preset values by pressing the keys described
below. Pressing any one of these keys positions the linear coordinate origin in the center
of the screen.
1(INIT) .......... Makes display range
x-axis = –6.3 to 6.3, y-axis = –3.1 to 3.1
2(TRIG) ........ Makes display range
x-axis = –540 to 540, y-axis = –1.6 to 1.6*
3(STD) ......... Makes display range
x-axis = –10 to 10, y-axis = –10 to 10
* When the setup screen angle unit (Angle) setting is “Deg”. The
x-axis range is –3π to 3π
when the angle unit setting is “Rad”, and –600 to 600 when it is “Gra”.
3. When all of the View Window settings are the way you want, press J or !J(QUIT).
Note
• If the above operation is started by pressing !3(V-WIN) while a graph screen is
displayed, completing the procedure in step 3 will return to the List Editor screen. The View
Window settings that you configured will be applied the next time you draw a graph.
• Changing the Xmin or Xmax value will automatically cause the Xdot value to be adjusted
as well. Changing the Xdot value will automatically cause the Xmax value to be adjusted
accordingly.
• The input range for each View Window item is shown below.
–9.999999999
E 97 to 9.999999999E 97
u To save a View Window setup
1. Perform steps 1 and 2 of the procedure under “To configure View Window settings
manually” to configure View Window settings to the values you want.
2. Press 4(STO).
• This displays a dialog box for assigning a to the View
Window setup.
3. Input a number from 1 to 6 and then press w.
u To recall a View Window setup
1. On the View Window setup screen, press 5(RCL).
2. On the View Window setup number input dialog box that appears, input the number of the
setup you want to recall and then press w.
Loading ...
Loading ...
Loading ...