Loading ...
Loading ...
Loading ...
34
OEM DIAGNOSTICS
Scan All Systems
n If you do not want to proceed, tap Cancel to cancel the erase procedure.
3. If you chose to erase DTCs, an “Erasing DTCs…” message displays while the erase function is in progress.
n If the erase was successful, a conrmation message shows. Tap Scan Again to re-scan the
currently selected module; or tap Close to exit and return to the test results screen.
n If the erase was not successful, an advisory message shows. Make sure the tablet is properly
connected to the vehicle’s DLC, then tap Try Again to repeat the erase procedures.
━ Tap Cancel to cancel the erase procedure and close the message.
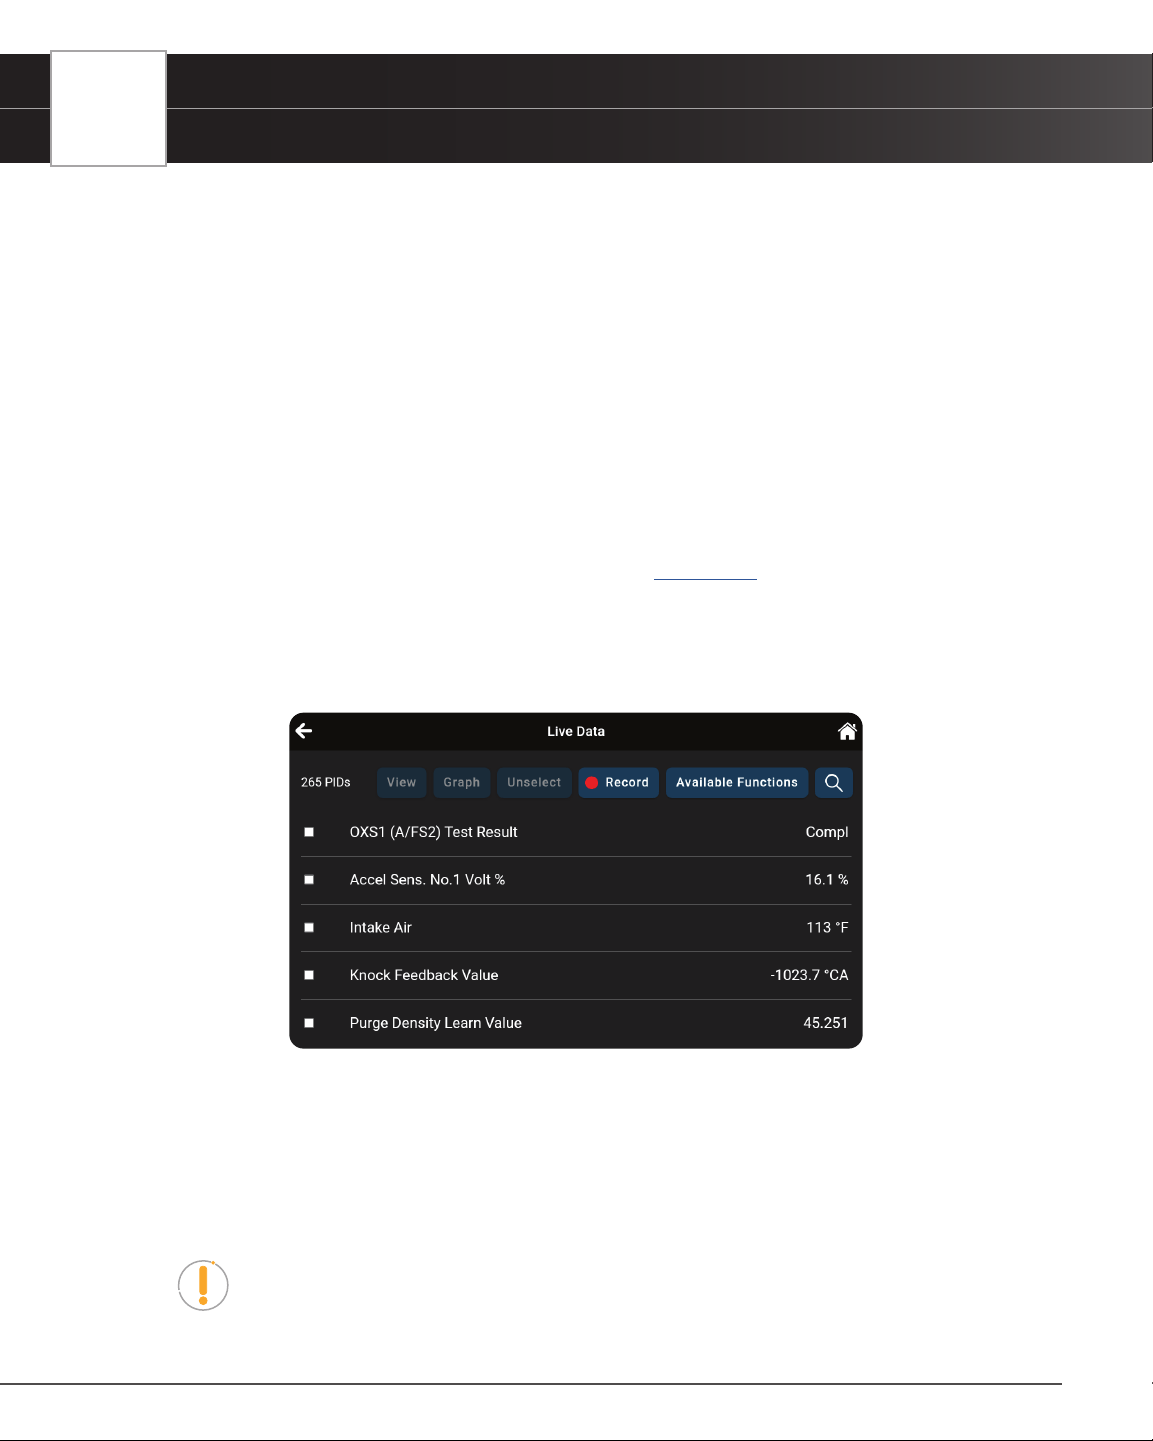
Viewing Live Data for a Selected Module
You can view Live Data for the currently selected module.
1. While linked to the vehicle, start the engine.
2. Select the module for which you wish to view Live Data. [
See page 32]
3. Tap Live Data in the “Available Functions” menu to place the tablet in Live Data mode.
4. The results screen displays all of the vehicle’s available PIDs with reported values. Each PID is unselected to
offer customization on which component you wish to select and explore further. A total PID count is provided
at the top left of the screen.
5. Select the PIDs you wish to explore further and continue as desired:
n Tap the View button to view PID data in a tabular format.
n Tap the Graph button to view PID data in graphical format.
n Tap the Unselect button to unselect all PID parameters.
n Tap Record to record the selected Live Data PID(s) in real time.
NOTE: Tapping the Record button without selecting any PIDs will record all of the
vehicle’s available PIDs.
n Tap the Available Functions button to open its selection menu.
Loading ...
Loading ...
Loading ...