Loading ...
Loading ...
Loading ...
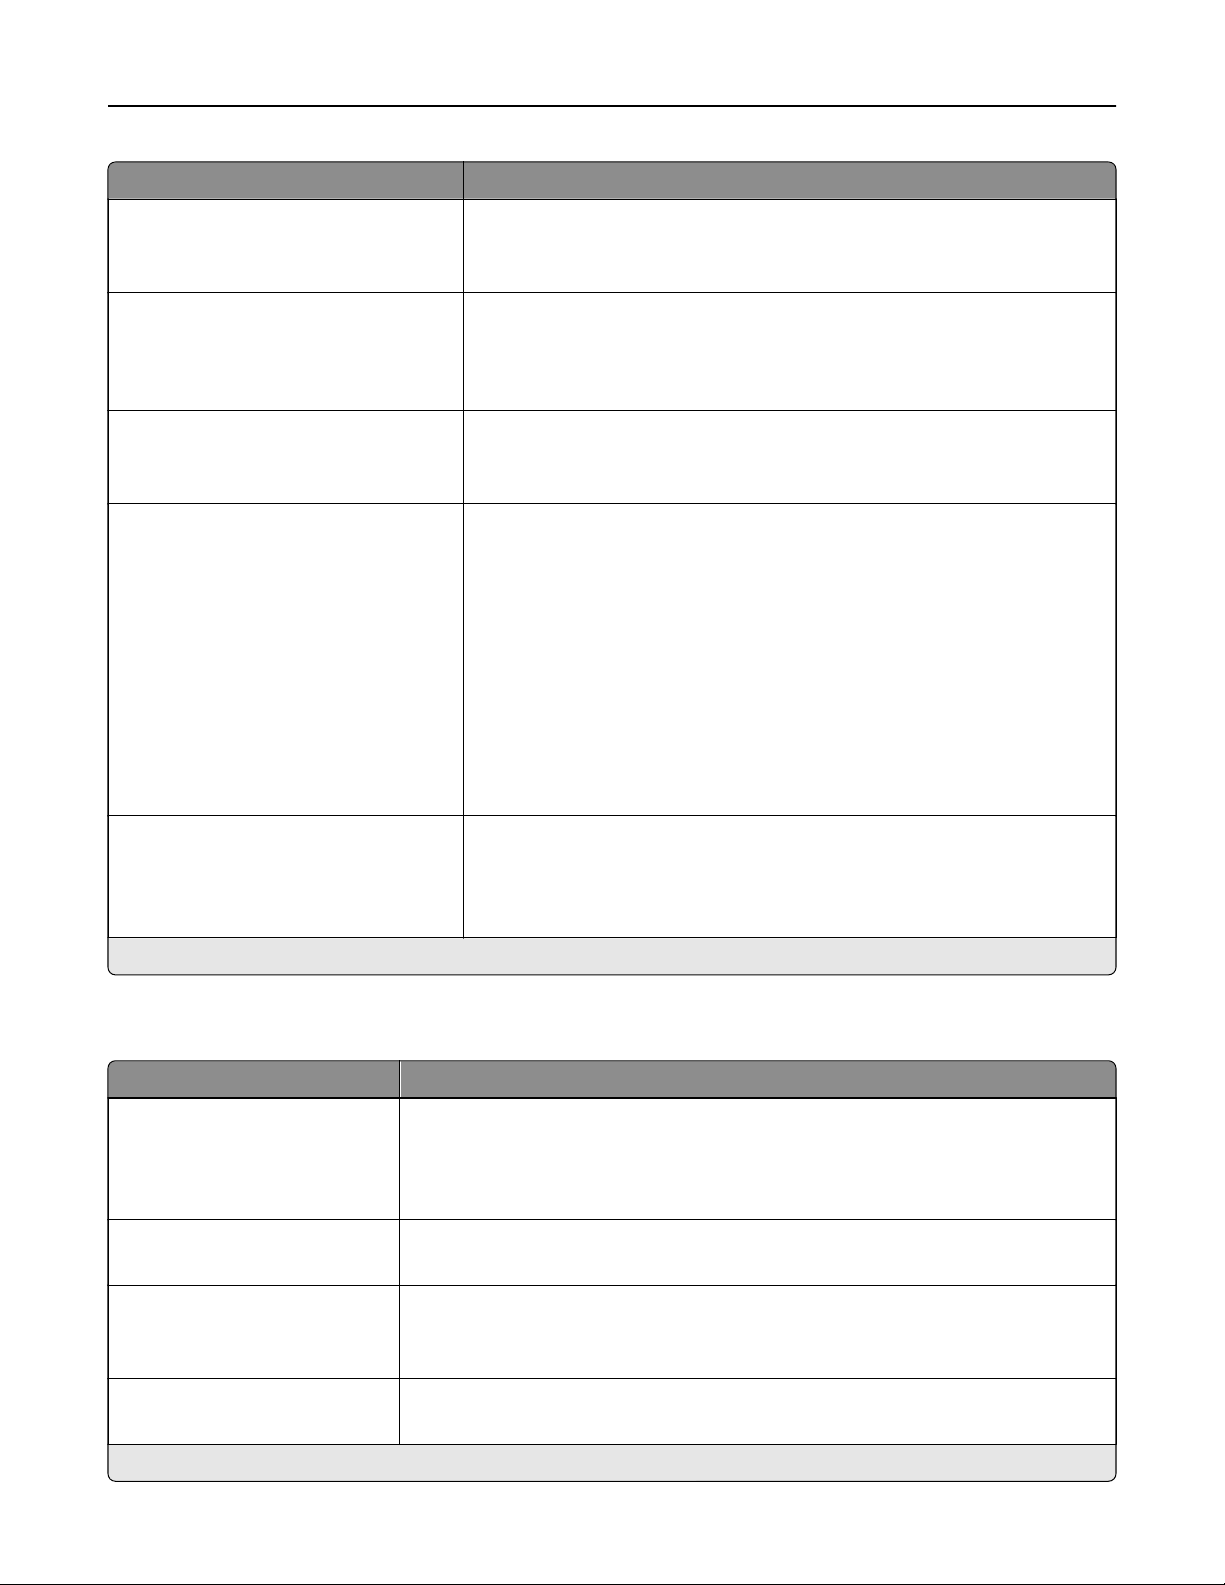
Menu item Description
Job Waiting
O*
On
Preserve print jobs requiring supplies so that jobs not requiring the missing
supplies can print.
Note: This menu item appears only when a hard disk is installed.
Job Hold Timeout
0–255 (30*)
Set the time in seconds that the printer waits for user intervention before
it holds jobs that require unavailable resources and continues to print other
jobs in the print queue.
Note: This menu item appears only when a hard disk is installed.
Download Target
RAM*
Disk
Specify where to save all permanent resources, such as fonts and macros,
that have been downloaded to the printer.
Note: This menu item appears only when a hard disk is installed.
Resource Save
O*
On
Determine what the printer does with downloaded resources, such as
fonts and macros, when it receives a job that requires more than the
available memory.
Notes:
• When set to
O,
the printer retains downloaded resources only until
memory is needed. Resources associated with the inactive printer
language are deleted.
• When set to On, the printer preserves all the permanent
downloaded resources across all language switches. When
necessary, the printer shows memory full messages instead of
deleting permanent resources.
Print All Order
Alphabetical*
Newest First
Oldest First
Specify the order in which held and confidential jobs are printed when Print
All is selected.
Note: This menu item appears only when a hard disk is installed.
Note: An asterisk (*) next to a value indicates the factory default setting.
Quality
Menu item Description
Print Resolution
600 dpi*
1200 Image Q
1200 dpi
Set the resolution for the text and images on the printed output.
Note: Resolution is determined in dots per inch or image quality.
Toner Darkness
1–10 (8*)
Determine the lightness or darkness of text images.
Halftone
Normal*
Detail
Enhance the printed output to have smoother lines with sharper edges.
Brightness
‑6 to 6 (0*)
Adjust the brightness of the printed output.
Note: An asterisk (*) next to a value indicates the factory default setting.
Use printer menus 194
Loading ...
Loading ...
Loading ...