
Loading ...
Loading ...
Loading ...
12-26 BRAKES
Brake Fluid
•
Bleed the brake line and the caliper.
Repeat this operation until no more air can be seen com-
ing out into the plastic hose.
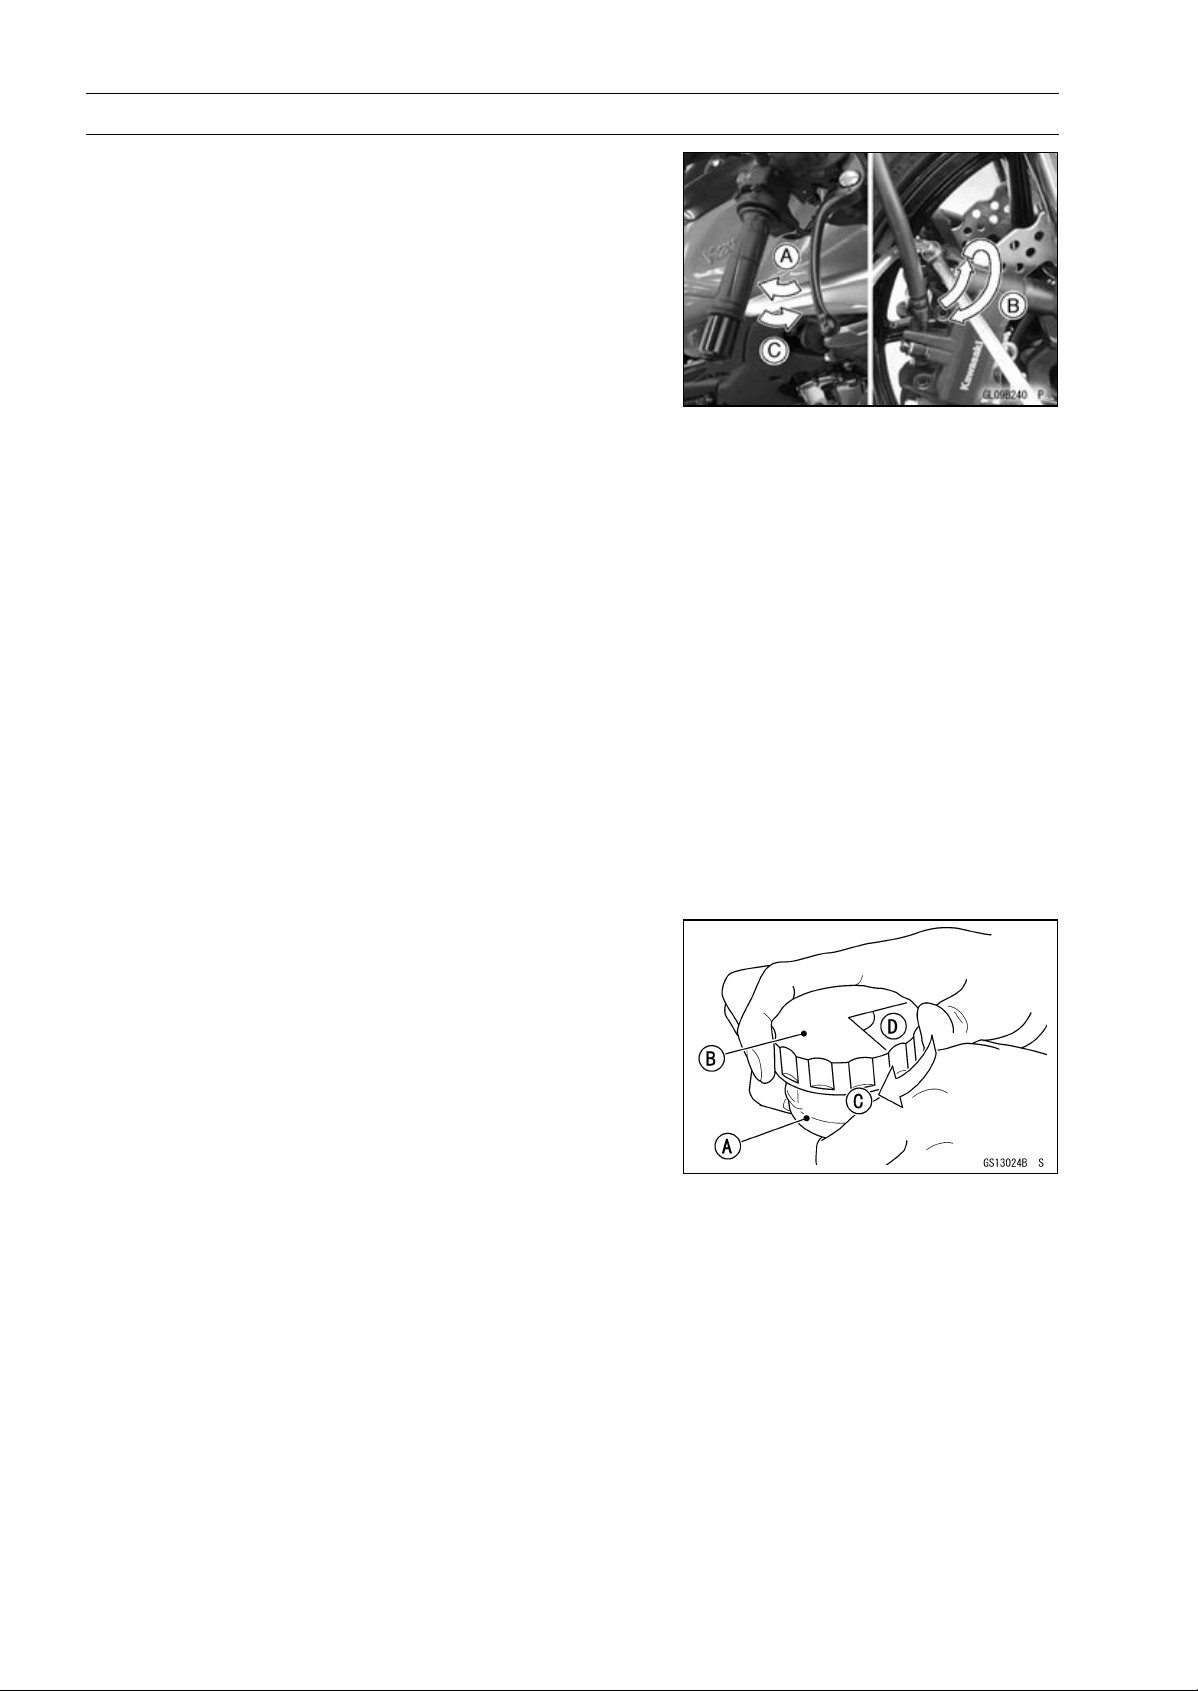
1. Pump the brake lever until it becomes hard, and apply
the brake and hold it [A].
2. Quickly open and close [B] the bleed valve while hold-
ing the brake applied.
3. Release the brake [C].
NOTE
○
The fluid level must be checked often during the bleed-
ing operation and replenished with fresh brake fluid as
necessary. If the fluid in the reservoir runs completely
out any time during bleeding, the bleeding operation
must be done over again from the beginning since air
will have entered the line.
○
Tap the brake hose lightly from the caliper to the reser-
voir for more complete bleeding.
○
Front Brake: First bleeding the right caliper then repeat
the above steps for the left caliper.
•
Remove the clear plastic hose.
•
Install:
Float
Diaphragm
Diaphragm Plate
Front Brake Reservoir Cap
•
Tighten:
Torque - Front Brake Reservoir Cap Bolts: 1.5 N·m (0.15
kgf·m, 13 in·lb)
•
Follow the procedure below to install the rear brake fluid
reservoir cap correctly.
First, tighten the brake fluid reservoir cap [B] clockwise
[C] by hand until slight resistance is felt indicating that
the cap is seated on the reservoir body, then tighten the
cap an additional 1/6 turn [D] while holding the brake fluid
reservoir body [A].
•
Tighten the bleed valve, and install the rubber cap.
Torque - Bleed Valves: 7.8 N·m (0.80 kgf·m, 69 in·lb)
•
Check the fluid level (see Brake Fluid Level Inspection in
the Periodic Maintenance chapter).
•
After bleeding is done, check the brake for good braking
power, no brake drag, and no fluid leakage.
Loading ...
Loading ...
Loading ...