Loading ...
Loading ...
Loading ...

2
EN
NL
HU
SK
CS
PL
TR
BG
HR
RO
SL
BS
SR
ET
LV
LT
BEFORE THE FIRST USE
Unpack the appliance
• Remove the appliance from the packaging and unpack all the accessories and printed documents.
• Open the lid by pushing the opening button located on the housing - g.1.
Read the instructions and carefully follow the operating method.
Clean the appliance
• Remove the ceramic bowl – g.2, the steam shield and the pressure valve – g.3a and 3b.
• Clean the bowl, the valve and the steam shield with a sponge and washingup liquid.
• Wipe the outside of the appliance and the lid with a damp cloth.
• Dry off carefully.
• Put all the elements back in their original position. Install the steam shield in the right positions on the
top lid of machine. Then, put the steam shield behind the 2 ribs and push it on the top until it’s fixed.
Install the detachable cord into the socket on the cooker base.
• Insert the spoon support on the base of the appliance – g.4.
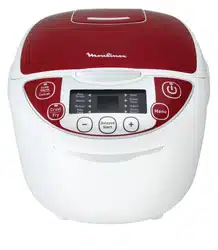
THE APPLIANCE
• This multicooker is equipped with 12 multi-functions: Rice/Cereal, Pilaf/Risotto, Reheat, Milk Porridge,
Stew, Steam/Soup, Yogurt, Baking, Fry, Keep Warm, Adjustable Timer and Preset.
• When the power cord is installed into the power outlet and into the socket on the cooker base, the
appliance will ring a long sound «Bi», all the indicators on the control box will light up for an instant.
Then the screen display show «--» very soon, all the indicators will switch off. The appliance enters into
standby mode, you can select the menu functions as you wish.
• At the end of the cooking period, the appliance will automatically switch over to keep warm which will
last up to 24h.
• Using dishwashing machine is not recommended.
• Do not touch the heating element when the product is connected or after cooking.
• Do not carry the product in use or just after cooking.
PREPARATION BEFORE COOKING
Measuring the ingredients - Max capacity of the bowl
• The graduated markings on the inside of the bowl are given in liters and cups, these are used for
measuring the amount of water when cooking rice.
• The plastic measuring cup provided with your appliance is for measuring rice and not water. 1 level
measuring cup of rice weighs about 160 g.
• Users may reduce or increase water according to types of rice and their preference of taste.
• As the voltage varies in different areas, slight spillover of rice and water is a normal phenomenon.
• The maximum quantity of water + rice should not exceed the highest mark inside the bowl.
Never add ingredients or water higher than the highest level mark.
Loading ...
Loading ...
Loading ...