
Loading ...
Loading ...
Loading ...
Fuses and bulbs
–
Pl
ace the bulb hol
der in the headlight and
pull the wire clip upwards until it clicks into
place.
–
Rotate the cover
›››
Fig. 64 in the opposite
direction to the arrow as far as it will go.
Always seek the help of a specialist when
changing the Xenon dipped beam and main
beam headlamps
›››
in Introduction on
page 60.
Note
The illustrations show the left hand head-
light. The structur
e of the right hand side
headlight is symmetric.
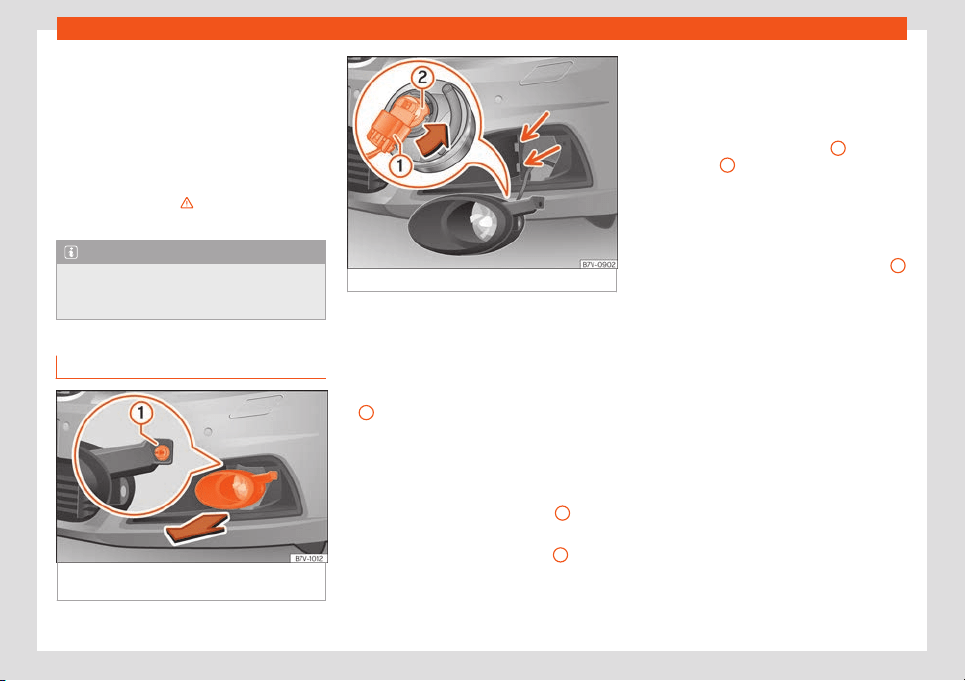
Replacing the front bumper bulb
Fig. 66
On the right side of the front bumper:
disassembling the headlights.
Fig. 67 Changing the bulbs in the headlights
Complete operations only in the sequence
giv
en:
–
Pull the co
ver forwards, in the direction of
the arrow
›››
Fig. 66.
–
Unscrew the attachment screw
›››
Fig. 66
1
using the screwdriver from the vehicle
t
ool kit
›
››
page 41.
–
Tilt the headlight slightly forward and ex-
tract it from its lateral attachments
›››
Fig. 67 (small arrows).
–
Release the connector
›››
Fig. 67
1
and re-
mo
v
e it.
–
Rotate the bulb holder
›››
Fig. 67
2
to the
l
eft all the w
ay, in the direction of the arrow,
and pull it out backwards together with the
bulb.
–
Replace the faulty bulb with a new identical
bulb.
–
Place the bulb holder in the headlight and
rotate to the right all the way.
–
Insert the connector
›››
Fig. 67
1
on the
bulb hol
der
2
. The connector must audibly
click int
o pl
ace.
–
Place the headlight into its position
›››
Fig. 67 (small arrows) and tilt it back-
wards.
–
Tighten the attachment screw
›››
Fig. 66
1
using the screwdriver.
–
Replace the cover on the bumper
›
›
›
Fig. 66.
63
Loading ...
Loading ...
Loading ...