Loading ...
Loading ...
Loading ...
Safety
●
F
ol
d both sides
›››
Fig. 32
B
up in the direc-
tion of the arr
o
w
›››
Fig. 32
2
.
●
Push the cushion
›
›
›
Fig. 32
C
back in the
dir
ection of the arr
ow
›››
Fig. 32
3
until it en-
gages.
Inst
all the headr
est on the child safety
seat
●
Remove the head support and store it safe-
ly in the vehicle
›››
page 133.
●
Make sure that the seat belt guide is instal-
led in the head support of the seat for chil-
dren on the window side
›››
page 38.
●
Enter the child seat head support in the
corresponding backrest until it fits correctly
into place
›››
Fig. 33.
●
Make sure that the rear seats and backr-
ests are correctly locked into place, pulling
on both of them.
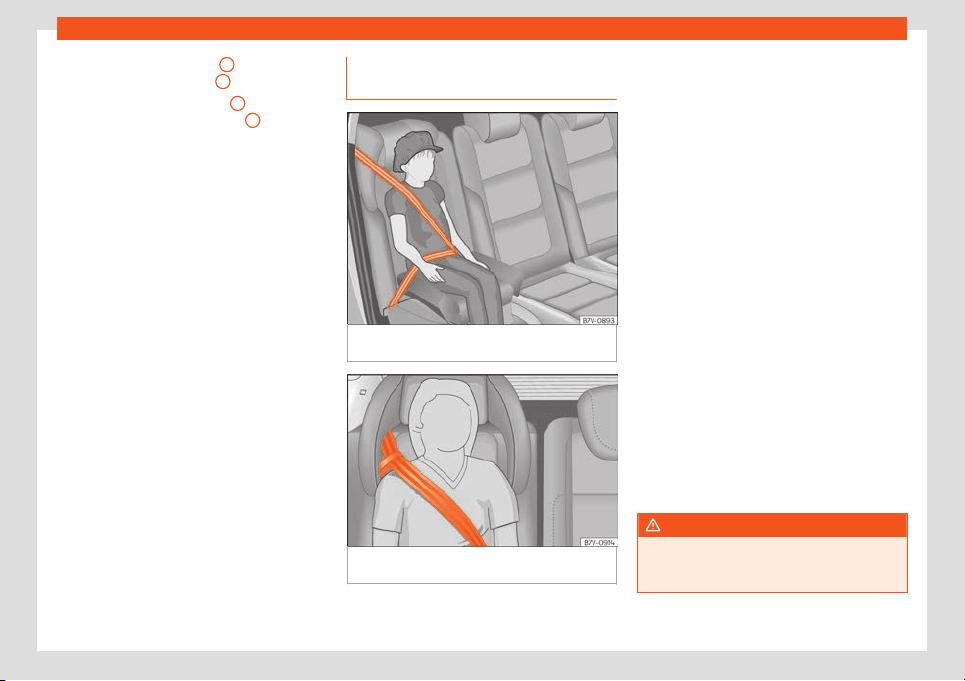
Seat belt route with integrated
child seat
Fig. 34
Integrated child seat: fitting the seat
belt.
Fig. 35 Integrated child seat: seat belt route
with guide handl
e
.
Using the guide handle
›
›
›
Fig. 35, position
the seat belt so that the shoulder part of the
belt lies on the centre of the child's shoulder.
Seat belt guide handle
●
Secure the seat belt guide handle to the
side headrest on the window side. The guide
handle is secured by a button.
●
Open the upper button on the seat belt
guide handle and pass the belt webbing be-
low the side headrest and through the guide
handle.
●
Close the button again.
Adjusting the seat belt
●
Guide the automatic three-point seat belt
below the side headrest.
●
Pull the latch plate and slowly place the
belt webbing across the child's chest and lap.
●
Insert the latch plate into the buckle for the
appropriate seat and push it down until it is
securely locked with an audible click.
●
Pull the belt to ensure that the latch plate is
securely engaged in the buckle.
WARNING
The seat belt only offers maximum protec-
tion from se
vere or fatal injuries when it is
correctly positioned.
38
Loading ...
Loading ...
Loading ...