Loading ...
Loading ...
Loading ...
26
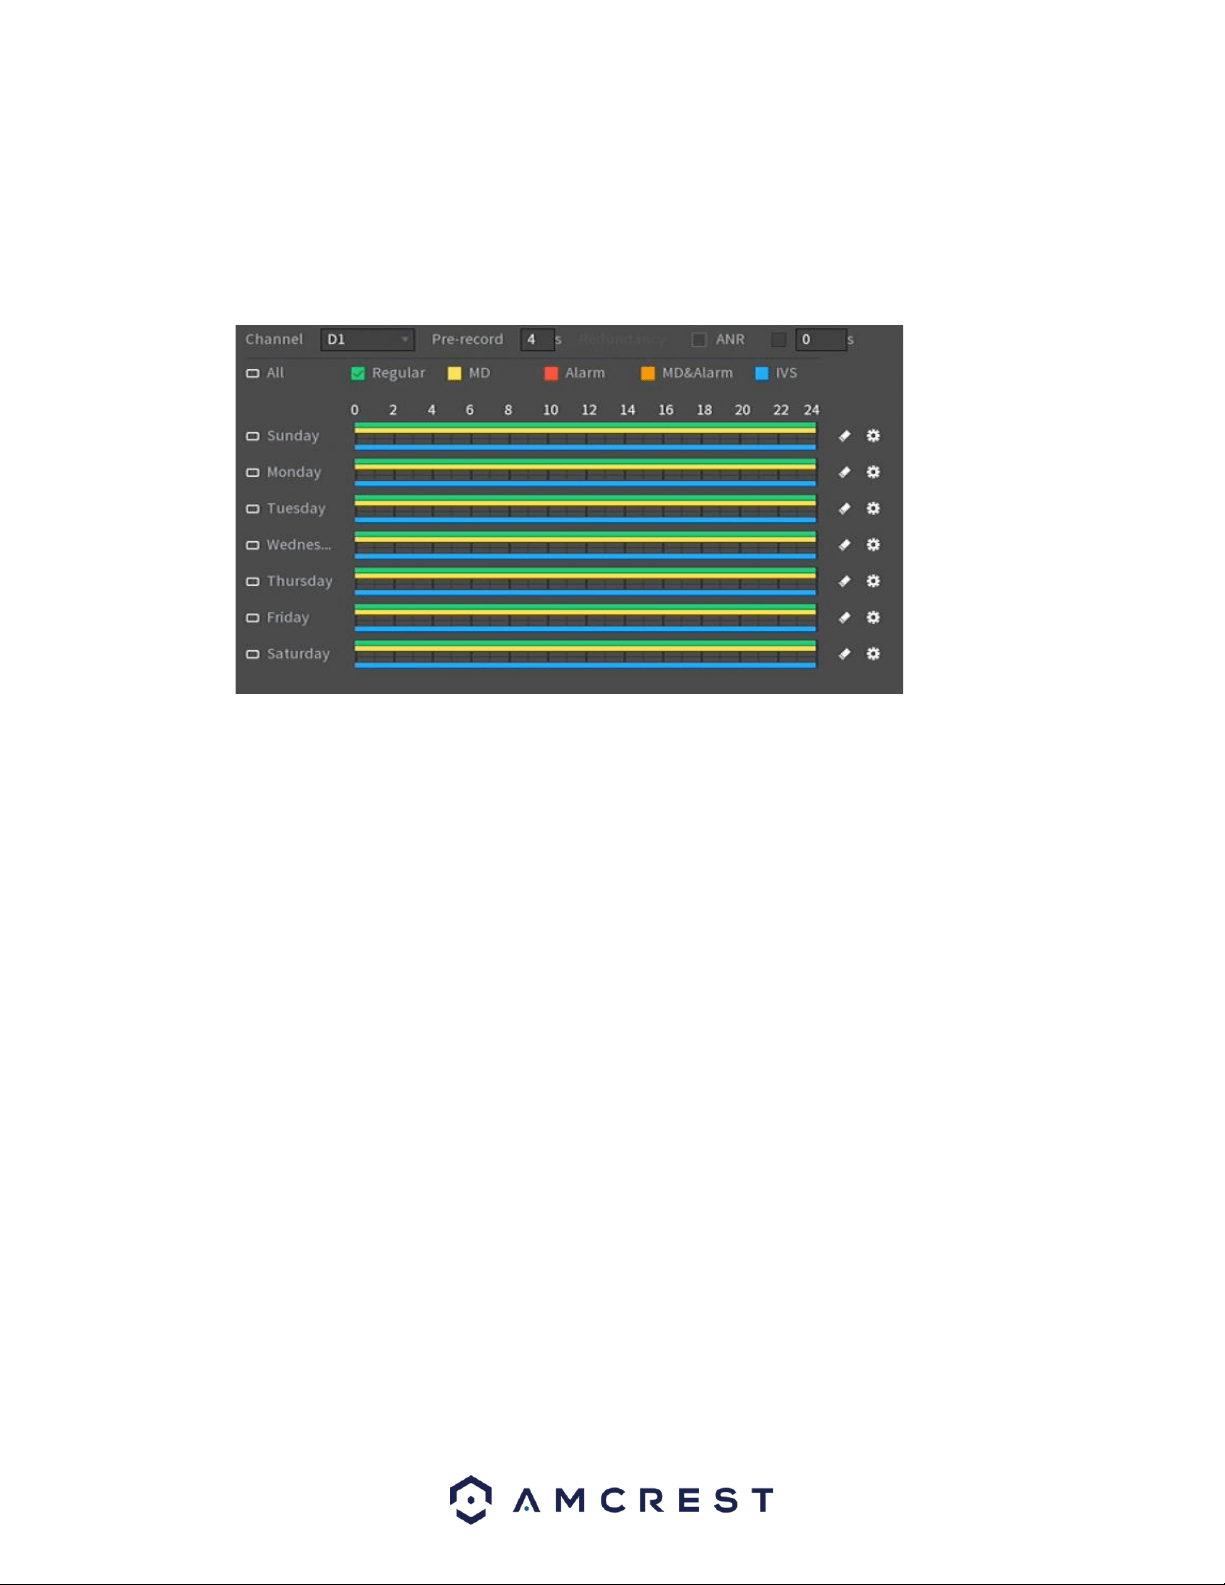
Schedule (Rec)
The next screen you will see is the Rec screen which allows you to set recording schedules for
regular (24/7 continuous recordings), motion detection, alarm, motion & alarm, and POS
recording types. For more information on setting a recording schedule, please see section,
“Setting Up Recording Schedules”.
Click Next to continue.
This will take you to the snapshot settings for scheduled recordings. This screen is used similarly
to the Rec menu only it pertains only to snapshot events. Once you have scheduled your events,
click on the OK button to continue.
Once the setup process is finished you should see a dialog box indicating the startup wizard is
finished. Click Save to continue
The next screen you will see will be the video wall screen which will display all connected devices.
Right click on the video wall and click on the ‘Main Menu’ from the selections to access the main
menu.
Main Menu Overview
The screenshot below is the main menu screen for the Amcrest NVR console interface:
Loading ...
Loading ...
Loading ...