Loading ...
Loading ...
Loading ...

Engine Servicing
4-31
4-31
Inspection
Cylinder
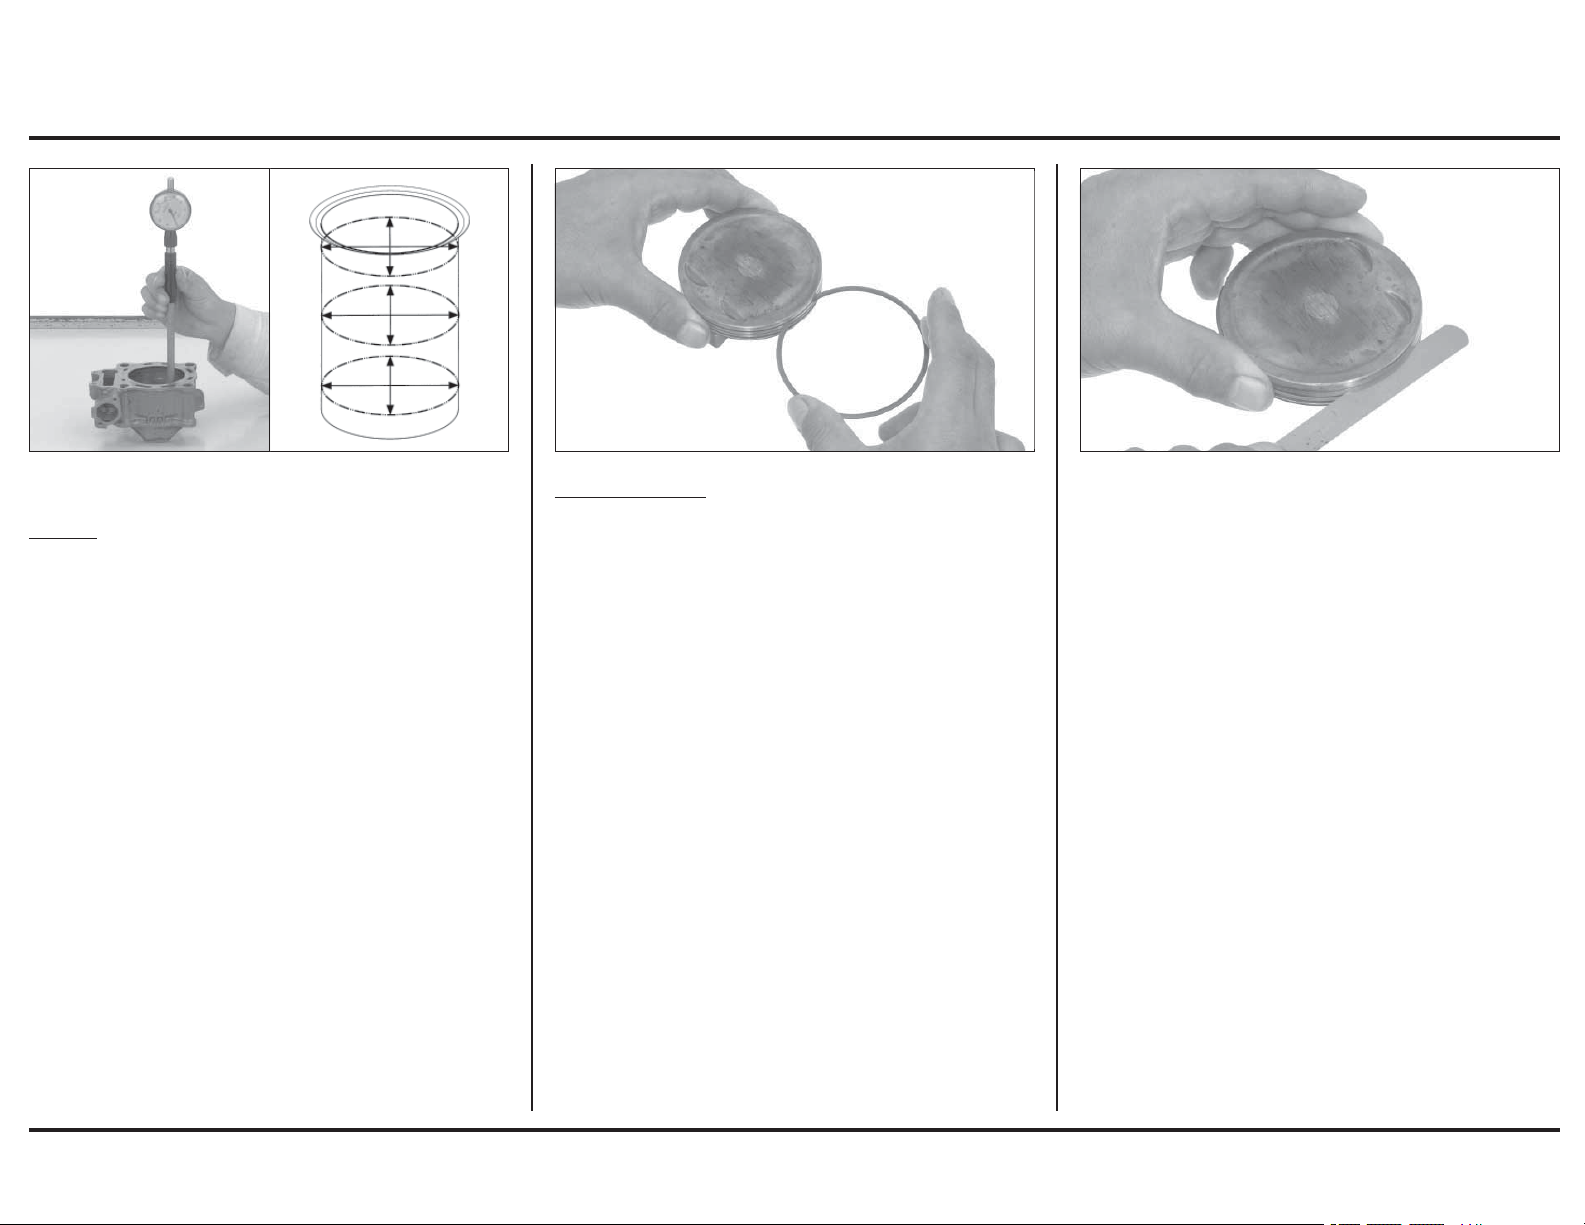
Inspect the cylinder bore for wear or damage.
Measure the cylinder I.D. in the X and Y axis at three
levels.
Take the maximum reading to determine the cylinder
wear.
Service limit: 76.54 mm (3.013 in)
Calculate the taper and out-of-round at three levels in the
X and Y axis. Take maximum reading to determine the
cylinder condition.
Service limit:
Taper: 0.05 mm (0.002 in)
Out-of-round: 0.05 mm (0.002 in)
Inspect the top of the cylinder for warpage.
Service limit: 0.05 mm (0.002 in)
Piston/Piston Ring
Remove the carbon deposits from the piston head or
piston ring grooves using old piston rings.
Inspect the piston for damage and the ring grooves for
wear.
Temporarily install the piston rings to their proper position
with the mark facing up.
Measure the piston ring-to-ring groove clearance with the
rings pushed into the grooves.
Service limit:
Top: 0.015 mm (0.0045 in)
Second: 0.065 mm (0.0026 in)
Inspect the piston ring grooves for wear or damage.
Loading ...
Loading ...
Loading ...