Loading ...
Loading ...
Loading ...
OUTDOOR TECHNICAL OVERVIEW
B-18
ENGLISH
Topic Title
Testing
Variable Speed Compressor
1. Begin by turning o power at the equipment disconnect switch. Adequate time must be given for capacitors on the circuit
board to discharge. Wait a minimum of 12 minutes before handling the circuitry.
2. Locate the Inverter control module (IPM). The IPM is connected to the main circuit board by a wire harnesses, and has the
compressor connections mounted on it.
3. Set your test meter to AC volts and test for voltage at the three compressor connections. Voltage should be zero before
proceeding.
4. Remove the three compressor connections making note of the terminal letter and the wire colors.
5. Set your ohm meter to the lowest resistance setting that is available. Test all three connections terminals using the following
sequence:
• U terminal to V terminal
• U terminal to W terminal
• V terminal to W terminal
All three resistance values should match the specication table below. Compressor windings are deemed bad if they are
greater than 7% out of specication. Readings taken at the wire IPM module that are outside of factory tolerances require
steps 6 through 9.
6. Remove the compressor blanket and set it aside. Remove the terminal block cover to expose the connections at the
compressor terminals. Inspect for any visual damage. Remove all three wires from the terminals making note of the wire color
and the terminal identier.
7. Repeat process outlined in step 5. Repair or replace the wires if the compressor windings check properly.
8. Check each terminal to ground (suction line connection at compressor) to check for grounded windings if the resistance
values are not correct.
9. Replace the compressor if the winding measurements are greater than 7% out of specication.
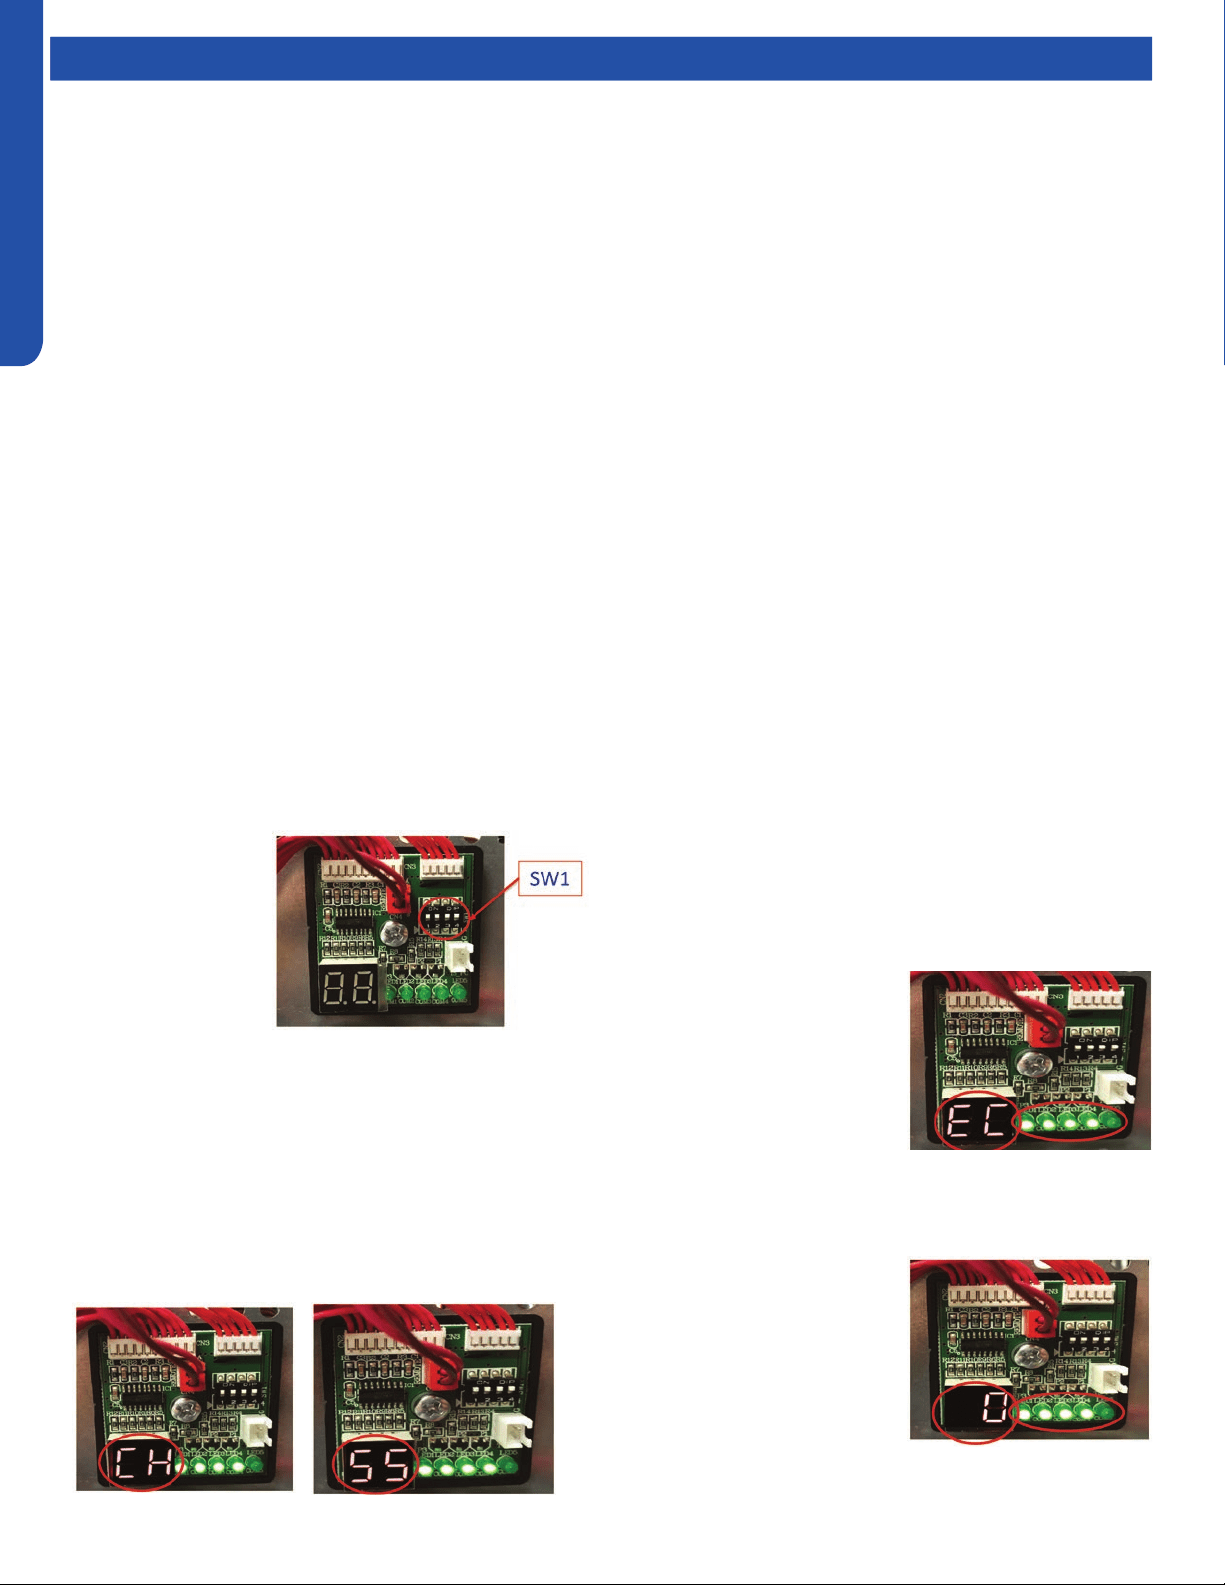
Wiring Error Check
1. Disconnect power to
the outdoor unit.
2. Set Dip Switches
SW1-1, SW1-2,
SW1-3 & SW1-4 to
the ON position.
These dip switches
are located on the
Service Monitor
Board.
3. Turn ON power to the outdoor unit.
4. All indoor fans will be set to HIGH fan speed.
5. EEV for Circuit A will open. All other EEV’s will close.
6. After a 3 minute delay, the Compressor will start and ramp
up to 55HZ.
7. The digital display with alternately display “CH” and
“Compressor Frequency (HZ)” at 5 second intervals
8. The system will circulate refrigerant through Circuit A for
approximatley 10 minutes.
9. Afterwards, Circuit A’s EEV will close and Circuit B’s EVV
will open.
10. This process will be repeated for each indoor unit that is
connected.
11. Once all indoor units have
been checked, the digital
display will display either
“EC” or “0”. “EC” indicates
a communication error
between the outdoor and
indoor unit. The LED(s) will
be ashing, indicating which
circuit has the fault
12. Once the wiring is corrected, re-run this test to conrm
everything is functional.
13. “0” indicates that all wiring is
correct.
14. If all wiring is correct, the
LED’s remain solid lit.
15. Once the test is complete,
make sure to change the dip
switches back to the OFF
position, and set each indoor
unit to preferred set points.
Loading ...
Loading ...
Loading ...