Loading ...
Loading ...
Loading ...
CONSOLE TECHNICAL OVERVIEW
I-5
ENGLISH
Topic Title
Testing
3. Take note of connection location and carefully remove
each connector.
4. Remove the 2 screws mounting the board in the box. They
in diagonal corners from each other.
Upper Louver Removal
1. Remove the lter cover and front cover.
2. Locate and remove the two screws mounting the upper
louver assembly to the case. They are on either end of the
assembly.
Lower Damper Assembly Removal
1. Remove the lter cover and front cover.
2. Disconnect the condensate drain.
3. Locate and remove the two screws mounting the damper
assembly to the case.
4. Pull on the right end of the assembly and rotate the
bottom of the assembly outward.
Note: When re-installing the damper assembly, rst place the
front edge of the condensate drain pan into place then rotate
the bottom of the assembly into position.
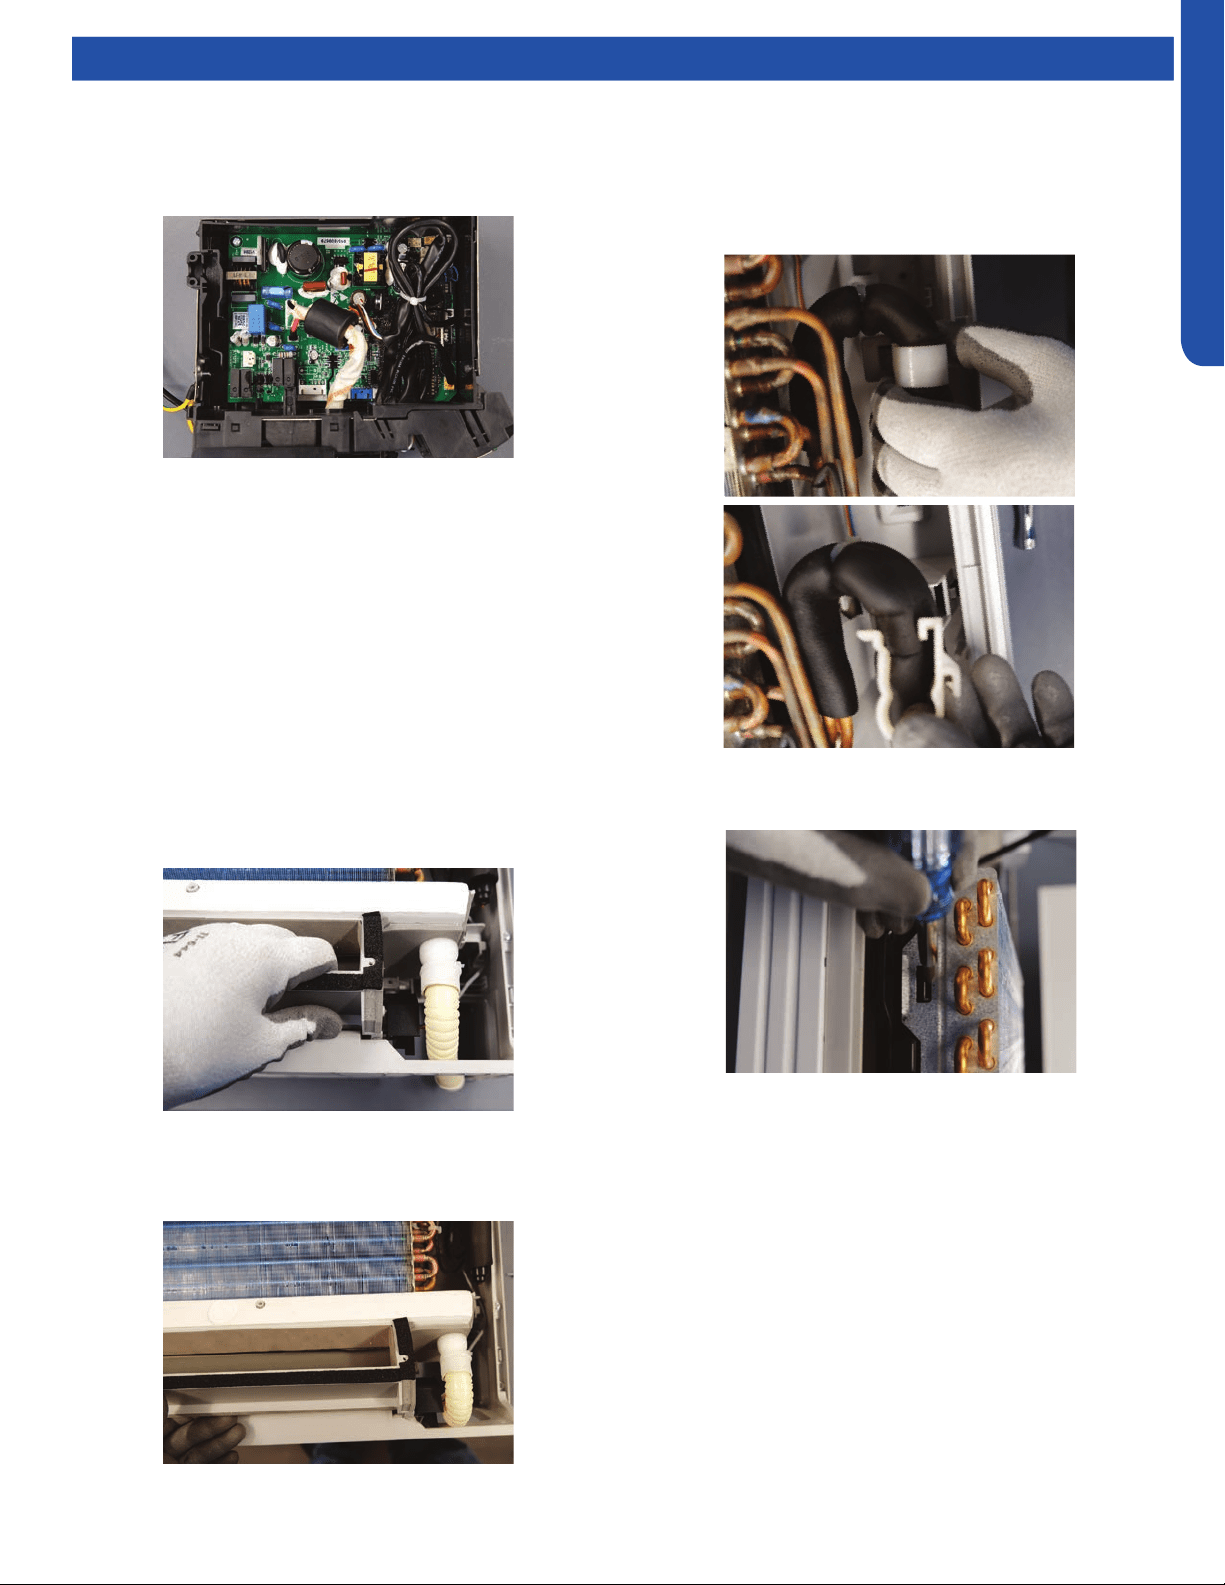
Replace Fan Motor
1. Remove lter cover, front panel, control box, upper louver
and bottom damper.
2. Remove the white plastic strap that hold the line set in
place on the right side of the unit.
3. Locate the locking tabs on the left side of the evaporator
and press them inward and pull the coil forward to remove.
IMPORTANT: Great care should be taken to when performing
this step. Excessively moving the lineset that connects to the
are can cause a refrigerant leak.
4. Slide the coil to the right to. The coil can now be gently
pulled away from the case. Only move the coil far enough
to access the four screws holding on the fan inlet faring.
Loading ...
Loading ...
Loading ...