Loading ...
Loading ...
Loading ...
The steps below will help you get your TV connected and
working quickly. The page numbers on which you can find
detailed instructions for each of these steps are also listed
for your convenience.
UnpackTV and accessories.
The accessories that came packed with your TV include
two remote controls, six AAA batteries, power cord, and
antenna adapter.
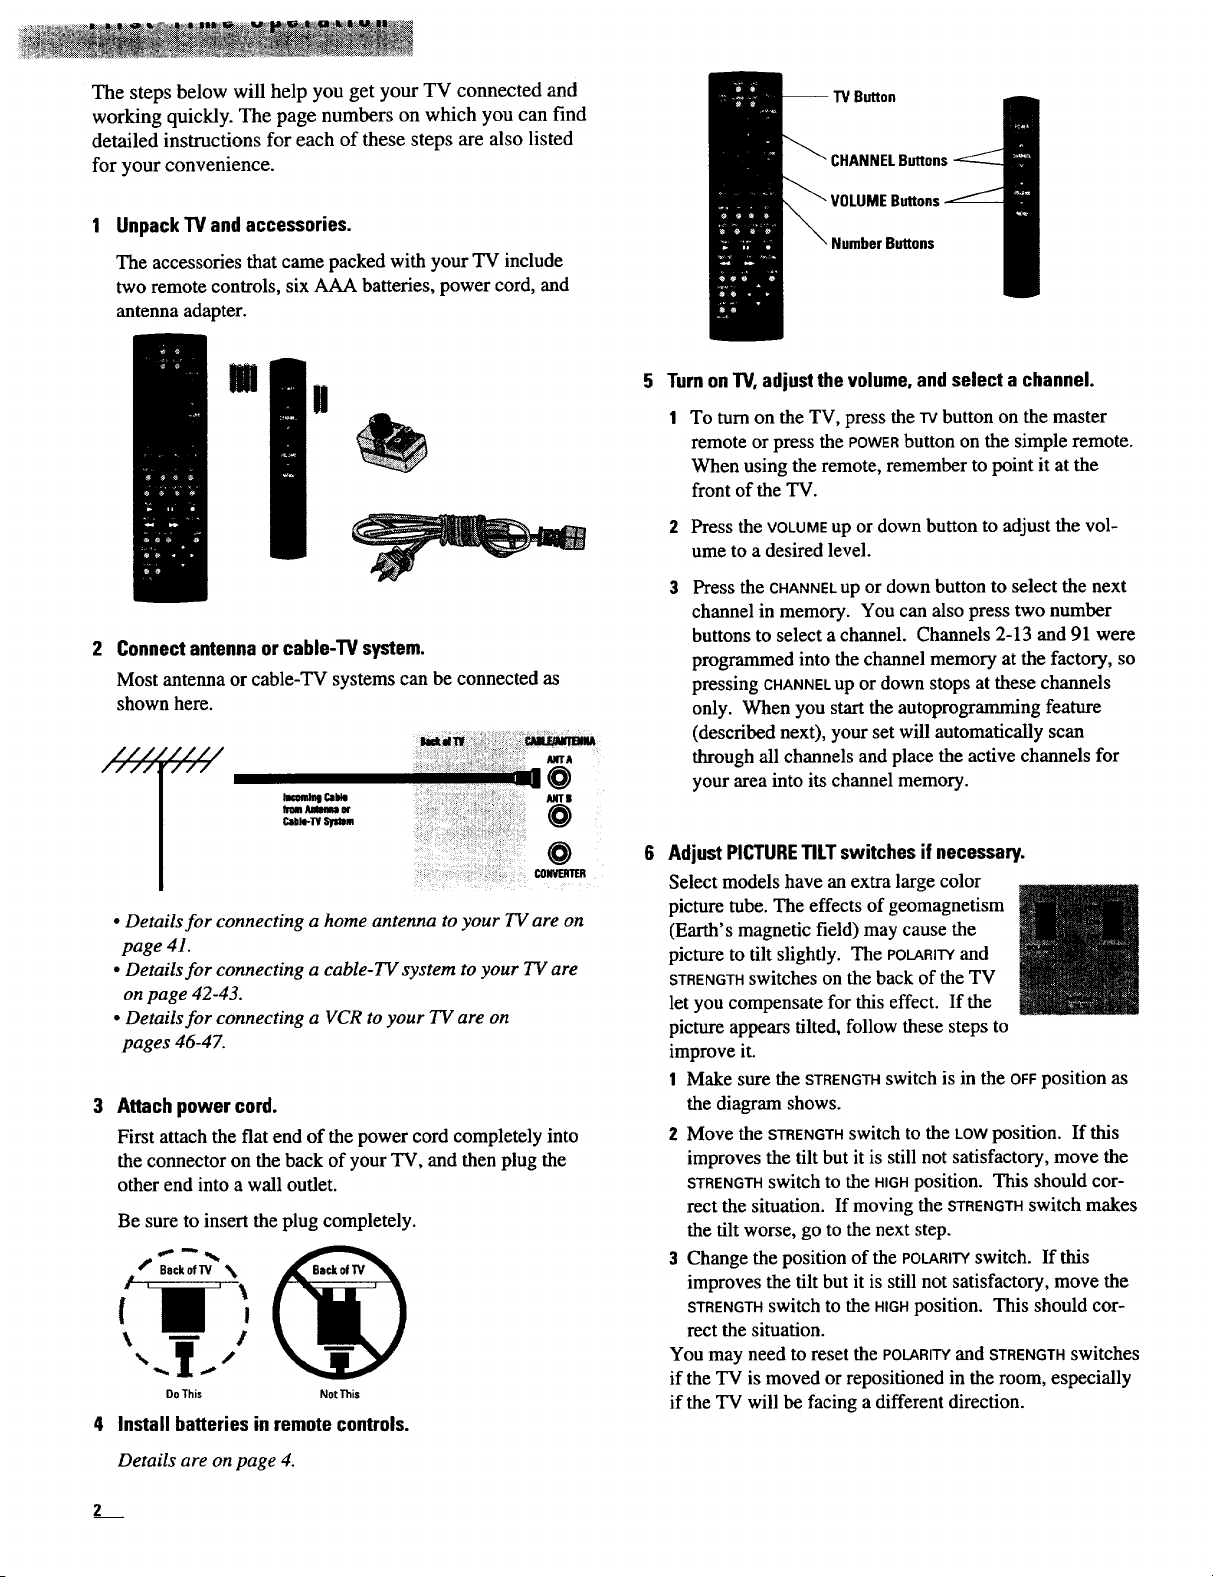
-- TV Button
B,NNELButtons
Buttons
m
i
2 Connectantenna or cable-TV system.
Most antenna or cable-TV systems can be connected as
shown here.
///.
////
'////
"///
lacond_l Cai4e
h'omAMmumor
Cable-W SYstem
_dw , cMe.J_VnnnlA
•=',:_i/:,:];:__.'- _trA
O
O
• Details for connecting a home antenna to your TV are on
page 41.
• Details for connecting a cable-TV system to your TV are
on page 42-43.
• Details for connecting a VCR to your TV are on
pages 46-47.
Attach power cord.
First attach the flat end of the power cord completely into
the connector on the back of your TV, and then plug the
other end into a wall outlet.
Be sure to insert the plug completely.
DoThis Not This
4 Install batteries in remotecontrols.
Details are on page 4.
5 Turn onTV, adjustthe volume,and select a channel.
To turn on the TV, press the TVbutton on the master
remote or press the POWERbutton on the simple remote.
When using the remote, remember to point it at the
front of the TV.
2 Press the VOLUMEup or down button to adjust the vol-
ume to a desired level.
Press the CHANNELup or down button to select the next
channel in memory. You can also press two number
buttons to select a channel. Channels 2-13 and 91 were
programmed into the channel memory at the factory, so
pressing CHANNELup or down stops at these channels
only. When you start the autoprogramming feature
(described next), your set will automatically scan
through all channels and place the active channels for
your area into its channel memory.
AdjustPICTURETILTswitches if necessary.
Select models have an extra large color
picture tube. The effects of geomagnetism
(Earth's magnetic field) may cause the
il
Make sure the STRENGTHswitch is in the OFFposition as
the diagram shows.
2 Move the STRENGTHswitch to the LOWposition. If this
improves the tilt but it is still not satisfactory, move the
STRENGTHswitch to the HIGHposition. This should cor-
rect the situation. If moving the STRENGTHswitch makes
the tilt worse, go to the next step.
3 Change the position of the POLARITYswitch. If this
improves the tilt but it is still not satisfactory, move the
STRENGTHswitch to the HIGHposition. This should cor-
rect the situation.
You may need to reset the POLARITYand STRENGTHswitches
if the TV is moved or repositioned in the room, especially
if the TV will be facing a different direction.
picture to tilt slightly. The POLARITYand
STRENGTHswitches on the back of the TV
let you compensate for this effect. If the
picture appears tilted, follow these steps to
improve it.
1
Loading ...
Loading ...
Loading ...