Loading ...
Loading ...
Loading ...
Fuses and bulbs
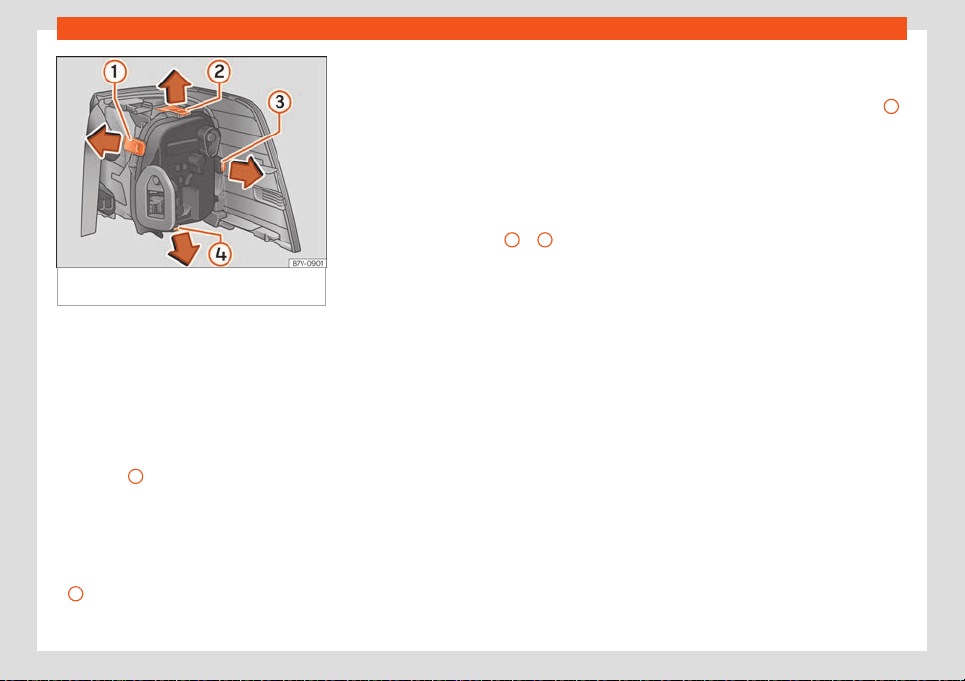
Fig. 71
Tail light unit in the bodywork: removing
the bulb hol
der.
Complete operations only in the sequence
giv
en.
Removing the rear light units
–
Open the rear lid.
–
Left tail light: open the storage compart-
ment on the left side of the luggage com-
partment
›››
page 152 and then rotate cap
›››
Fig. 70
1
90 ° in the direction of the ar-
r
ow and remove it.
–
Right tail light: Move the 12 V power socket
support by pressing gently downwards
›››
Fig. 70 (arrow).
–
Unscrew the attachment screw
›››
Fig. 70
2
using the screwdriver from the vehicle
t
ool kit
›››
page 41. The bolt is secured in its
position.
–
Extract the rear light from the bodywork by
carefully pulling backwards.
–
Pull the red strip on the connector and ex-
tract the connector.
–
Disassemble the tail light unit and place it
on a flat, clean surface.
To change the bulb
–
To release the bulb holder, press on the at-
tachment tabs
›››
Fig. 71
1
to
4
in the di-
r
ection of the arrow.
–
Remove the bulb holder from the rear light
unit.
–
Replace the faulty bulb with a new identical
bulb.
–
Place the bulb holder in the tail light unit.
The attachment tabs should audibly click
into place.
–
Insert the connector and press the red at-
tachment strip in so that the connector is
locked into place.
Assembling the rear light units
–
Carefully insert the tail light unit into the
opening in the bodywork. To do this, insert
the upper rear light unit guide into the at-
tachment ring.
–
Tighten the white attachment screw using
the screwdriver from the vehicle tool kit.
–
Ensure that the tail light unit has been cor-
rectly fitted and is firmly secured.
–
Left tail light: replace the cap
›››
Fig. 70
1
and turn it through 90º in the opposite di-
r
ection to the arrow. Close the storage
compartment.
–
Right tail light: Move the 12 V power socket
support upwards gently until it is properly
closed.
–
Close the rear lid
›››
page 107.
65
Loading ...
Loading ...
Loading ...