Loading ...
Loading ...
Loading ...
Puttin etherYour Saw To
Your radial arm saw is easy to put together,
however it will take time. Ask a friend to
help, and follow these assembly instructions.
It is important for your safety, and for the
quality of your cuts, that the saw be put
together with care.
'_ WARNING: Plugging the saw in
during assembly can result in electrical
shock or your fingers, hand, or arm be-
ing cut off from blade contact. Do not
plug in the saw at any time during as-
sembly. The saw should only be
plugged in when it is to be used.
A
E
G
F D
J
\
Unpacking/Set up
1. As you unpack, try to keep the contents of
each of the smaller bags together and separate
from the others. This will help you identify and
locate the parts you need during assembly.
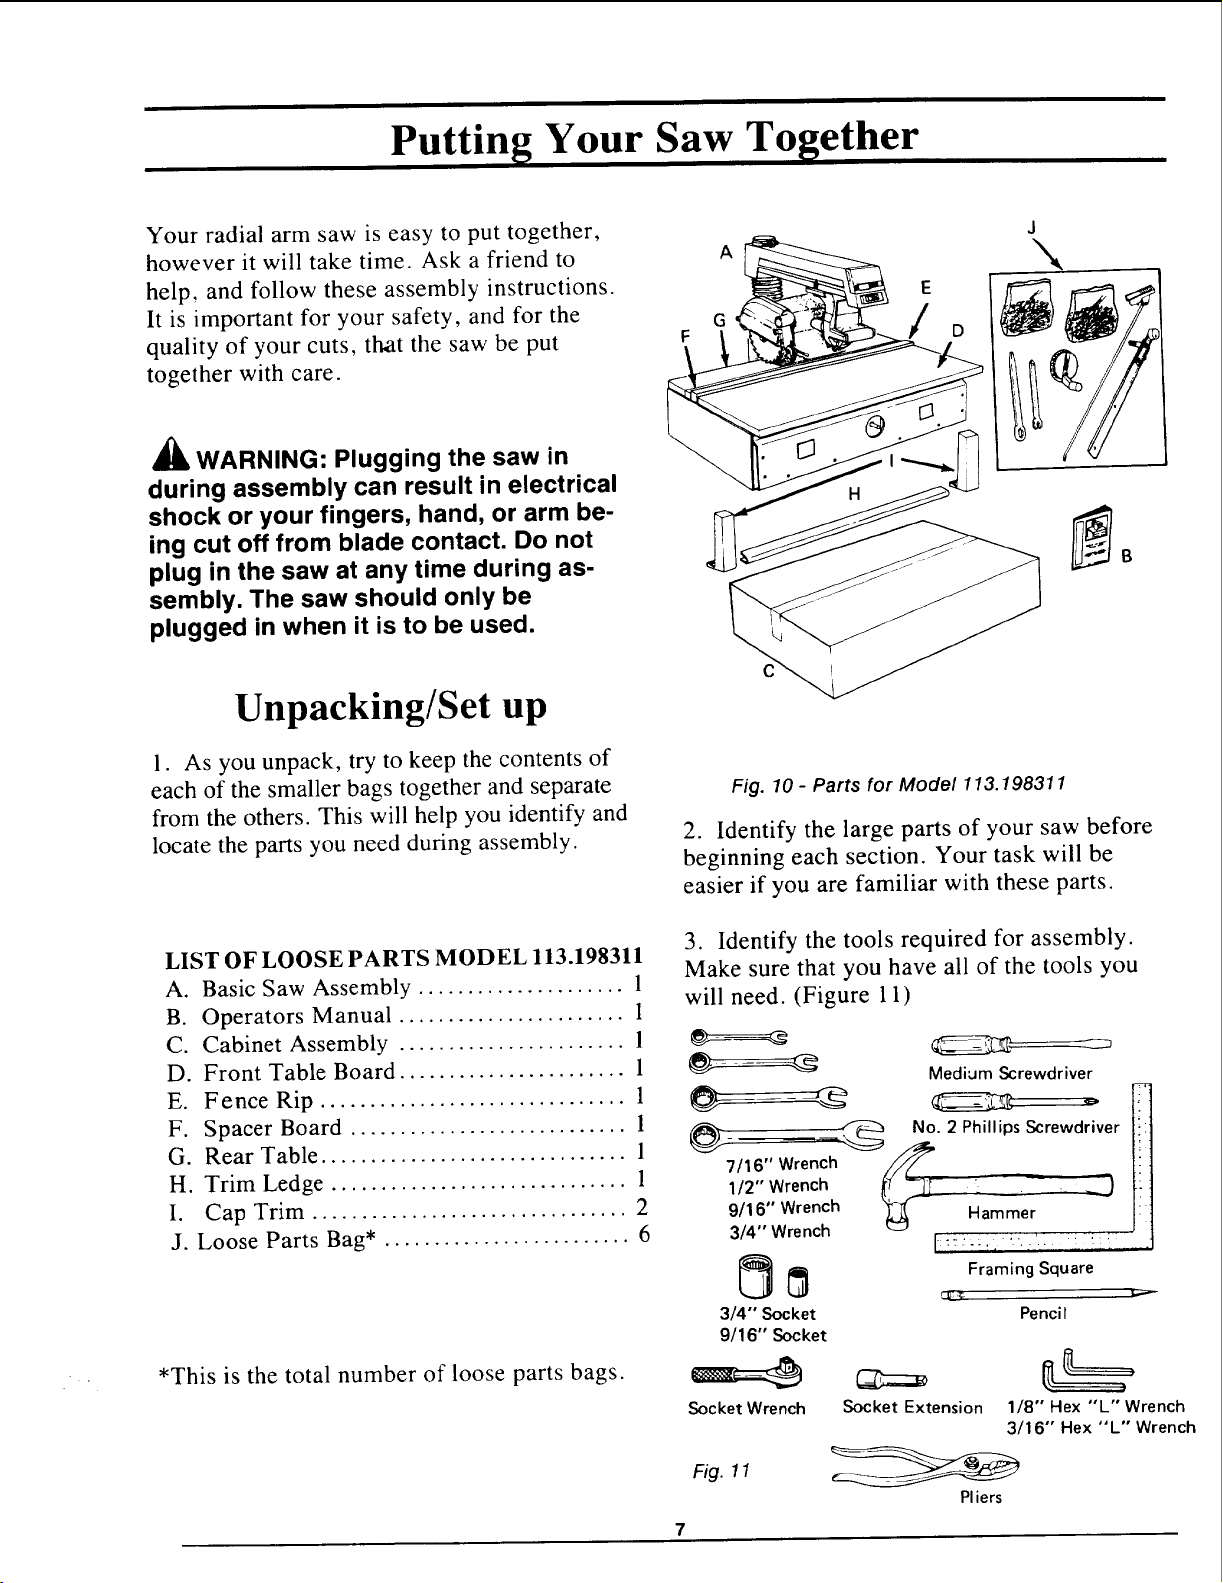
LIST OF LOOSE PARTS MODEL 113.198311
A. Basic Saw Assembly ..................... 1
B. Operators Manual ....................... 1
C. Cabinet Assembly ....................... 1
D. Front Table Board ....................... 1
E. Fence Rip ............................... 1
F. Spacer Board ............................ 1
G. Rear Table ............................... 1
H. Trim Ledge .............................. 1
I. Cap Trim ................................ 2
J. Loose Parts Bag* ......................... 6
*This is the total number of loose parts bags.
Fig. 10- Parts for Model 113.198311
2. Identify the large parts of your saw before
beginning each section. Your task will be
easier if you are familiar with these parts.
3. Identify the tools required for assembly.
Make sure that you have all of the tools you
will need. (Figure 11)
---_=a_ Medium Screwdriver
_7/16,, Wrench _//_ No. 2 Phillips Screwdriver
1/2" Wrench i'( _--]T
llJ
9/16" Wrench Hammer
3/4" Wrench
3/4"' Socket
9/16" Socket
Socket Wrench
Fig. 11
I::.":;, ", " ..i. :_: -
Framing Square
ut_s_
Pe nci I
Socket Extension 1/8" Hex "L" Wrench
3/16" Hex "L" Wrench
Pliers
Loading ...
Loading ...
Loading ...