Loading ...
Loading ...
Loading ...
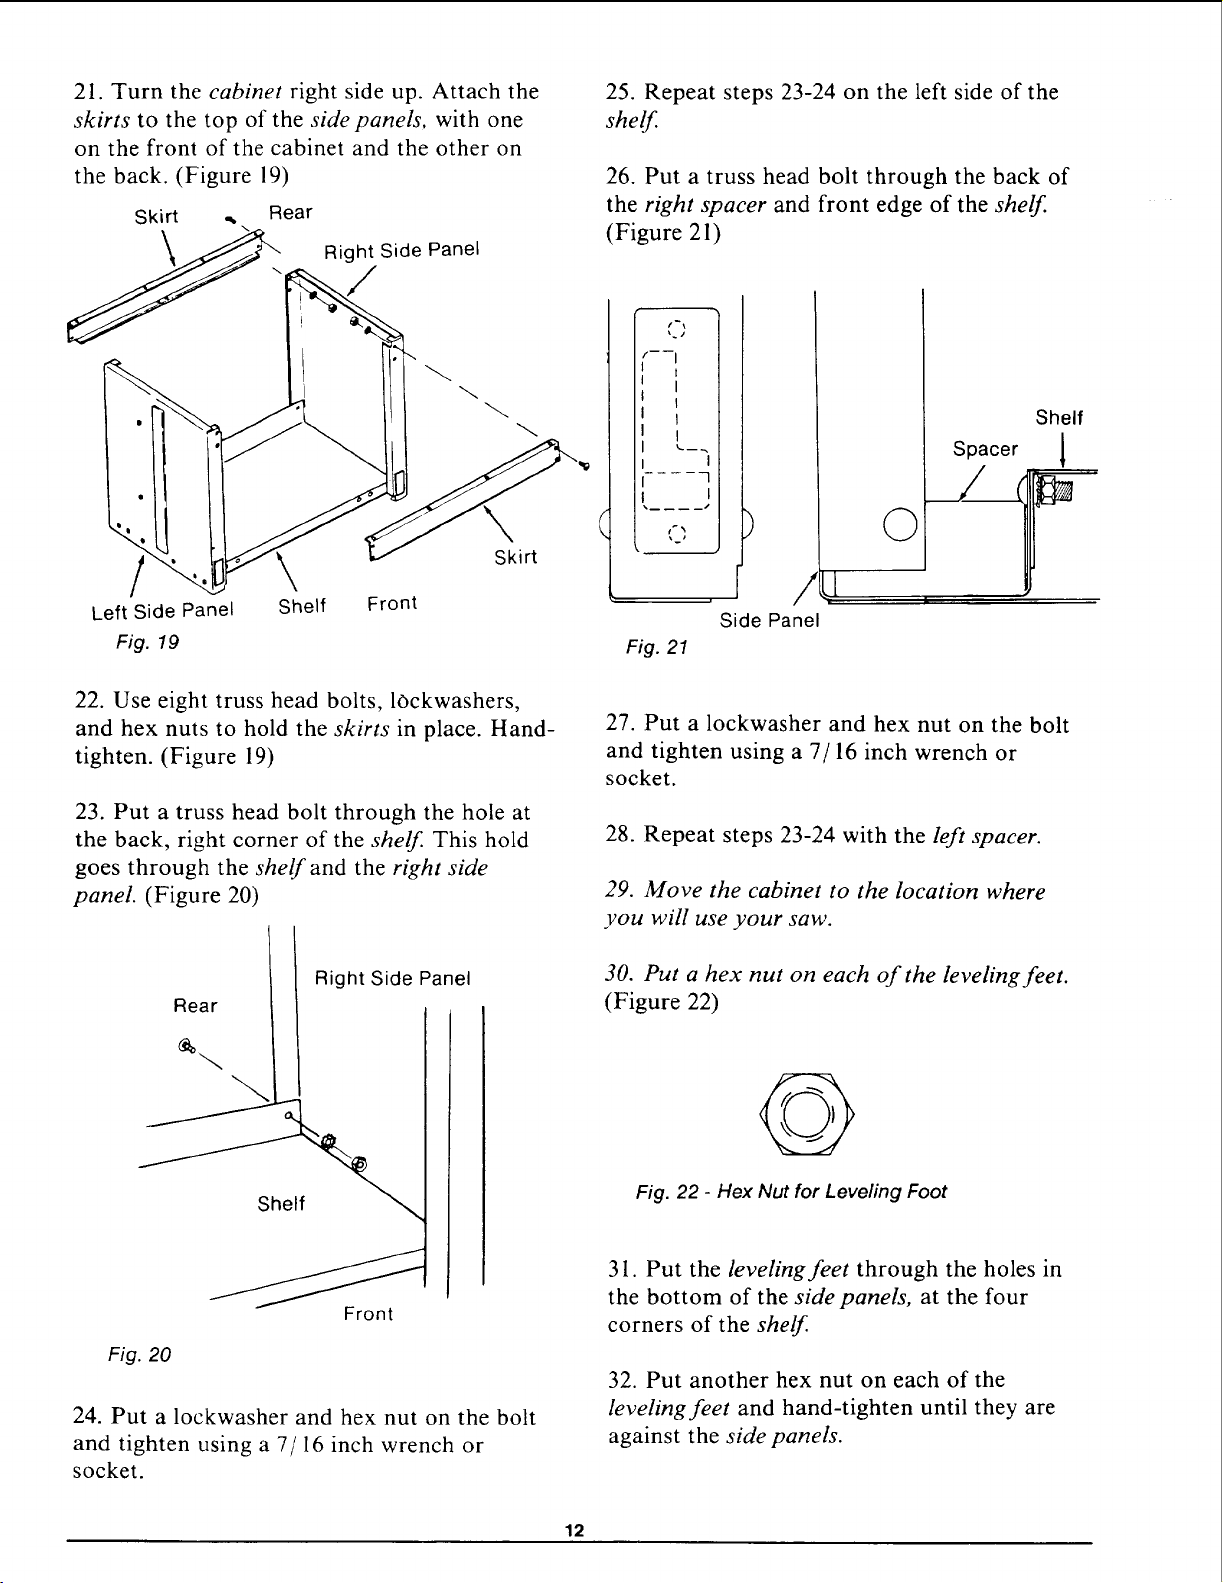
21. Turn the cabinet right side up. Attach the
skirts to the top of the side panels, with one
on the front of the cabinet and the other on
the back. (Figure 19)
Skirt ., Rear
Right Side Panel
/
Left Side Panel
Fig. 19
Shelf Front
Skirt
22. Use eight truss head bolts, lOckwashers,
and hex nuts to hold the skirts in place. Hand-
tighten. (Figure 19)
23. Put a truss head bolt through the hole at
the back, right corner of the shelf. This hold
goes through the shelf and the right side
panel. (Figure 20)
25. Repeat steps 23-24 on the left side of the
shelf.
26. Put a truss head bolt through the back of
the right spacer and front edge of the shelf.
(Figure 21)
t'\
f----i
i i
I I
I.... -3
I I
.... s
tP_
Fig. 21
)
/
Side Panel
©
Spacer
Shelf
1
27. Put a lockwasher and hex nut on the bolt
and tighten using a 7/16 inch wrench or
socket.
28. Repeat steps 23-24 with the left spacer.
29. Move the cabinet to the location where
you will use your saw.
Right Side Panel
Rear
Fig. 20
Front
24. Put a lockwasher and hex nut on the bolt
and tighten using a 7/16 inch wrench or
socket.
30. Put a hex nut on each of the leveling feet.
(Figure 22)
@
Fig. 22 - Hex Nut for Leveling Foot
31. Put the leveling feet through the holes in
the bottom of the side panels, at the four
corners of the shelf.
32. Put another hex nut on each of the
leveling feet and hand-tighten until they are
against the side panels.
12
Loading ...
Loading ...
Loading ...