Loading ...
Loading ...
Loading ...
Square Hole----
Fig. 33
Lock Handle With
Mounting Plate Underneath
3. Slide the rod through one of the square
holes in the front of the saw. Then put the
hex head bolt through the round hole above
it. (Figure 33)
4. Put another lockwasher and a hex nut on
the bolt and tighten with a 7/16 inch wrench
or socket.
5. Repeat steps 1 - 4 on the other side of the
saw.
6. Turn the front table (44" x 17") upside
down. The top of the front table has five large
holes and seven smaller ones. This side
should be toward the floor.
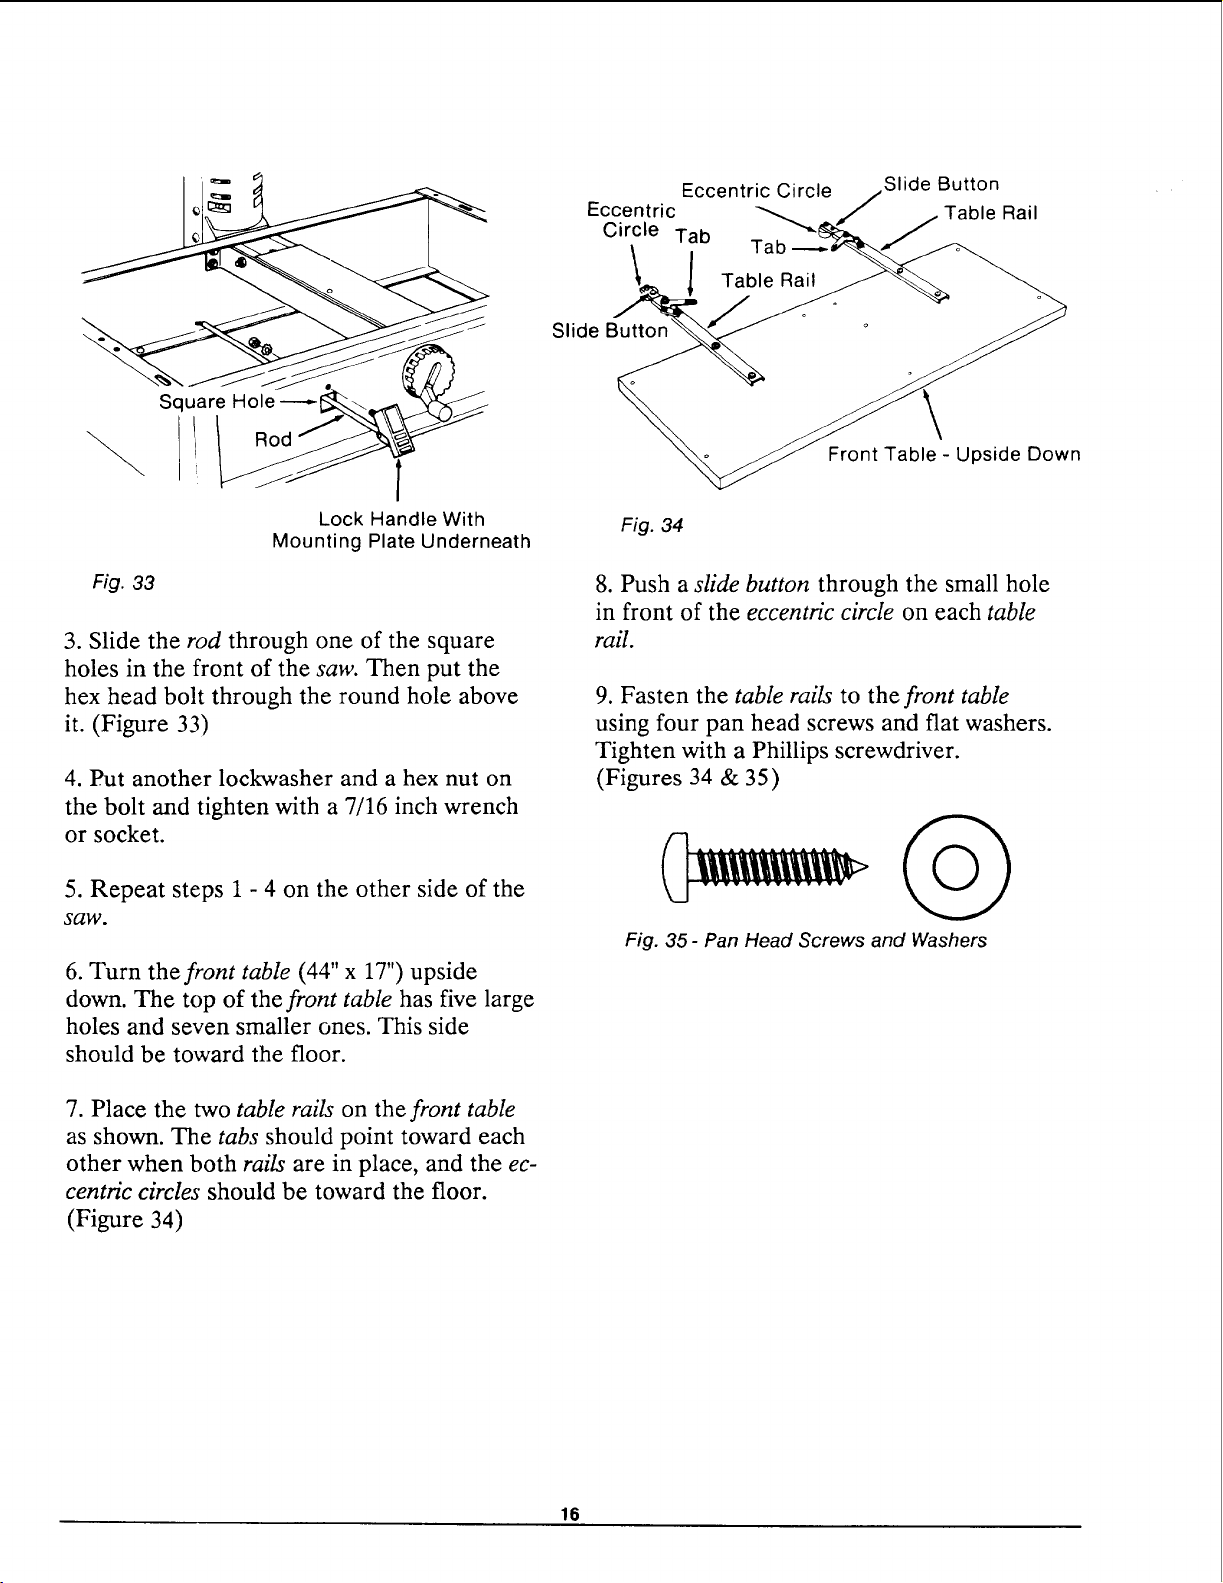
7. Place the two table rails on the front table
as shown. The tabs should point toward each
other when both rails are in place, and the ec-
centric circles should be toward the floor.
(Figure 34)
Slide
Eccentric Circle Slide Button
Eccentric Table Rail
Circle Tab "_
Front Table - Upside Down
Fig. 34
8. Push a sfide button through the small hole
in front of the eccentric circle on each table
rail.
9. Fasten the table rails to the front table
using four pan head screws and flat washers.
Tighten with a Phillips screwdriver.
(Figures 34 & 35)
Fig. 35- Pan Head Screws and Washers
16
Loading ...
Loading ...
Loading ...