Loading ...
Loading ...
Loading ...
Ao
B.
C.
D.
E.
F.
G.
H.
I.
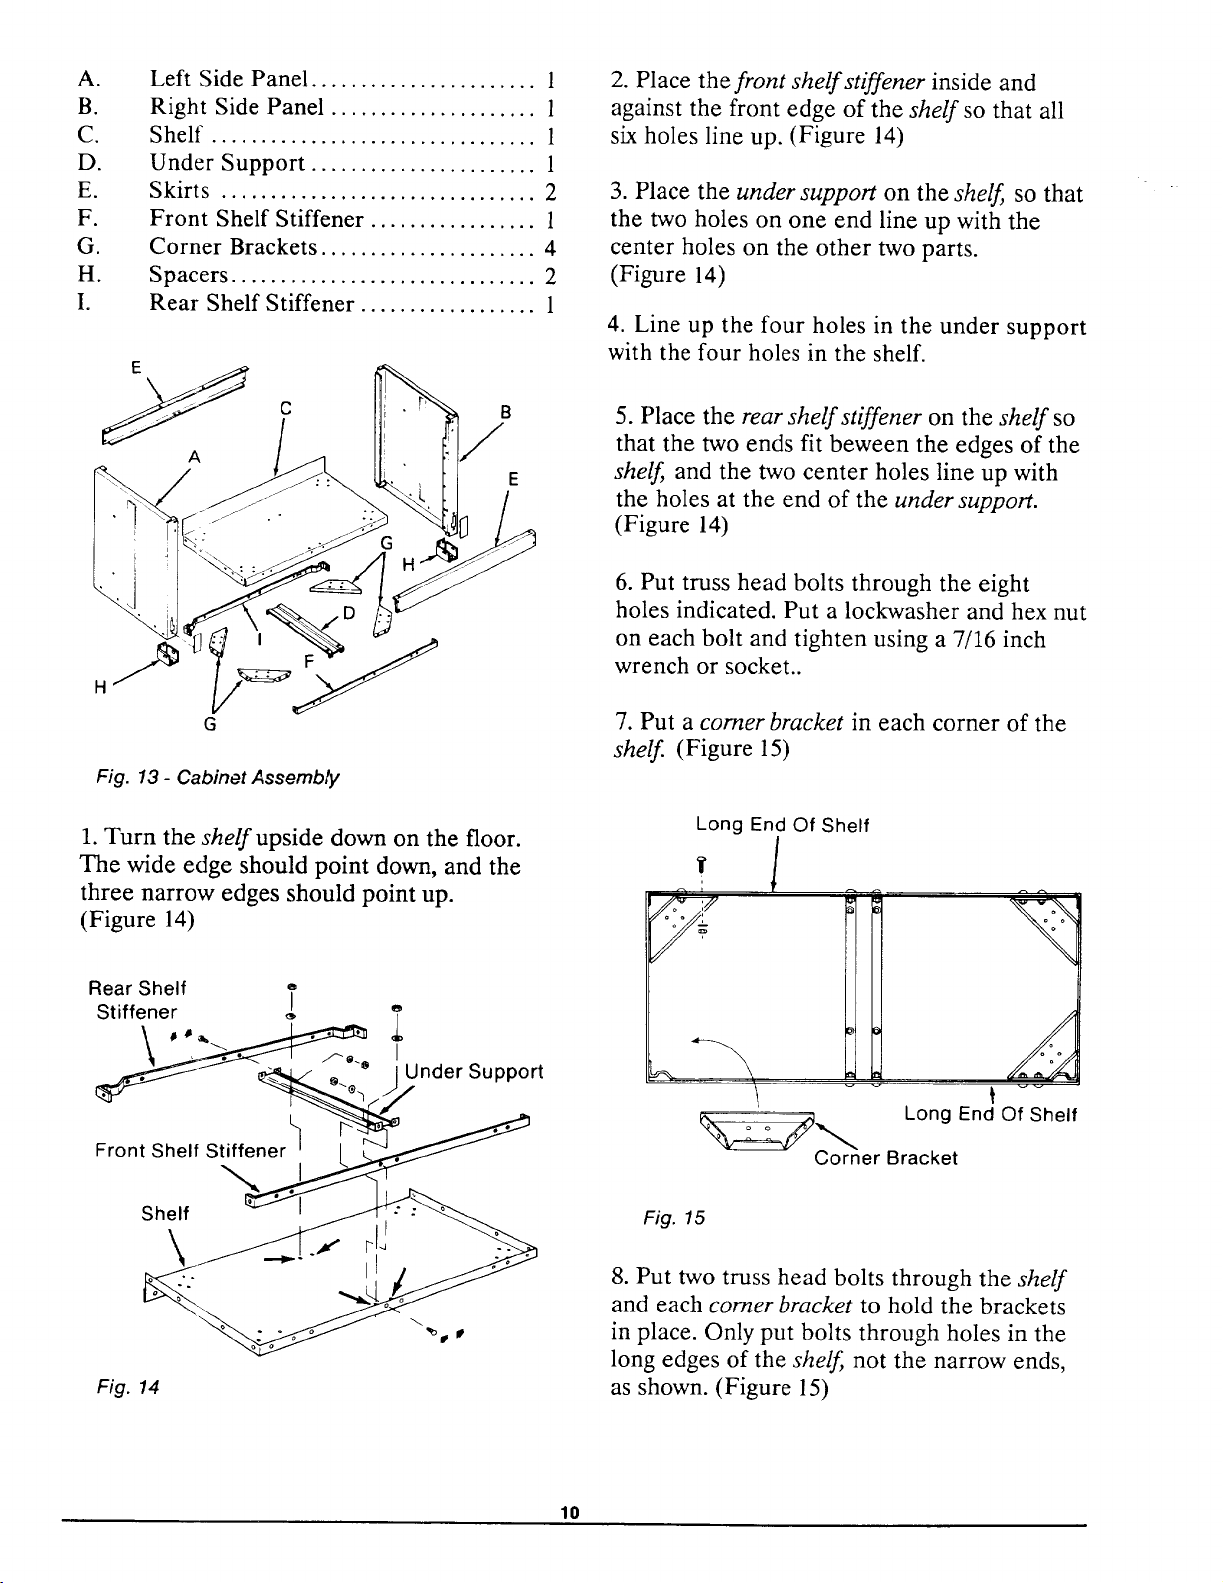
Left Side Panel ....................... 1
Right Side Panel ..................... 1
Shelf ................................. 1
Under Support ....................... 1
Skirts ................................ 2
Front Shelf Stiffener ................. 1
Corner Brackets ...................... 4
Spacers ............................... 2
Rear Shelf Stiffener .................. 1
A
G
Fig. 13 - Cabinet Assembty
1. Turn the shelf upside down on the floor.
The wide edge should point down, and the
three narrow edges should point up.
(Figure 14)
Rear Shelf T
Stiffener _ e
• " Under Support
Front Shelf Stiffener
2. Place the front shelf stiffener inside and
against the front edge of the shelf so that all
six holes line up. (Figure 14)
3. Place the under support on the shelf so that
the two holes on one end line up with the
center holes on the other two parts.
(Figure 14)
4. Line up the four holes in the under support
with the four holes in the shelf.
5. Place the rear shelf stiffener on the shelf so
that the two ends fit beween the edges of the
shelf and the two center holes line up with
the holes at the end of the under support.
(Figure 14)
6. Put truss head bolts through the eight
holes indicated. Put a lockwasher and hex nut
on each bolt and tighten using a 7/16 inch
wrench or socket..
7. Put a comer bracket in each corner of the
shelf (Figure 15)
Long End Of Shelf
, l
r_ ,
Long End Of Shelf
_Co-_rner Bracket
Shelf
\
Fig. 14
Fig. 15
8. Put two truss head bolts through the shelf
and each comer bracket to hold the brackets
in place. Only put bolts through holes in the
long edges of the shelf not the narrow ends,
as shown. (Figure 15)
10
Loading ...
Loading ...
Loading ...