Loading ...
Loading ...
Loading ...
9. Put a lockwasher and hex nut on each bolt
and tighten using a 7/16 inch wrench or
socket.
10. Find the right and left side panels. Look
carefully to find the "R" and "L" stamped in
the metal near the center of the wide edge.
These stamps are the easiest way to tell the
right sidepanel from the left. (Figure 16)
13. Put two truss head bolts through right side
panel and spacer, one on each side.
14. Put a lockwasher and hex nut on each
bolt and tighten using a 7/16 inch wrench or
socket.
15. Put a plastic cover over the J-shaped slot
in the side panel. (Figure 17)
16. Repeat steps 11-15 with the left sidepanel.
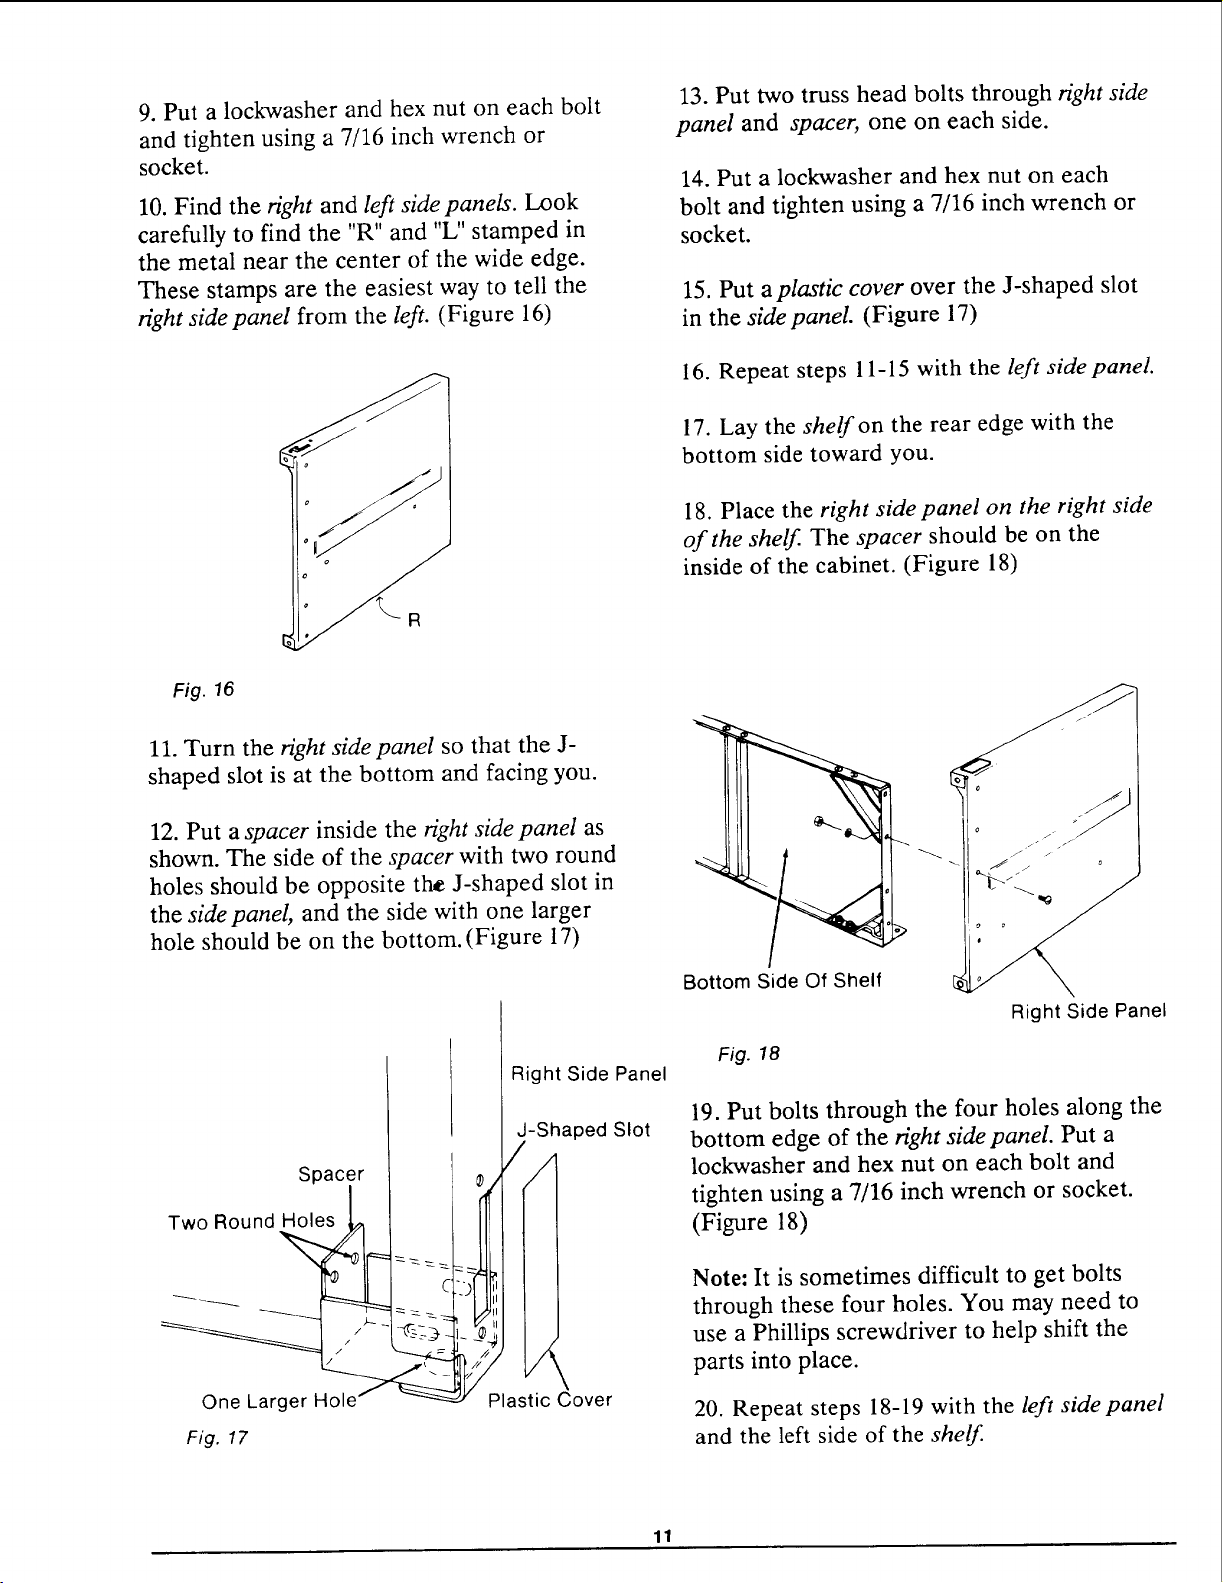
17. Lay the shelf on the rear edge with the
bottom side toward you.
18. Place the right side panel on the right side
of the shelf. The spacer should be on the
inside of the cabinet. (Figure !8)
Fig. 16
11. Turn the right side panel so that the J-
shaped slot is at the bottom and facing you.
12. Put a spacer inside the right side panel as
shown. The side of the spacer with two round
holes should be opposite the J-shaped slot in
the side panel, and the side with one larger
hole should be on the bottom. (Figure 17)
Spacer
Two Round Holes
Fig. ¢7
Right Side Panel
-Shaped Slot
iI
II
II
Plastic Cover
Bottom Side Of Shelf
Fig. 18
Right Side Panel
19. Put bolts through the four holes along the
bottom edge of the right side panel. Put a
lockwasher and hex nut on each bolt and
tighten using a 7/16 inch wrench or socket.
(Figure 18)
Note: It is sometimes difficult to get bolts
through these four holes. You may need to
use a Phillips screwdriver to help shift the
parts into place.
20. Repeat steps 18-19 with the left sidepanel
and the left side of the shelf.
11
Loading ...
Loading ...
Loading ...