Loading ...
Loading ...
Loading ...
Mounting the Front Table
The following parts are used to mount the
front table:
A.
B.
C.
D.
E.
F.
Tee Nuts ......................... 3
U-Clips 1/4-20 .................... 5
Mounting Screws 1/4-20 x l-l/2 ..... 5
Rubber Grommets ................ 5
Hex Head Bolts 1/4-20x5/8 ......... 2
Washers 17/64-5/8xl/32 ............ 5
B
A C
D F
E
Fig. 36 - Parts for Mounting Table
1. Place a tee nut over each of the three
leveling holes and hammer them into place.
(Figure 37)
Mounting Holes
Leveling Holes
Leveling Hole
Mounting
Holes
Front Table - Upside Down
Fig. 37 - Leveling and Mounting Holes
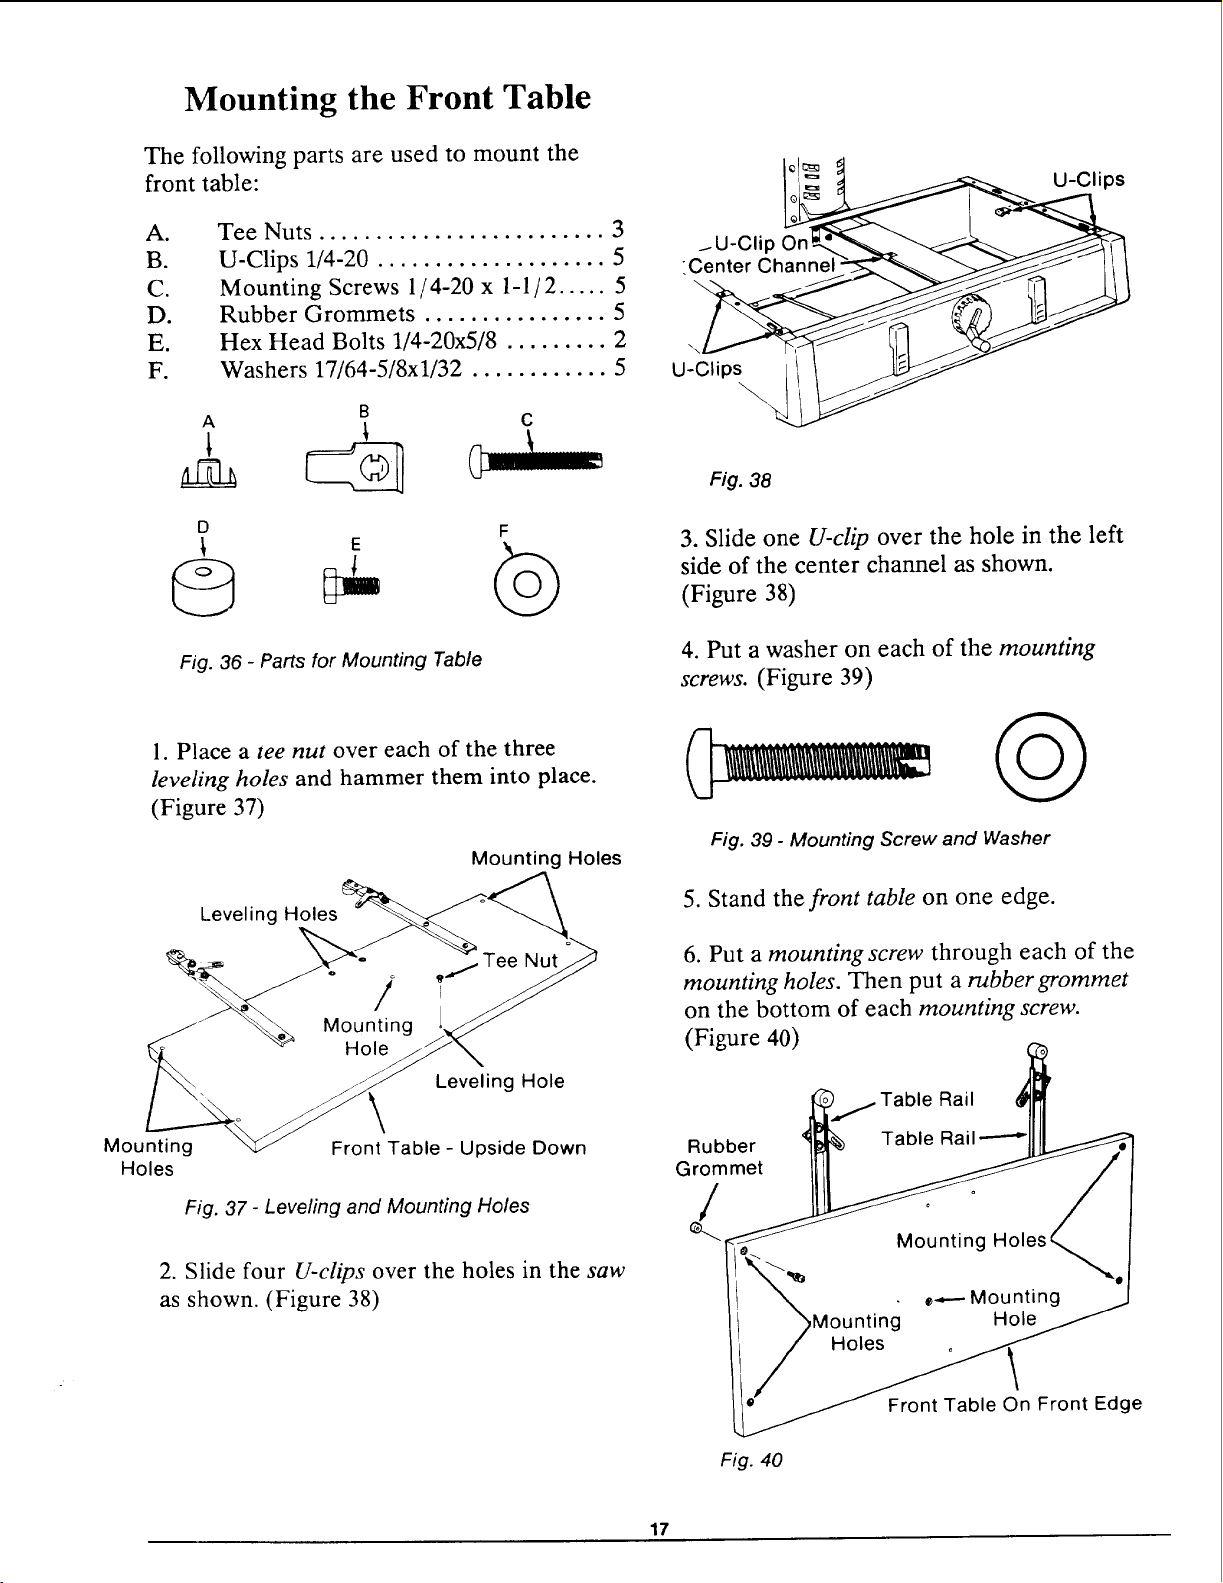
2. Slide four U-clips over the holes in the saw
as shown. (Figure 38)
Io]==
Fig. 30
3. Slide one U-clip over the hole in the left
side of the center channel as shown.
(Figure 38)
4. Put a washer on each of the mounting
screws. (Figure 39)
Fig. 39 - Mounting Screw and Washer
5. Stand the front table on one edge.
6. Put a mounting screw through each of the
mounting holes. Then put a rubber grommet
on the bottom of each mounting screw.
(Figure 40)
Rubber
Grommet
Table Rail
Front Table On Front Edge
Fig. 40
17
Loading ...
Loading ...
Loading ...