Loading ...
Loading ...
Loading ...
2-61
COPIER
Contents
3
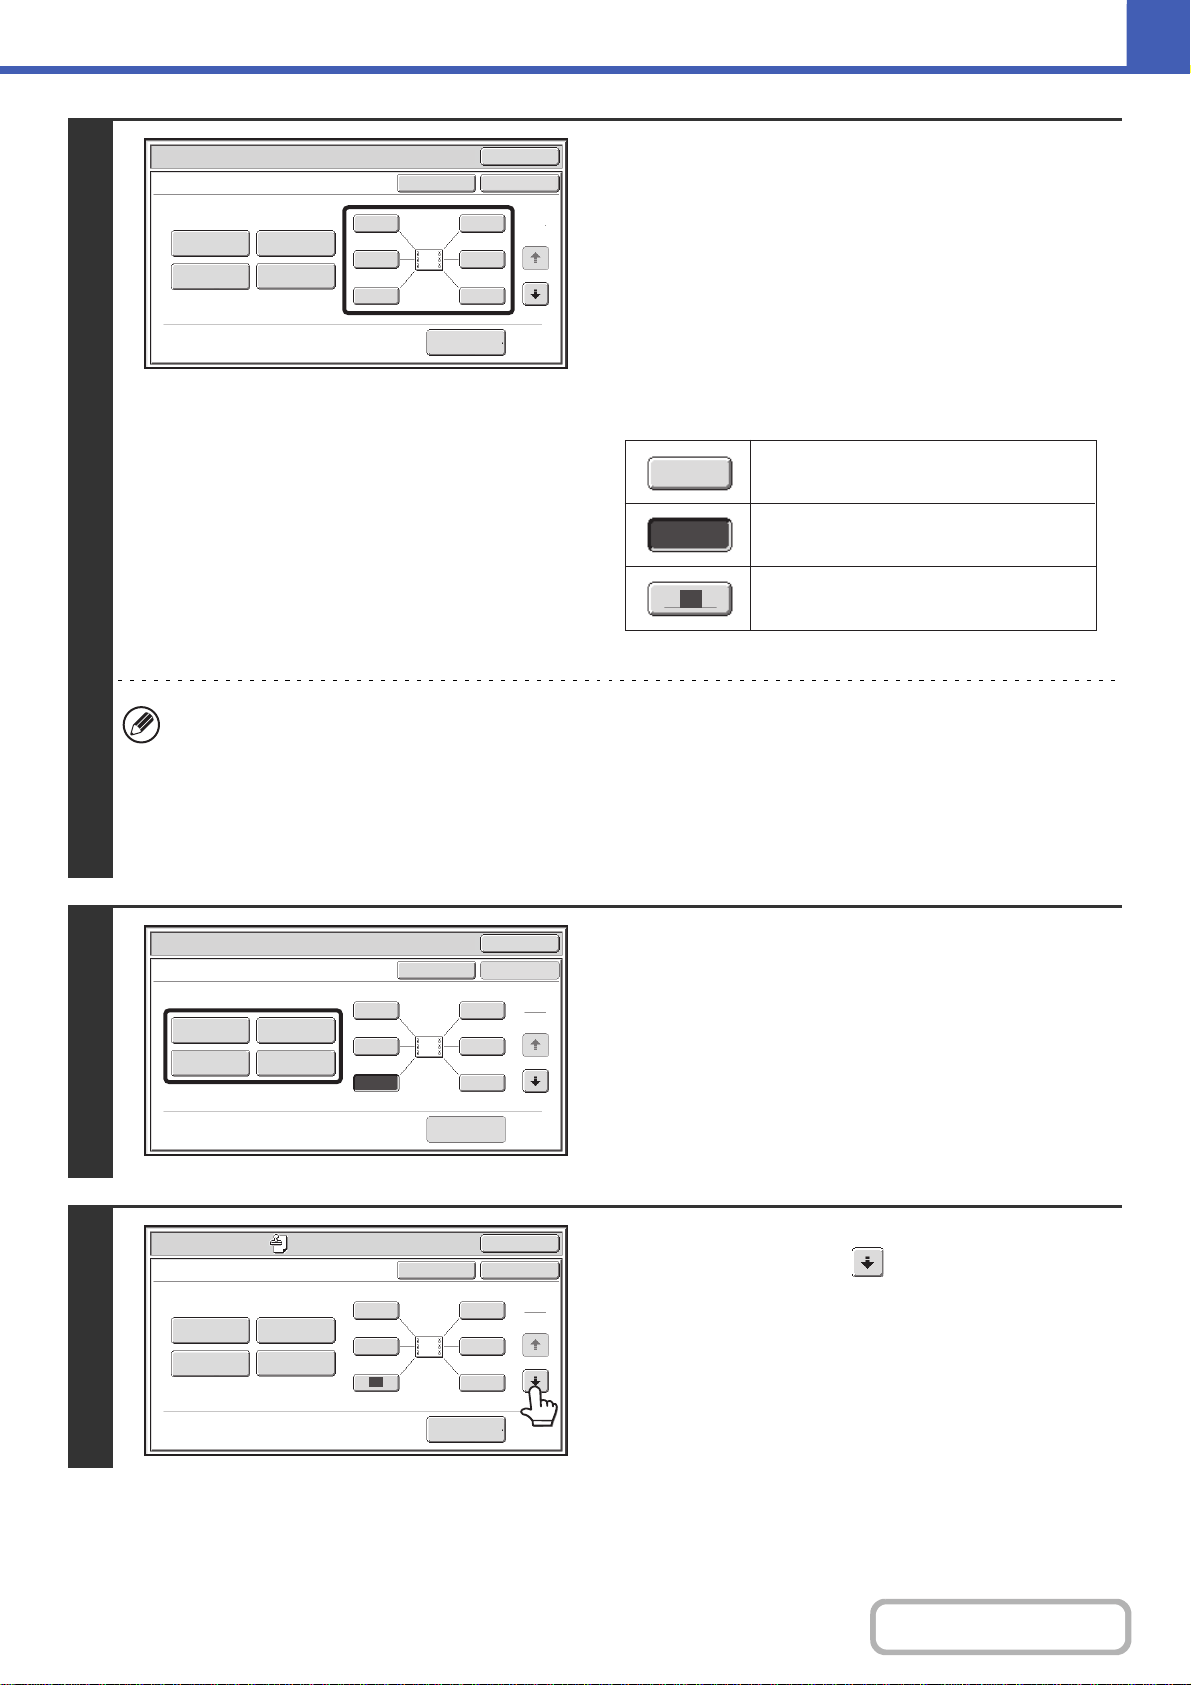
Select the print position.
Select from 6 positions: top left, top center, top right, bottom
left, bottom center, bottom right.
You can also skip this step and go directly to the next step. In
this case, the stamp items will be printed in the following
positions:
Date: Top right Stamp: Top left
Page Numbering: Bottom center Text: Top left
Print positions
The keys that show the print positions will appear as follows
depending on the state of the settings.
• "Date" and "Page Numbering" cannot be selected in multiple positions. If the [Date] key or [Page Numbering] key is
touched when "Date" or "Page Numbering" has already been selected for a position, a message will appear asking
you if you wish to move that item to the selected position. To move the item, touch the [Yes] key. Otherwise, press
the [No] key.
• If you attempt to set "Date", "Text", or "Page Numbering" in a position where one of these items is already set, a
message will appear. To change the previously selected item to the new item, touch the [Yes] key. To keep the
previous item, touch the [No] key.
4
Select Stamp.
For detailed information on each of the stamp items, see the
following sections:
Date: ADDING THE DATE TO COPIES (Date)
(page 2-63)
Stamp: STAMPING COPIES (Stamp) (page 2-65)
Page numbering: PRINTING PAGE NUMBERS ON COPIES
(Page Numbering) (page 2-67)
Text: PRINTING TEXT ON COPIES (Text) (page
2-70)
5
When you have finished selecting stamp
settings, touch the key.
OK
Special Modes
Stamp
OK
Layout
Cancel
Date
Page
Numbering
Text
Stamp
1
1
2
3 6
5
4
2
1
1
1
Not selected, stamp setting has not
been selected.
Selected during selection of the stamp
setting.
Not available, stamp setting has already
been selected.
OK
Special Modes
Stamp
OK
Layout
Cancel
Date
Page
Numbering
Stamp
1
2
3 6
5
1
2
Text
4
1
2
3 6
5
4
OK
Special Modes
Stamp
OK
Layout
Cancel
Date
Page
Numbering
Text
Stamp
1
2
Loading ...
Loading ...
Loading ...