Loading ...
Loading ...
Loading ...

1-109
BEFORE USING THE MACHINE
Contents
v10.4.11, v10.5 - 10.5.8, v10.6 - 10.6.2
(1) Click the [Default Browser] icon.
If you are using Mac OS X v10.5 to 10.5.8 or v10.6 -
10.6.2, click the [Default] icon.
(2) Click the machine's model name.
• Using with AppleTalk:
The machine's model name usually appears as
[SCxxxxxx]*.
• Using with Bonjour:
The machine's model name usually appears as
[RDVxxxxxx]*.
* "xxxxxx" is a sequence of characters that varies
depending on your model.
(3) Make sure that the PPD file of your model is
selected.
The PPD file of the machine is automatically selected.
(4) Click the [Add] button.
• Using with AppleTalk:
The PPD file of the machine is automatically selected
and the peripheral devices installed on the machine are
detected and automatically configured.
• Using with Bonjour:
The "Installable Options" screen appears. Select the
machine configuration and click the [Continue] button.
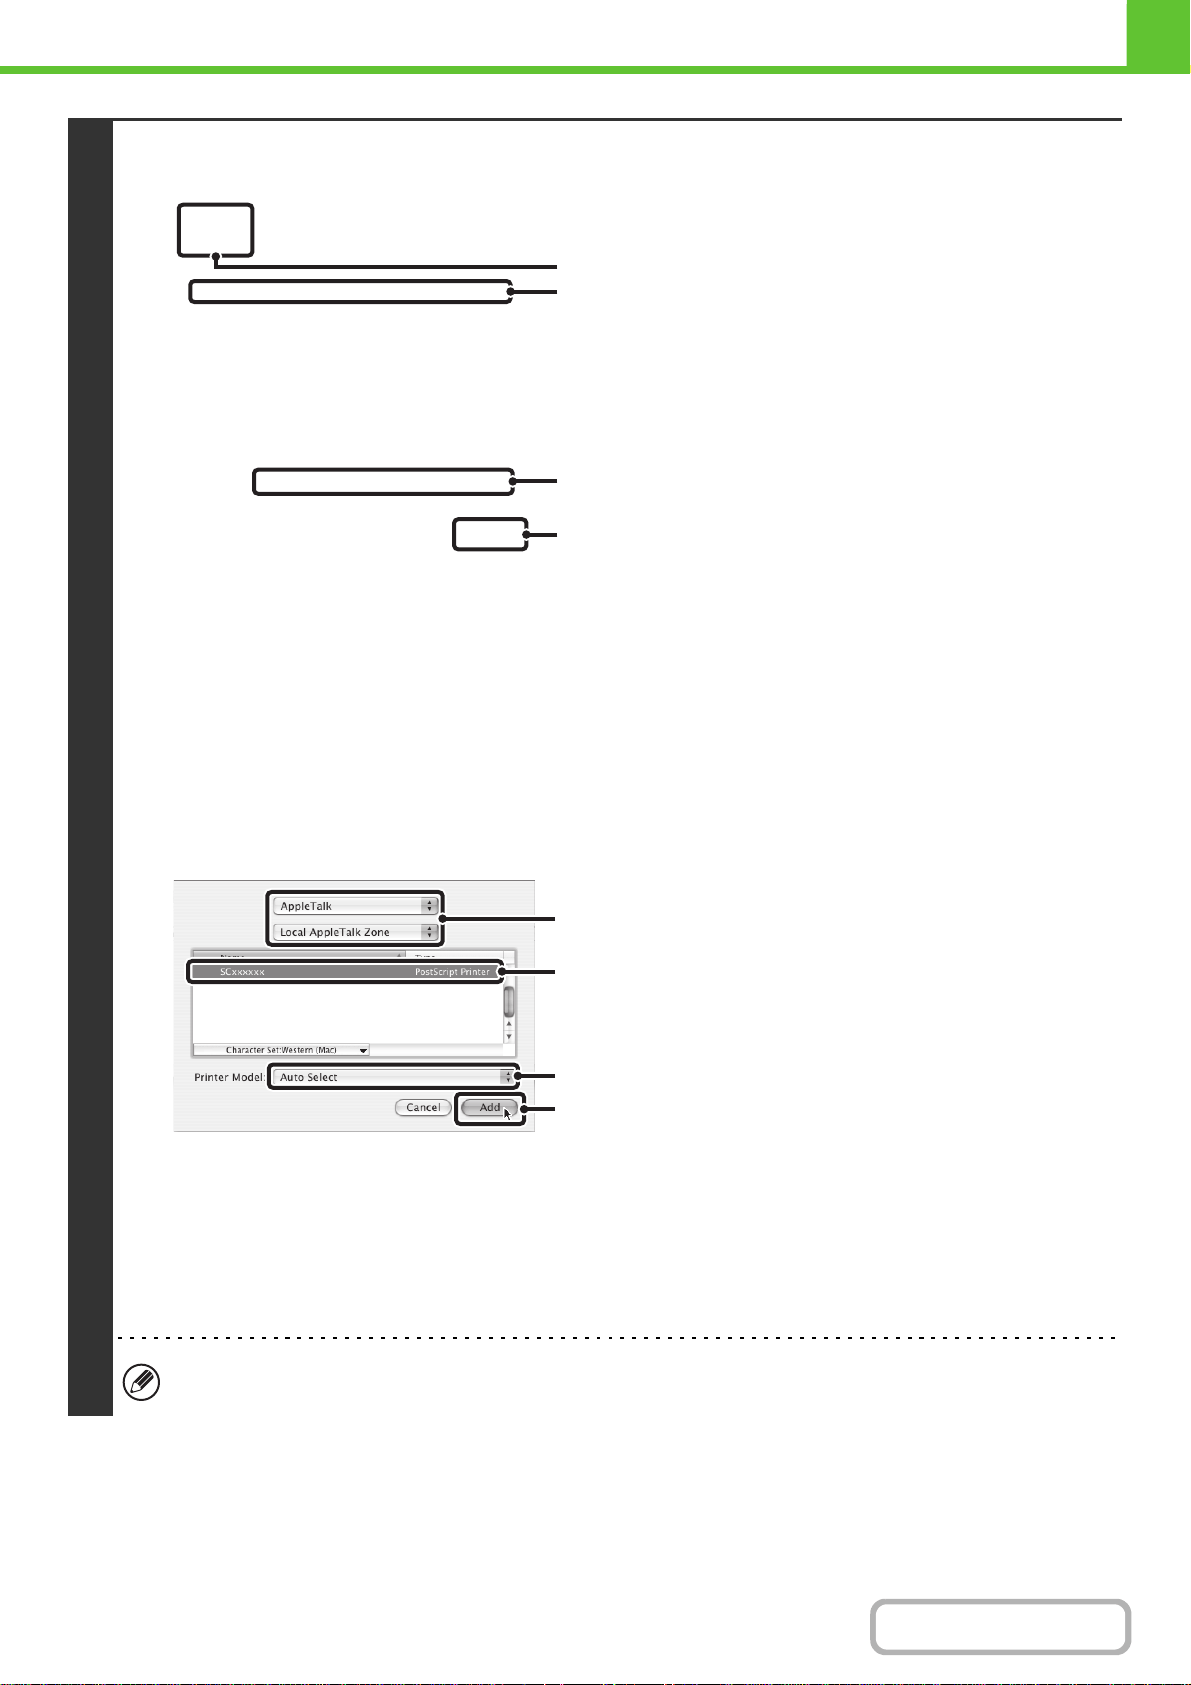
v10.2.8, v10.3.9
(1) Select [AppleTalk].
If multiple AppleTalk zones are displayed, select the zone
that includes the printer from the menu.
(2) Click the machine's model name.
The machine's model name usually appears as
[SCxxxxxx]. ("xxxxxx" is a sequence of characters that
varies depending on your model.)
(3) Select the PPD file of the machine.
• If you are using Mac OS X v10.3.9, select [Auto Select].
• If you are using Mac OS X v10.2.8, select [Sharp] and
click the PPD file of your model.
(4) Click the [Add] button.
If you are using Mac OS X v10.3.9, the PPD file of the
machine is automatically selected and the peripheral
devices installed on the machine are detected and
automatically configured.
The PPD file is installed in the following folders on the startup disk.
[Library] - [Printers] - [PPDs] - [Contents] - [Resources] - [en.lproj]
(1)
(2)
(4)
(3)
(1)
(2)
(4)
(3)
Loading ...
Loading ...
Loading ...