Loading ...
Loading ...
Loading ...
1-103
BEFORE USING THE MACHINE
Contents
4
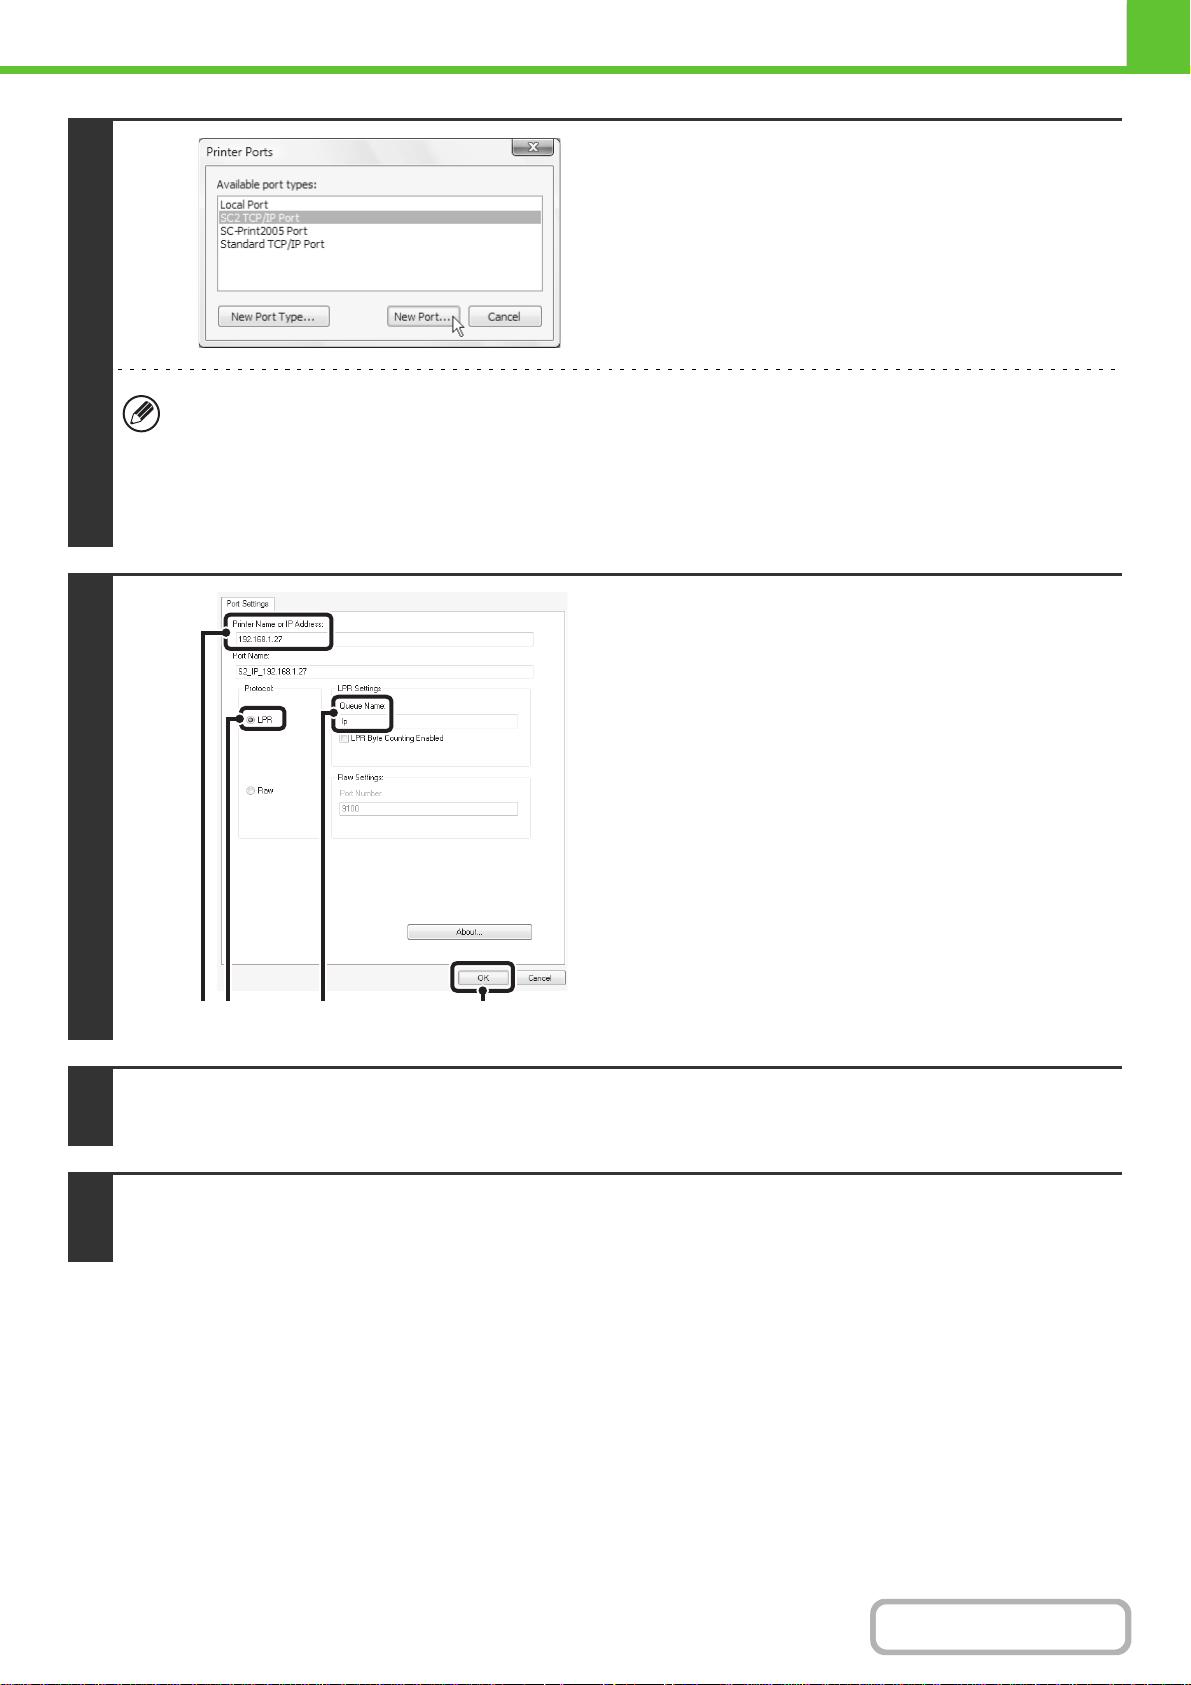
Select [SC2 TCP/IP Port] and then click
the [New Port] button.
• The "SC2 TCP/IP Port" is added when the printer driver is installed using a "Standard installation", or a "Custom
installation" with "LPR Direct Print (Specify Address/Auto Search)" selected.
• If the printer driver is installed using a "Custom installation" with "IPP" selected, the [SC-Print2005 Port] is added. If
you need to change the printer port when the machine is connected to an intranet or a wide area network (WAN)
using the IPP function, select [SC-Print2005 Port], click the [New Port] button, and follow the on-screen instructions
to create the port again.
5
Create the new port.
(1) Enter the machine's IP address.
☞ Start Guide "Checking the IP address of the machine"
(2) Make sure that [LPR] is selected.
(3) Make sure that [lp] is entered.
(4) Click the [OK] button.
6
Click the [Close] button in the screen of step 4.
7
Make sure the created printer port is selected in the printer properties window
and then click the [Apply] button.
(4)
(1)(2) (3)
Loading ...
Loading ...
Loading ...