Loading ...
Loading ...
Loading ...
1-64
BEFORE USING THE MACHINE
Contents
5
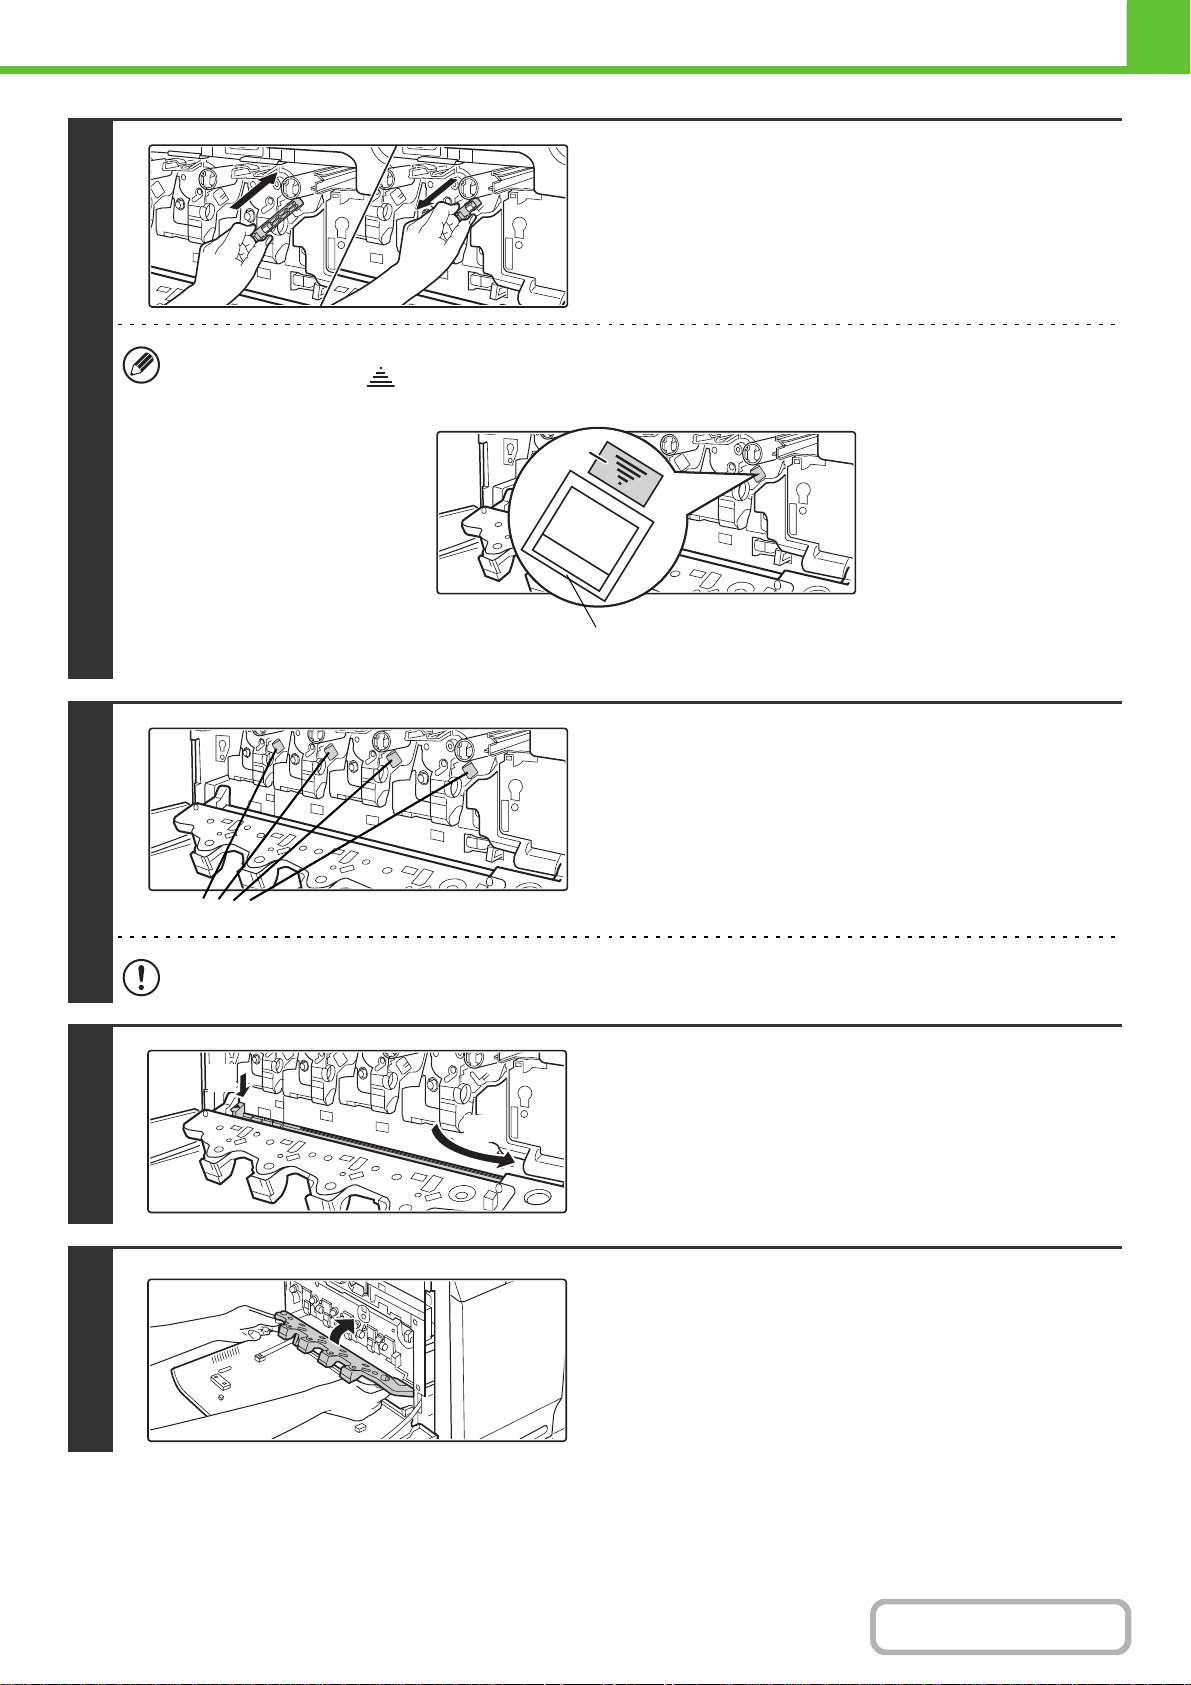
Clean the main charger.
(1) Gently push the charger cleaner all the way
in.
(2) Gently pull the charger cleaner out.
(3) Repeat the above (1) to (2) three times.
• Take care not to let the tip of the charger cleaner become soiled by toner.
• Clean with the mark ( ) on the charger cleaner facing down.
• Holes to be cleaned by the charger cleaner are indicated by labels similar to (A).
• Do not use the charger cleaner for any purpose other than cleaning the main charger.
6
Repeat step 5 with each of the other
main chargers.
There are a total of 4 places to be cleaned in the machine as shown.
7
Replace the charger cleaner in its
original position.
Insert the tip of the charger cleaner in toward the right and then
press down on the end of the charger cleaner. The charger
cleaner will lock into place.
8
Close the main charger cover and rotate
the lock levers in the direction of the
arrows to lock the cover.
☞ REPLACING THE DEVELOPER CARTRIDGE (page 1-53)
(A)
Position of mark
Main charger
(1)
(2)
Loading ...
Loading ...
Loading ...