Loading ...
Loading ...
Loading ...
306 | Chapter 4. Routing
ProSafe® Gigabit L3 Managed Stackable Switches Software Administration Manual
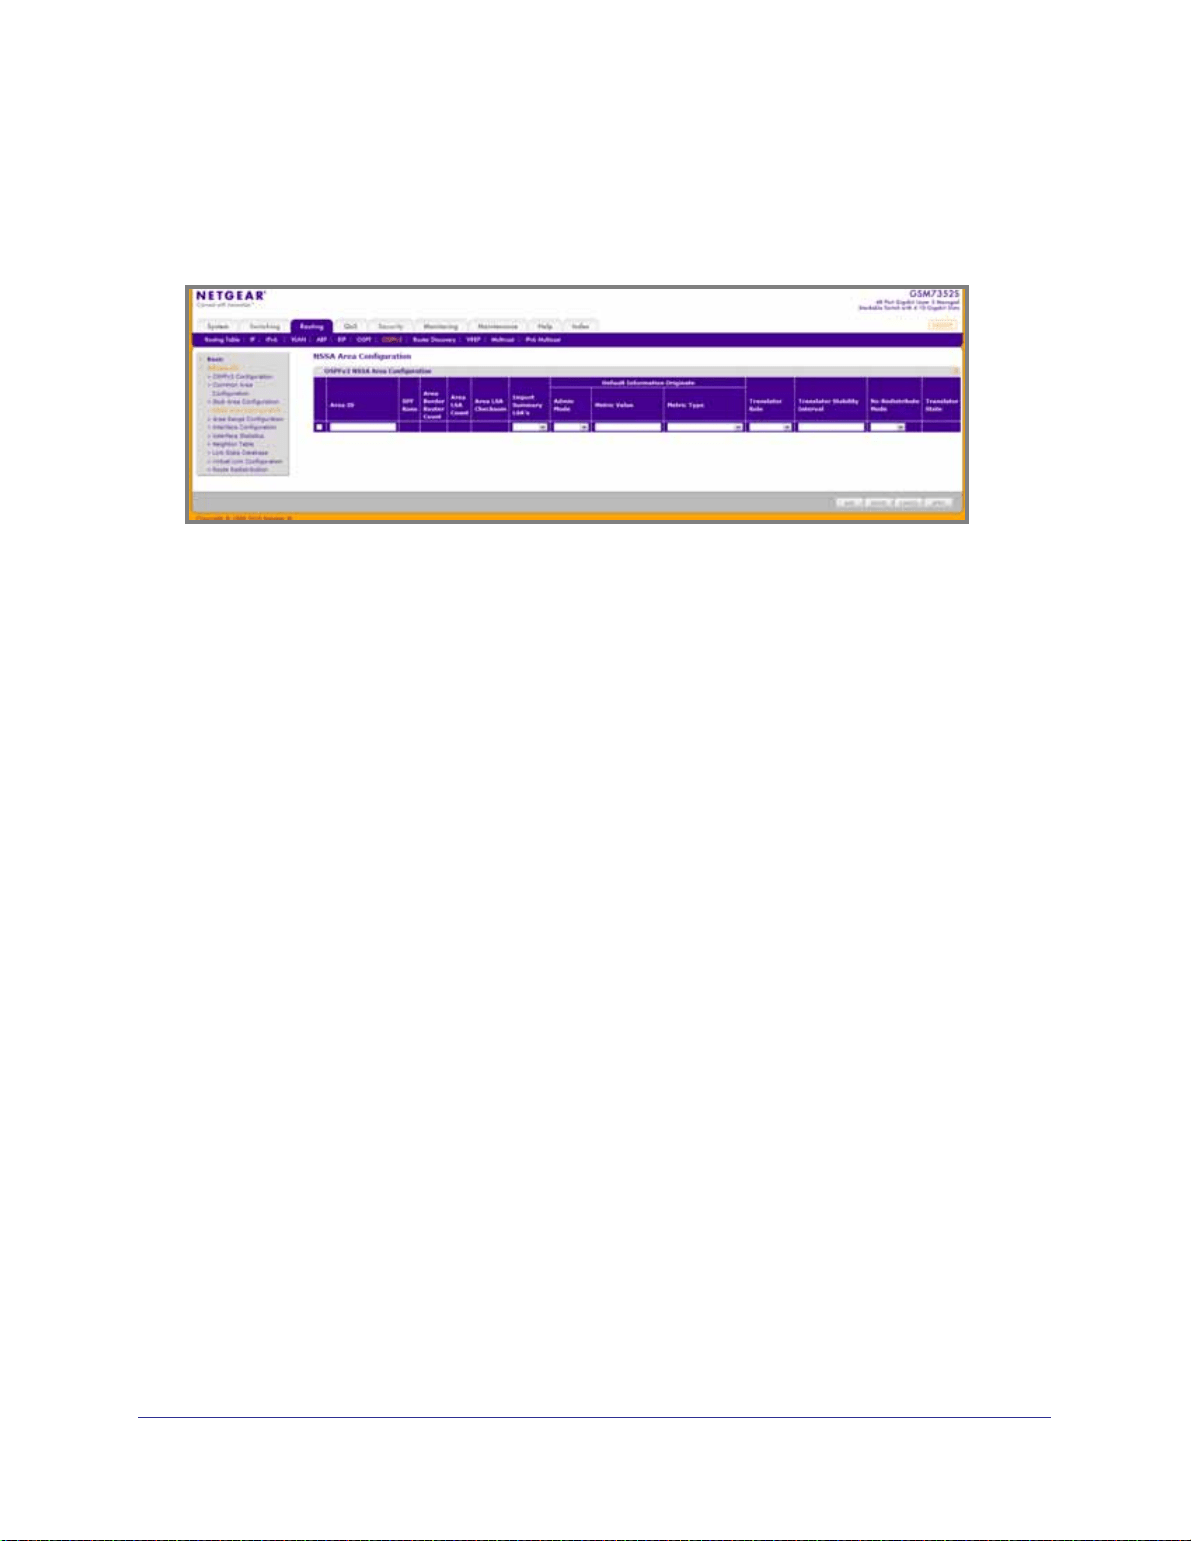
NSSA Area Configuration
To display the NSSA Area Configuration page, click Routing OSPFv3 Advanced NSSA
Area Configuration.
1. Use Area ID to enter the OSPF area ID. An Area ID is a 32-bit integer in dotted decimal
format that uniquely identifies the area to which a router interface connects.
2. Use Import Summary LSAs to select enable or disable. If you select enable summary
LSAs will be imported into areas. Defaults to Enable.
3. Use Default Information Originate to advertise a default route into the NSSA when Import
Summary LSAs is disabled. This can also be applied by the CLI command area
<areaid> nssa default-info-originate in the IPv6 router OSPF config mode.
4. Use Admin Mode to enable or disable the default information originate. Valid values are
True or False.
5. Use Metric Value to set the Default Metric value for default information originate. The valid
range of values is 1 to 16777214.
6. Use Metric Type to select the type of metric specified in the Metric Value field.
• Comparable Cost - External Type 1 metrics that are comparable to the OSPFv3
metric
• Non-comparable Cost - External Type 2 metrics that are assumed to be larger than
the cost of the OSPFv3 metric
7. Use Translator Role to specify the NSSA Border router's ability to perform NSSA
translation of type-7 LSAs into type-5 LSAs. The valid values are 'Always' and 'Candidate'.
8. Use Translator Stability Interval to specify the number of seconds after an elected
translator determines its services are no longer required, that it should continue to perform
its translation duties. The valid range of values is 0 to 3600.
9. Use No-Redistribute Mode to enable or disable the No-Redistribute Mode.
10. Click ADD to configure the area as a NSSA area.
11. Click DELETE to delete the NSSA area designation. The area will be returned to normal
state.
Loading ...
Loading ...
Loading ...