Loading ...
Loading ...
Loading ...
Adjustments (continued) ..............................................................
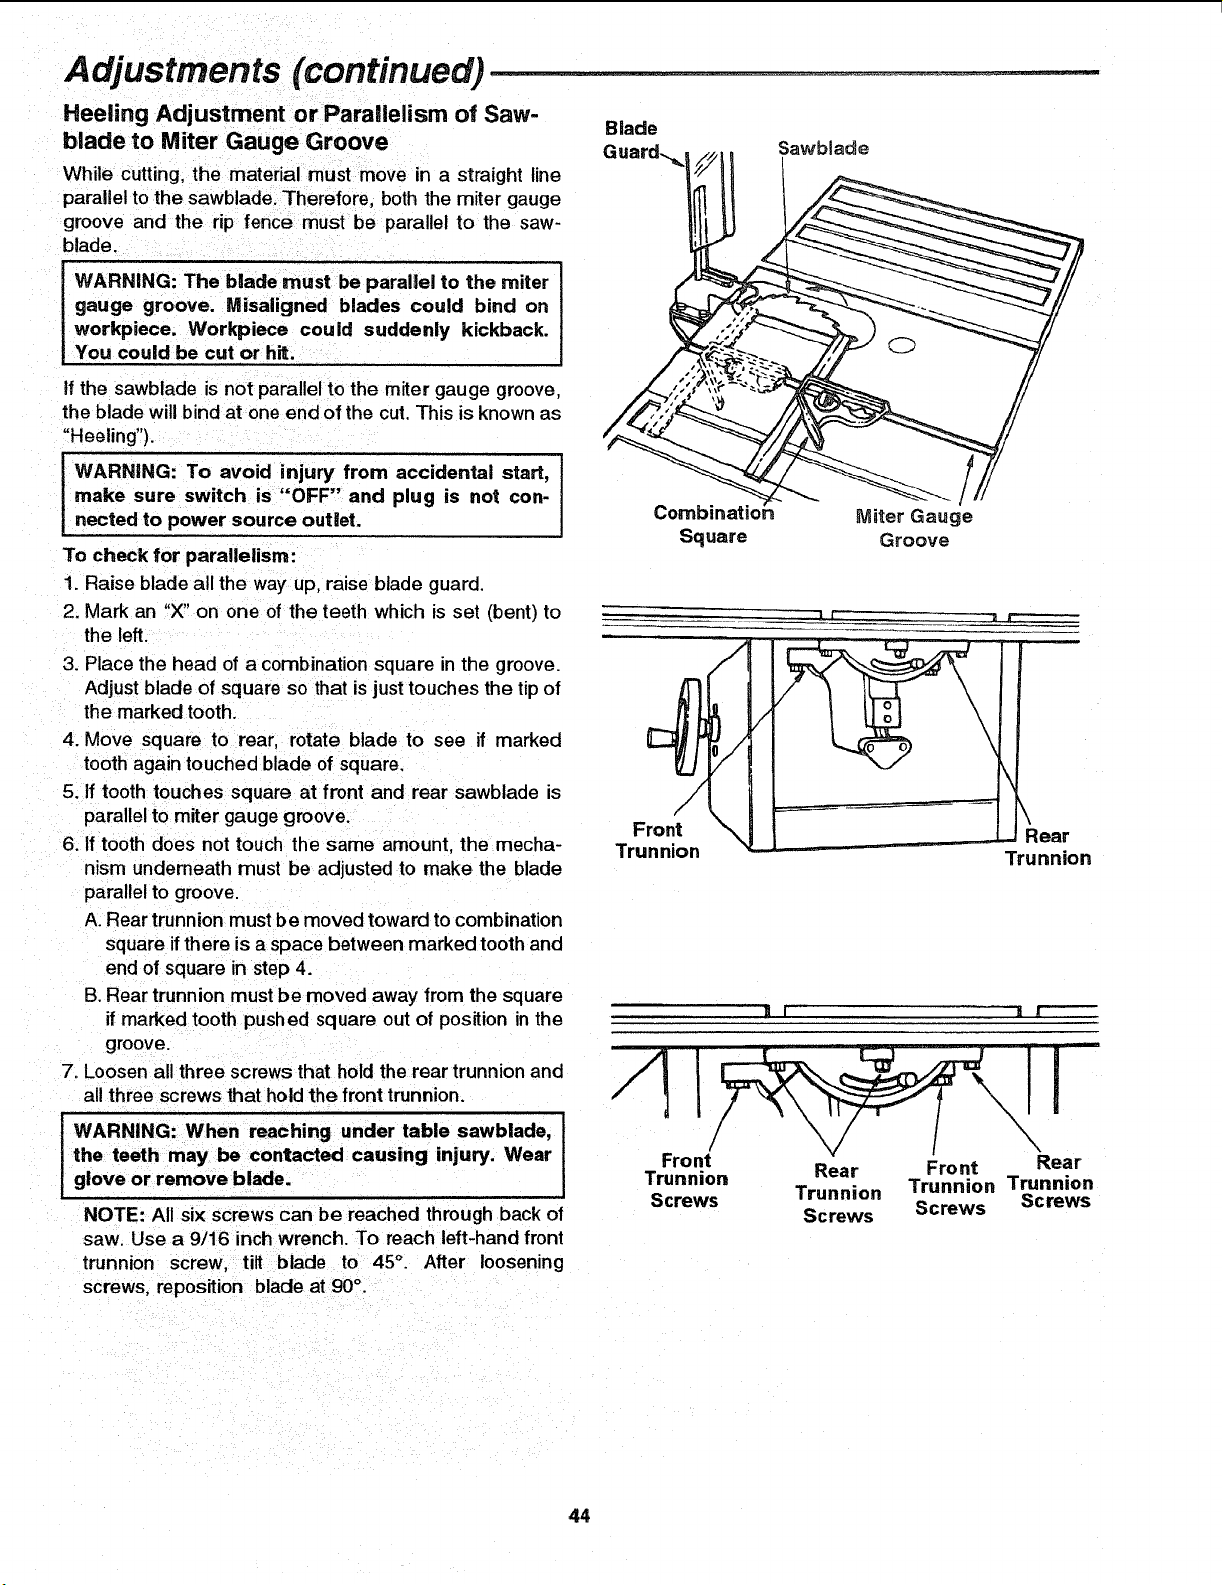
Heeling Adjustment or Parallelism of Saw-
blade to Miter Gauge Groove
While cutting, the material must move in a straight line
parallel to the sawblade. Therefore, both the miter gauge
groove and the rip fence must be parallel to the saw-
blade.
Blade
Guard-._
Sawblade
WARNING: The blade must be parallel to the miter
gauge groove. Misaligned blades could bind on
workpiece. Workpiece could suddenly kickback.
You could be cut or hit.
If the sawblade is not parallel to the miter gauge groove,
the blade will bind at one end of the cut. This is known as
"Heeling").
WARNING: To avoid injury from accidental start,
make sure switch is "OFF" and plug is not con-
nected to power source outlet.
To check for parallelism:
1. Raise blade all the way up, raise blade guard.
2. Mark an "X" on one of the teeth which is set (bent) to
the left.
3. Place the head of a combination square in the groove.
Adjust blade of square so that is justtouches the tip of
the marked tooth.
4. Move square to rear, rotate blade to see if marked
tooth again touched blade of square.
5. If tooth touches square at front and rear sawblade is
parallel to miter gauge groove.
6. If tooth does not touch the same amount, the mecha-
nism underneath must be adjusted to make the blade
parallel to groove.
A. Rear trunnion must be moved toward to combination
square if there is a space between marked tooth and
end of square in step 4.
B. Rear trunnion must be moved away from the square
if marked tooth pushed square out of position in the
groove.
7. Loosen all three screws that hold the rear trunnion and
all three screws that hold the front trunnion.
i WARNING: When reaching under table sawblade,
the teeth may be contacted causing injury. Wear
glove or remove blade.
NOTE: All six screws can be reached through back of
saw. Use a 9/16 inch wrench. To reach left-hand front
trunnion screw, tilt blade to 45° . After loosening
screws, reposition blade at 90°.
Square
Miter Gauge
Groove
I
Front
Trunnion
\
\
., Rear
Trunnion
Front Rear
Trunnion Rear Front
Screws Trunnion Trunnion Trunnion
Screws Screws Screws
44
Loading ...
Loading ...
Loading ...