Loading ...
Loading ...
Loading ...
Assembly (continued) --
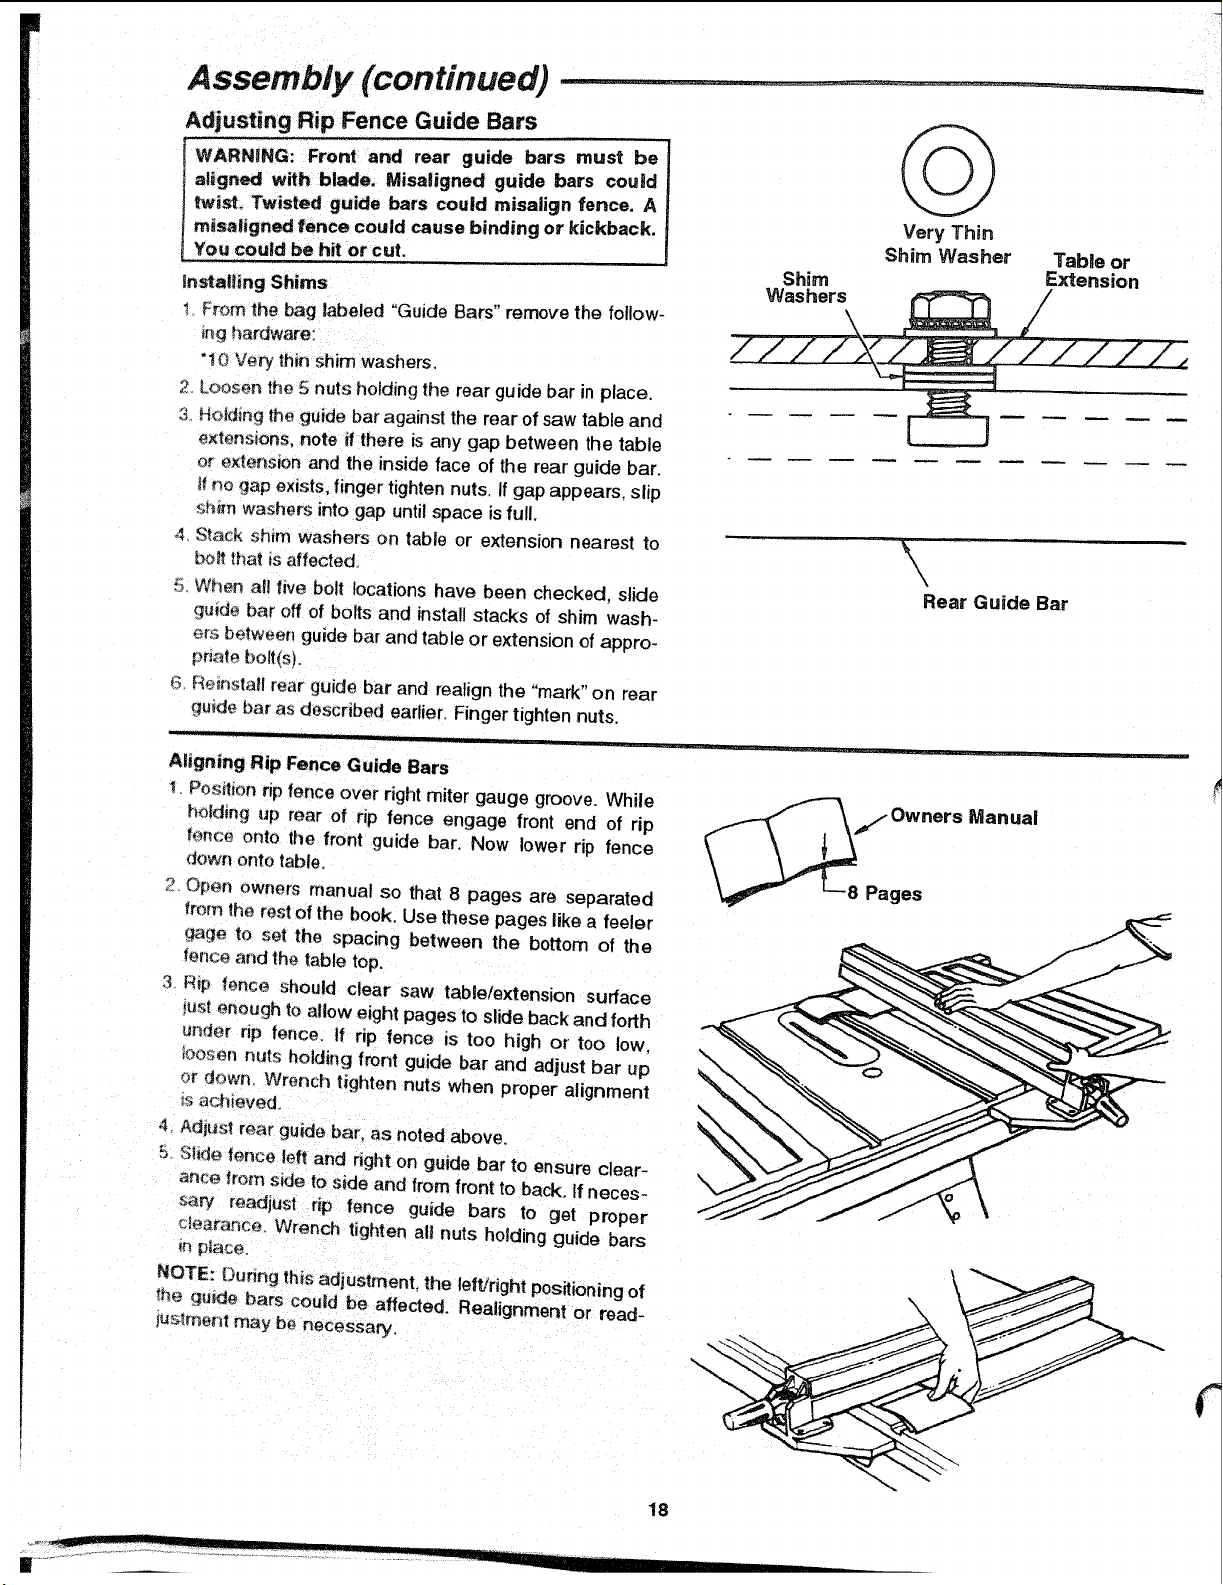
Very Thin
Shim Washer Table or
Shim Extension
\
\
Rear Guide Bar
Adj usting Rip Fence Guide Bars
IiARNING: Front and rear guide
bars
must be
ligned with blade. Misaligned guide bars could
tst. Twisted guide bars could misalign fence. A
_saltgned fence could cause binding or kickback.
ou could be hit or cut.
Insta!ling Shims
I From _he bag labeled "Guide Bars" remove the follow-
_ng hardware:
..... irrl
10 Very th_n sh washers.
2 Loosen the 5 nuts holding the rear guide bar in place.
3 Holding the guide bar against the rear of saw table and
extensions, note if there is any gap between the table
or e×_ens_on and the inside face of the rear guide bar,
_ no gap exists, finger tighten nuts. If gap appears, slip
_;t_m_washers into gap until space is full,
,_ S_ack shim washers on table or extension r_earest to
bo_ that is affected.
5. When all five bolt locations have been checked, slide
qu_de bar off of bolts and install stacks of shim wash-
ere between guide bar and table or extension of appro-
priate bolt(s).
6 Reinsta|l rear guide bar and realign the "mark" on rear
qu_de bar as described earlier, Finger tighten nuts.
./ JJIL i uJr " I [i
Manual
Aligning Rip Fence Guide Bars
Positwonnp fence over right miter gauge groove. While
holding up rear of rip fence engage front end of rip
ter_ce onto the front guide bar. Now lower rip fence
down onto table,
2. Open owners manual so that 8 pages are separated
from the rest of the book. Use these pages like a feeler
_age to set the spacing between the bottom of the
fence and the table top.
3 Htp fence should clear saw table/extension surface
_ustenough to allow eight pages to slide back and forth
u_der np fence. If rip fence is too high ot too low.
toosen nuts holding front guide bar and adjust bar up
or down, Wrench tighten nuts when proper alignment
_sachieved.
4. A@usl rear guide bar. as noted above.
5. $_ fence left and right on guide bar to ensure clear-
ance from side to s_de and from front to back. If neces-
saw readjust rip fence guide bars to get proper
c_earance. Wrench tighten all nuts holding guide bars
NOTE: Duhng this adjustment, the left!right positioning of
the guide bars could be affected. Realignment or read-
_uslment may be necessary,
18
I III
Loading ...
Loading ...
Loading ...