Loading ...
Loading ...
Loading ...
_ili;ii
2. Elevation HartdwheeL,.elevates or _cwers t_e
bJade. Turn clockwise _o e_evate, counterclockwise to
lower
3. Ti_t HandwheeL,.tifts the blade fo, _ oeve! cutting
Turn c_ockwise to titt toward _eft. cou[_terc[ock Nlse to
tilt toward right.
When the b!ade is tilted to the left as far as it will go,
it 9_ot_ld be al 45 ° to the table anq the bevel pointer
should poi_lt 4.5°.
NOTE: There are limit stops inside the saw which
prever_t the D_ade from tilting beyond 45 ° to the left
and 90 ° to the right. (See "Adjustments and Align-
me,-,ts" section "Blade Tilt, or Squareness of BDade
to Tab!e'_ -
4. Titt Lock Handmeo.,Iocks the blade in the desired
fllt position. To loosen, turn counterclockwise. Push
handle in and turn it to another position if necessary
in order to tighten or loosen.
iMPORTANT: Be sure handle is hanging in the
"DOWN" position before tilting blade. If it is pointing
to the 1 o'clock position it may jam on underside of
the table and bend the locking bolt.
5, Rip Fence...is locked in place by pushing the lock
lever down until the lever rests on the stop To move
the fence, lift the lock lever and grasp the fence with
one hand at the front.
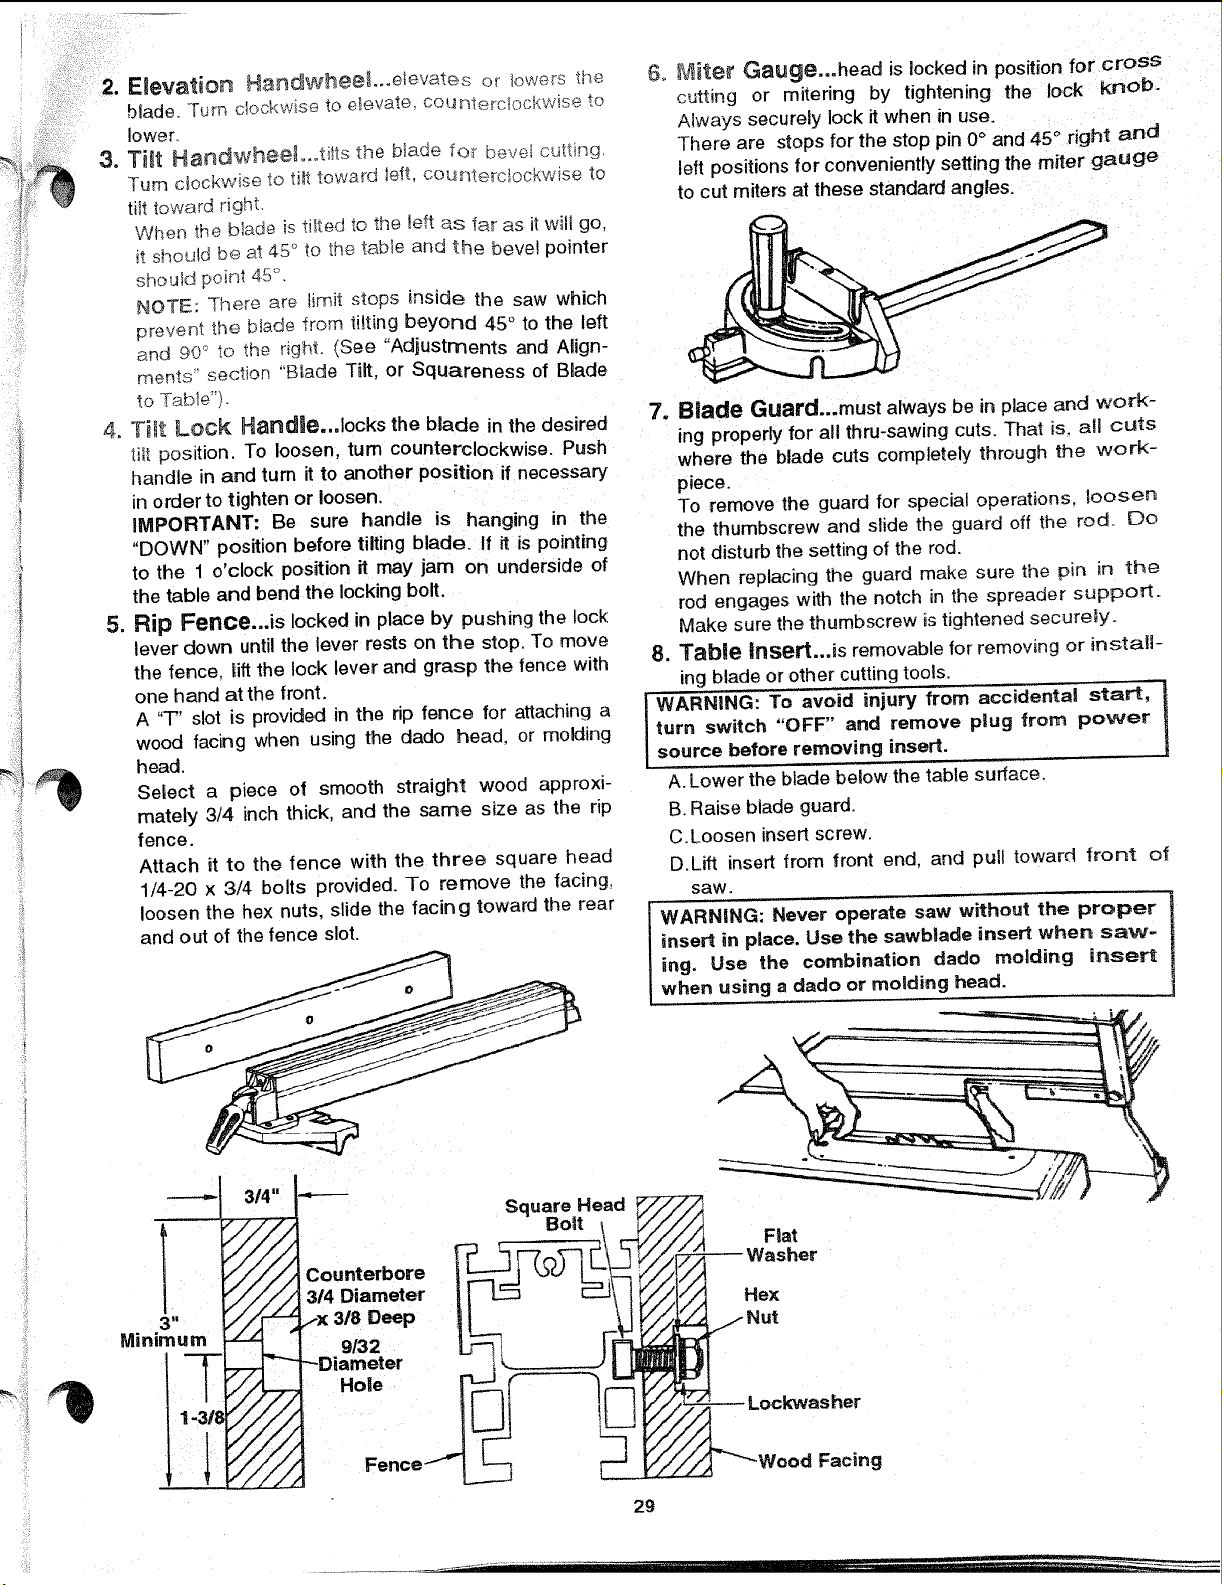
A "T" slot is provided in the rip fence for attaching a
wood facing when using the dado head, or molding
head.
Select a piece of smooth straight wood approxi-
mately 3/4 inch thick, and the same size as the rip
fence.
Attach it to the fence with the three square head
1/4-20 x 3/4 bolts provided. To remove the facing,
loosen the hex nuts, slide the facing toward the rear
and out of the fence slot.
3 I=
Minimum
314"
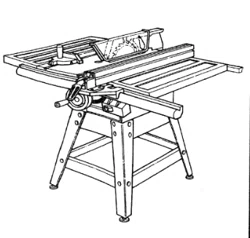
6, Miter Gauge...head is locked in position for cross
cutting or mitering by tightening the lock KnOb.
Always securely lock it when in use.
There are stops for the stop pin 0° and 45 ° right and
left positions for conveniently setting the miter gauge
to cut miters at these standard angles.
7. Blade Guard...must always be in place and work-
ing properly for all thru-sawing cuts. That is. all cuts
where the blade cuts completely through the work-
piece.
To remove the guard for special operations, aoosen
the thumbscrew and slide the guard off the rod. Do
not disturb the setting ot the rod.
When replacing the guard make sure the pin in the
rod engages with the notch in the spreader support.
Make sure the thumbscrew is tightened securely.
8. Table Insert...is removable for removing or install-
ing blade or other cutting tools.
WARNING: To avoid injury from accidenta! start, t
turn switch OFF and remove plug from power
source before removing insert. ]
A. Lower the blade below the table surface.
B. Raise blade guard.
C.Loosen insert screw.
D,Lift insert from front end. and pull toward front o_
saw.
WARNING: Never operate saw without the proper
insert in place. Use the sawblade insert when saw-
_ng. Use the combination dado molding insert
when using a dado or molding head.
2g
Loading ...
Loading ...
Loading ...