Loading ...
Loading ...
Loading ...
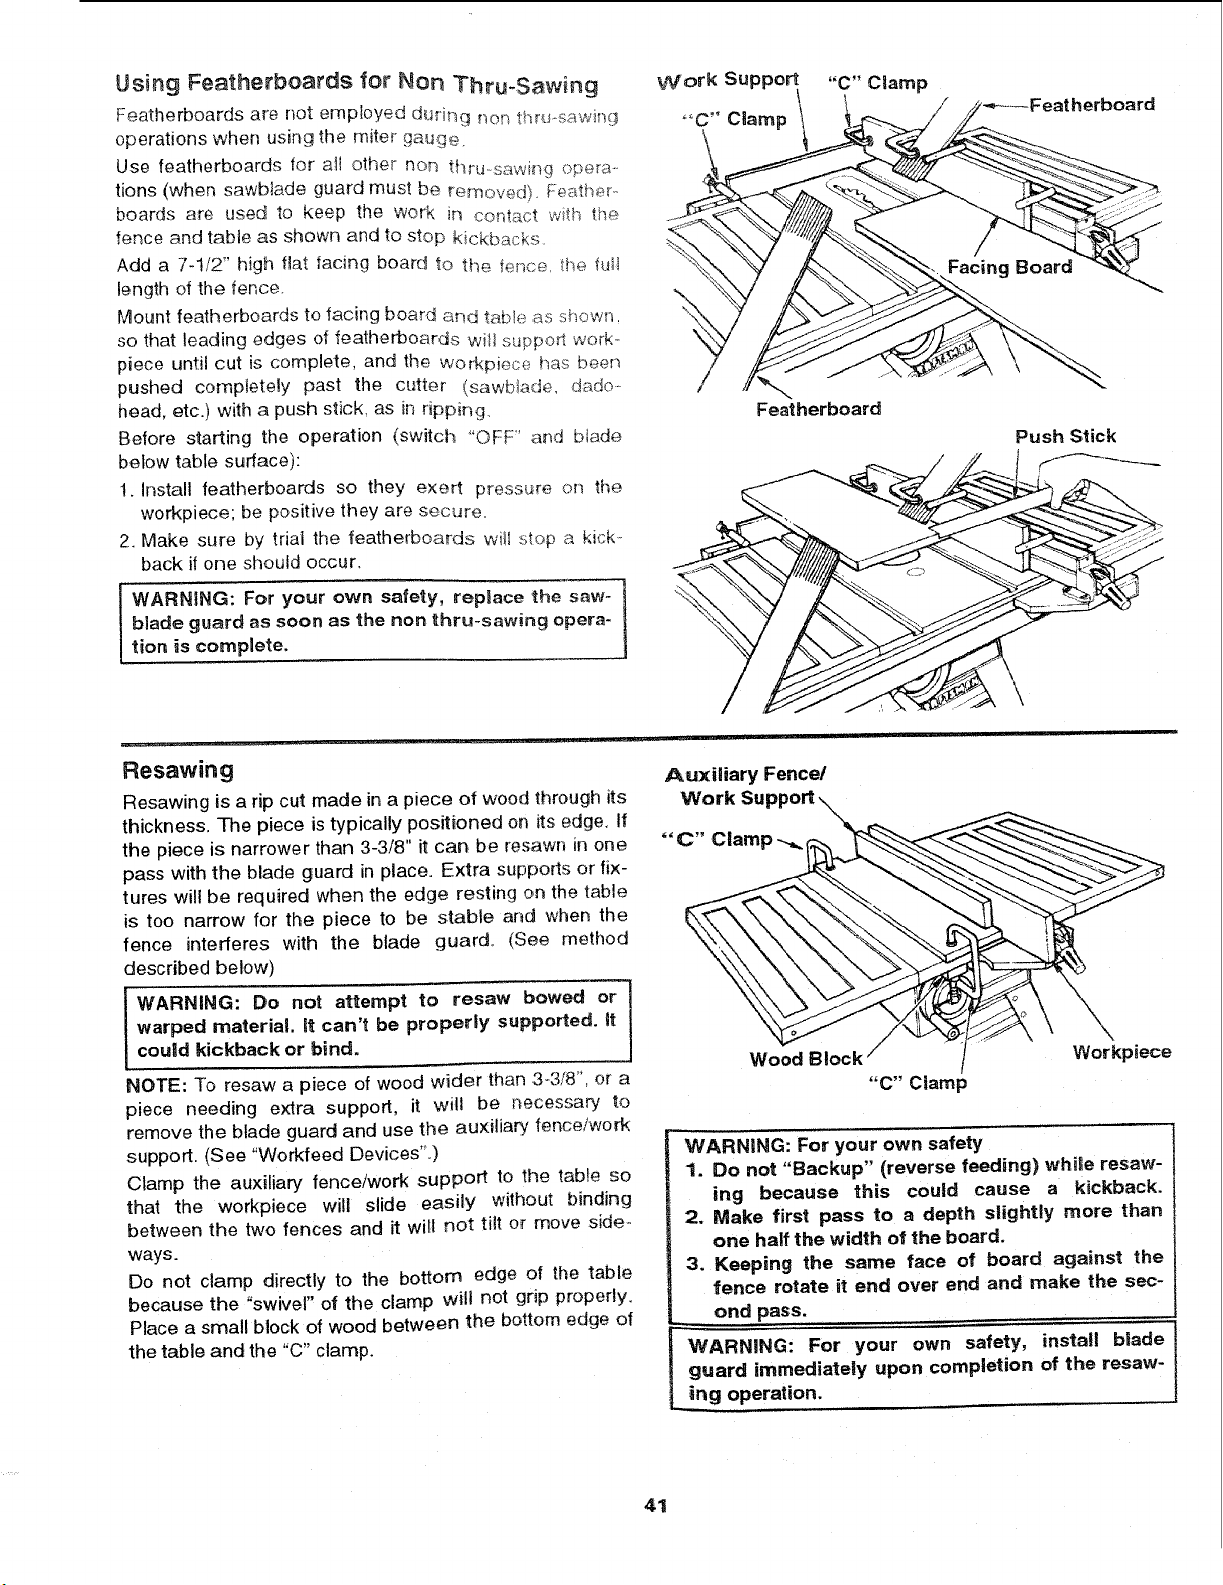
Using Featherboards for Non "Thru-Sawing
Featherboards are not emp!oyed duri_Tg nof_ thru-.sawing
operations when using the miter gauge.
Use featherboards for a_l other non !:hru--sawi_g opera ....
tions (when sawMade guard must be removed). Fe_,,ther.
boards are used to keep the woe< in contact wi_h fi_÷
fence and table as shown and to stop kickbacks.
Add a 7-1/2" high flat facing board to the fe_ce_ the full
length of the fence.
Mount featherboards to facing board and tame as shown.
so that leading edges of featherboards witl s,Jpporl work_
piece until cut is complete, and the Workpiece has been
pushed corlnpletely past the cutter (sawbtade, dado-
head, etc.) with a push stick, as in ripping.
Before starting the operation (switch "OFF" and btade
below table surface):
1. Install featherboards so they exert pressure on the
workpiece; be positive they are secure.
2. Make sure by trial the featherboards wi_l stop a kick-
back if one should occur.
WARNING: For your own safety, replace the saw- 1
blade guard as soon as the non thru-sawing opera-
lion is complete.
Featherboard
:herboard
Push Stick
Resawing
Resawing is a rip cut made in a piece of wood through its
thickness. The piece is typically positioned on its edge, I{
the piece is narrower than 3-3/8" it can be resawn in one
pass with the blade guard in place. Extra supports or fix-
tures will be required when the edge resting on the table
is too narrow for the piece to be stable and when the
fence interferes with the blade guard. (See method
described below)
WARNING: Do not attempt to resaw bowed or]
warped material. _t can't be properly supported, it
/
could kickback or bind.
NOTE: To resaw a piece of wood wider than 3-3/8", or a
piece needing extra support, it will be necessary to
remove the blade guard and use the auxilia,_ fence/work
support. (See "Wed<feed Devices".)
Clamp the auxiliary fence/work support, to the table so
that the workpiece will slide easily without binding
between the two fences and it will not tilt or move side-
ways.
Do not clamp directly to the bottom edge of the table
because the "swivel" of the clamp will not grip properly.
Place a small block of wood between the bottom edge of
the table and the "C" clamp.
Auxiliary Fence/
Work Support _
""C" Clam
Wood Block / Workpiece
"C" Ciaml_
WARNING: For your own safety
1. Do not "Backup" (reverse feeding) whi_e resaw-
ing because this could cause a kickback.
2. Make first pass to a depth slightly more than
one half the width ot the board.
3. Keeping the same face of board against the
fence rotate it end over end and make the sec-
ond pass,
WARNING: For your own safety, install blade
guard immediately upon completion of the resaw-
ing operation.
41
Loading ...
Loading ...
Loading ...