Loading ...
Loading ...
Loading ...
Mounting Your Saw
I. From the bag !abe_ed "Motor,_'3uard-Base" remove
only the lotlowing hardware:
_4 Hex He;_d Screws, 5/16-18 x 1-!/4" Lor_g
*4 He× Nuts, 5/!6-18
*4 Lockwashers. 5/16" External Type
_8 Flat Washers, 11/32 x 11/16 x 1/! 6
Items marked with asterisk (*) are si_own actual size.
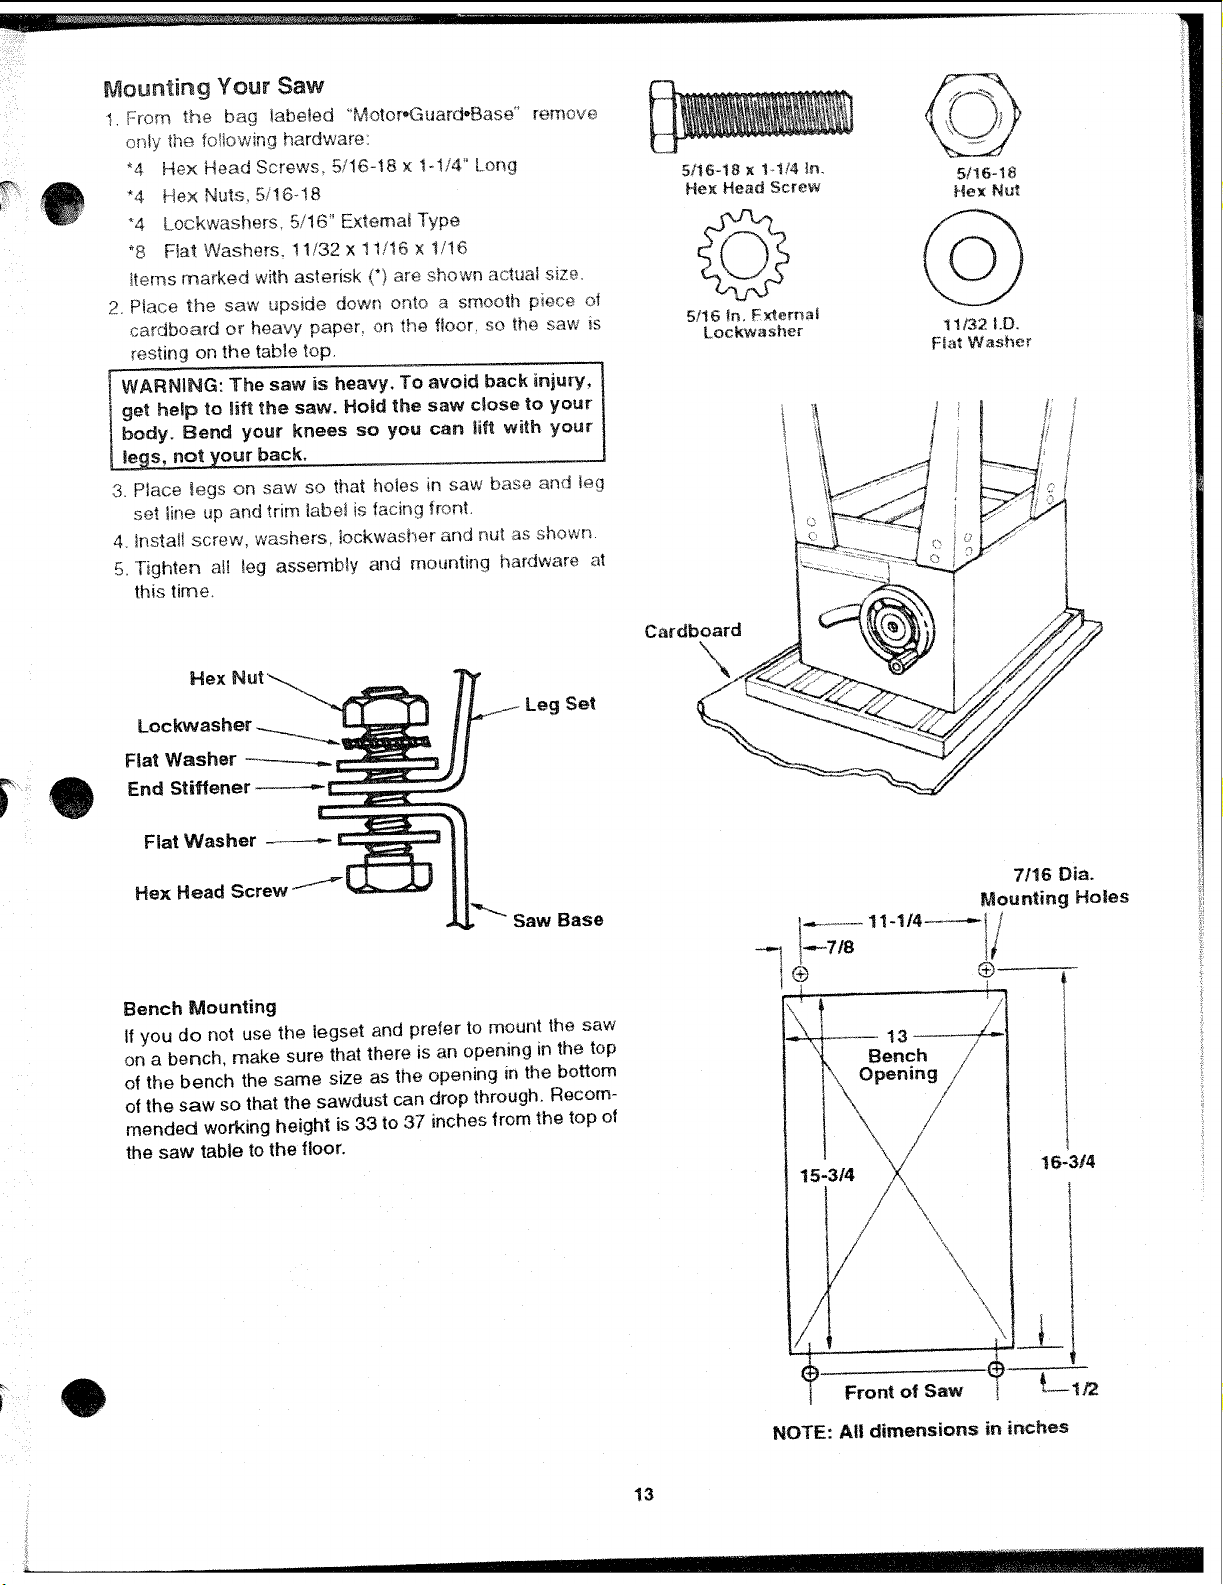
2. Place the saw upside down onto a smooth piece ol
cardbo_rd or heavy paper, on the floor, so the saw is
resting on the table top.
5/i6-18 x !-,1/4 _n. 5/16-18
Hex Head Screw Hex Nut
5/16 in.External
Lockwasher 1!/32 I.D.
Ftat Washer
WARNING: The saw is heavy. To avoid back injury,
get help to lift the saw. Hoid the saw cQose to your
body. Bend your knees so you can lifl with your
I._egs, not your back.
3. Place _egs on saw so that ho_es in saw base and leg
set line up and trim Iabet is facing front.
4. Install screw, washers, lockwasher and nut as showr_.
5. Tighten aH _eg assembly and mounting hardware at
this time.
Rex
Lockvvasher
Fiat Washer
End Stiffener ._---.-
Flat Washer
Leg Set
Cardboard
Hex Head Screw
Saw Base
Bench Mounting
If you do not use the legset and prefer to mount the saw
on a bench, make sure that there is an opening in the top
of the bench the same size as the opening in the bottom
of the saw so that the sawdust can drop through. Recom-
mended working height is 33 to 37 inches from the top of
the saw table to the floor.
7/16 Din.
Mounting Holes
G) ®
I
/
Bench
Opening
15-3/4
I
I
I Front of Saw
16-3!4
NOTE: All dimensions in inches
13
Loading ...
Loading ...
Loading ...