Loading ...
Loading ...
Loading ...
USING THE 907X
www.hasselblad.comCONTENTS
49
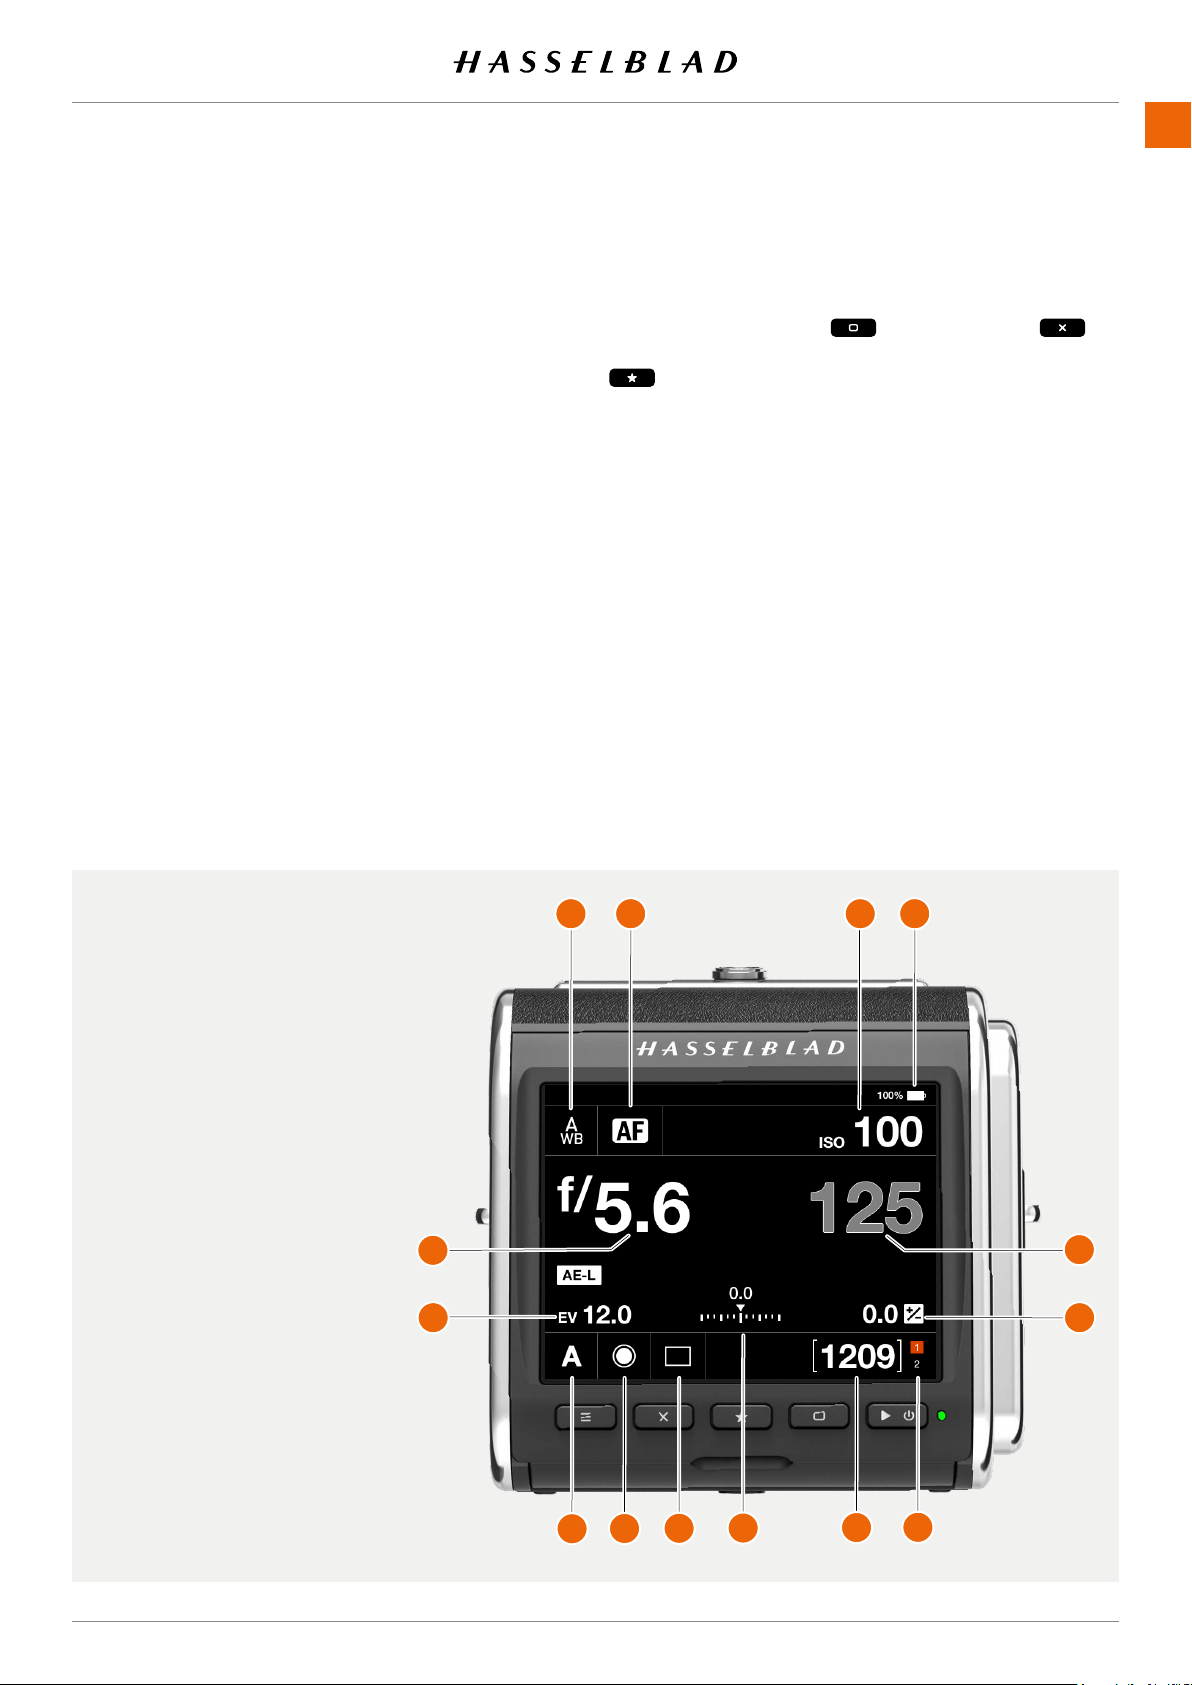
CONTROL SCREEN
This is a status screen showing the actual settings of the
camera. From this screen, you can also change settings
directly.
The control screen can be activated in two ways:
● Form any screen, you can slide in the control screen by
swiping the display from the top.
● Press the menu button until the control screen is shown
(requires 1 or 2 clicks).
From the Control Screen you can directly change the follow-
ing settings:
● White balance
(1)
● Autofocus mode
(2)
● ISO
(3)
● Aperture
(5)
● Shutter speed
(14)
● Exposure mode
(7)
● Light metering mode
(8)
● Drive mode
(9)
● Fixed exposure adjustment
(13)
Change settings using touch
Tap the value to bring up a setting dialogue. See page 51.
Change settings using buttons
Press the rectangle button or the cross button to
highlight the setting you want to change. Press the Star Button
to bring up the setting dialogue.
Use the Rectangle button or the cross button to select new
value. Accept with the Star Button.
The control screen also shows the following status indications:
● Battery status with optional percent value
(4)
.
● Remaining captures on card (free space)
(11)
● Card status
(12).
See more on page 70.
Depending on camera mode and setting, the control screen
can show additional information. This will be explained in
detail later in this user guide.
1 White balance.
2 Autofocus mode.
3 ISO.
4 Battery status (including
optional percentage).
5 Aperture value.
6 EV number.
7 Exposure mode.
8 Light metering mode.
9 Drive mode.
10 Exposure adjustment scale.
11 Remaining captures on card.
12 Card status.
13 Fixed exposure adjustment.
14 Shutter speed.
907X 50C USER GUIDE
7
8
9
10
11
12
13
14
5
6
1
2
3
4
Loading ...
Loading ...
Loading ...