Loading ...
Loading ...
Loading ...
How to Perform a Scan (for Windows Users)
78
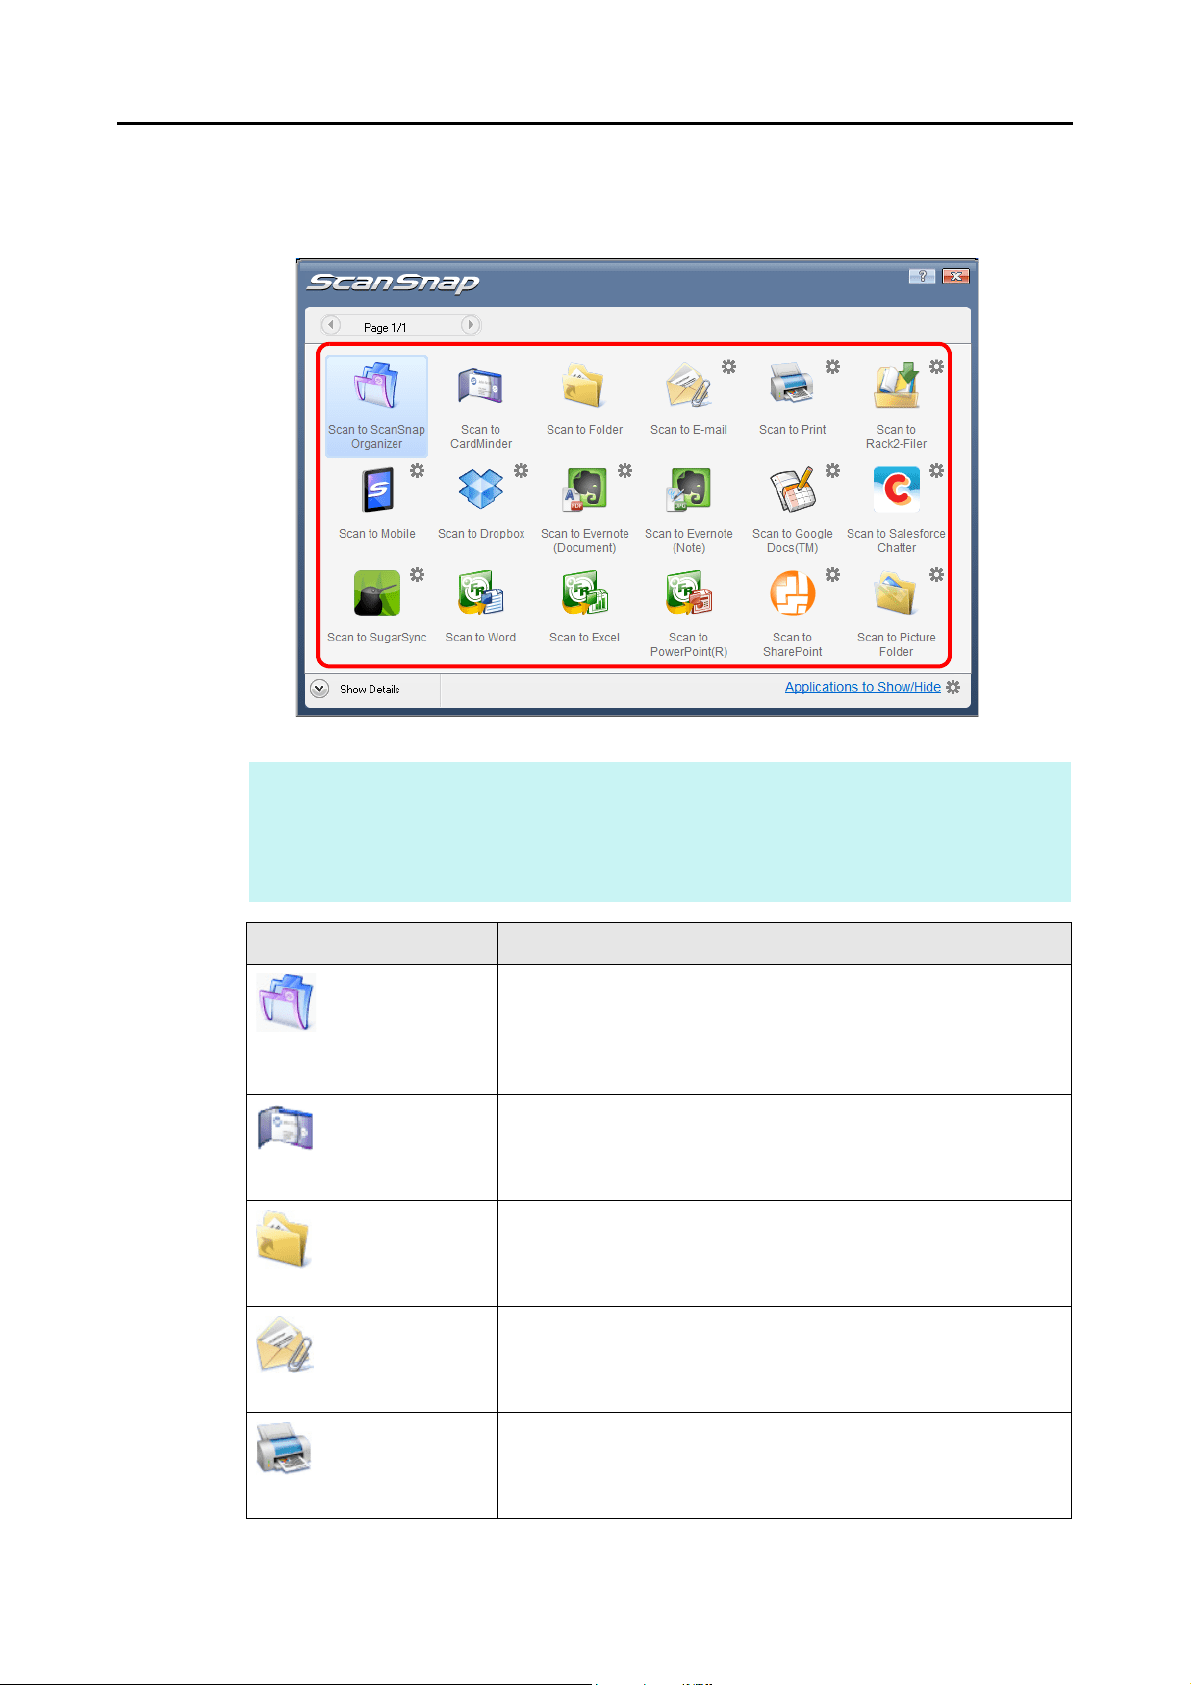
7. In the Quick Menu, click the icon of the application to link with ScanSnap
Manager.
D The selected application starts up.
HINT
z To specify which applications to display/hide in the Quick Menu, or change the display order of
the applications, refer to "Quick Menu Settings" (page 86).
z To select an application to link with ScanSnap Manager before scanning, refer to "Without Using
the Quick Menu" (page 81).
Application Description
Scan to ScanSnap
Organizer (*1)
Displays the [ScanSnap Organizer] dialog box.
Saves the scanned images in a folder specified in ScanSnap
Organizer.
For details about how to operate ScanSnap Organizer, refer to the
ScanSnap Organizer User's Guide.
Scan to
CardMinder (*2)
Displays the [CardMinder] dialog box.
Saves the scanned images to CardMinder.
For details about how to continue the process after you select this
item, refer to "Storing Business Cards in CardMinder" (page 152).
Scan to Folder Displays the [Scan to Folder] dialog box.
You can specify the destination folder to save the scanned images.
For details about how to continue the process after you select this
item, refer to "Saving Data in a Specified Folder" (page 110).
Scan to E-mail Displays the [Scan to E-mail] dialog box.
Attaches the scanned images to an e-mail message.
For details about how to continue the process after you select this
item, refer to "Attaching Files to E-Mail" (page 117).
Scan to Print Displays the [Scan to Print] dialog box.
Prints out the scanned images with a specified printer.
For details about how to continue the process after you select this
item, refer to "Using the ScanSnap as a Copy Machine" (page 128).
Loading ...
Loading ...
Loading ...