
Loading ...
Loading ...
Loading ...
Chapter 45 Mirroring
XGS2220 Series User’s Guide
314
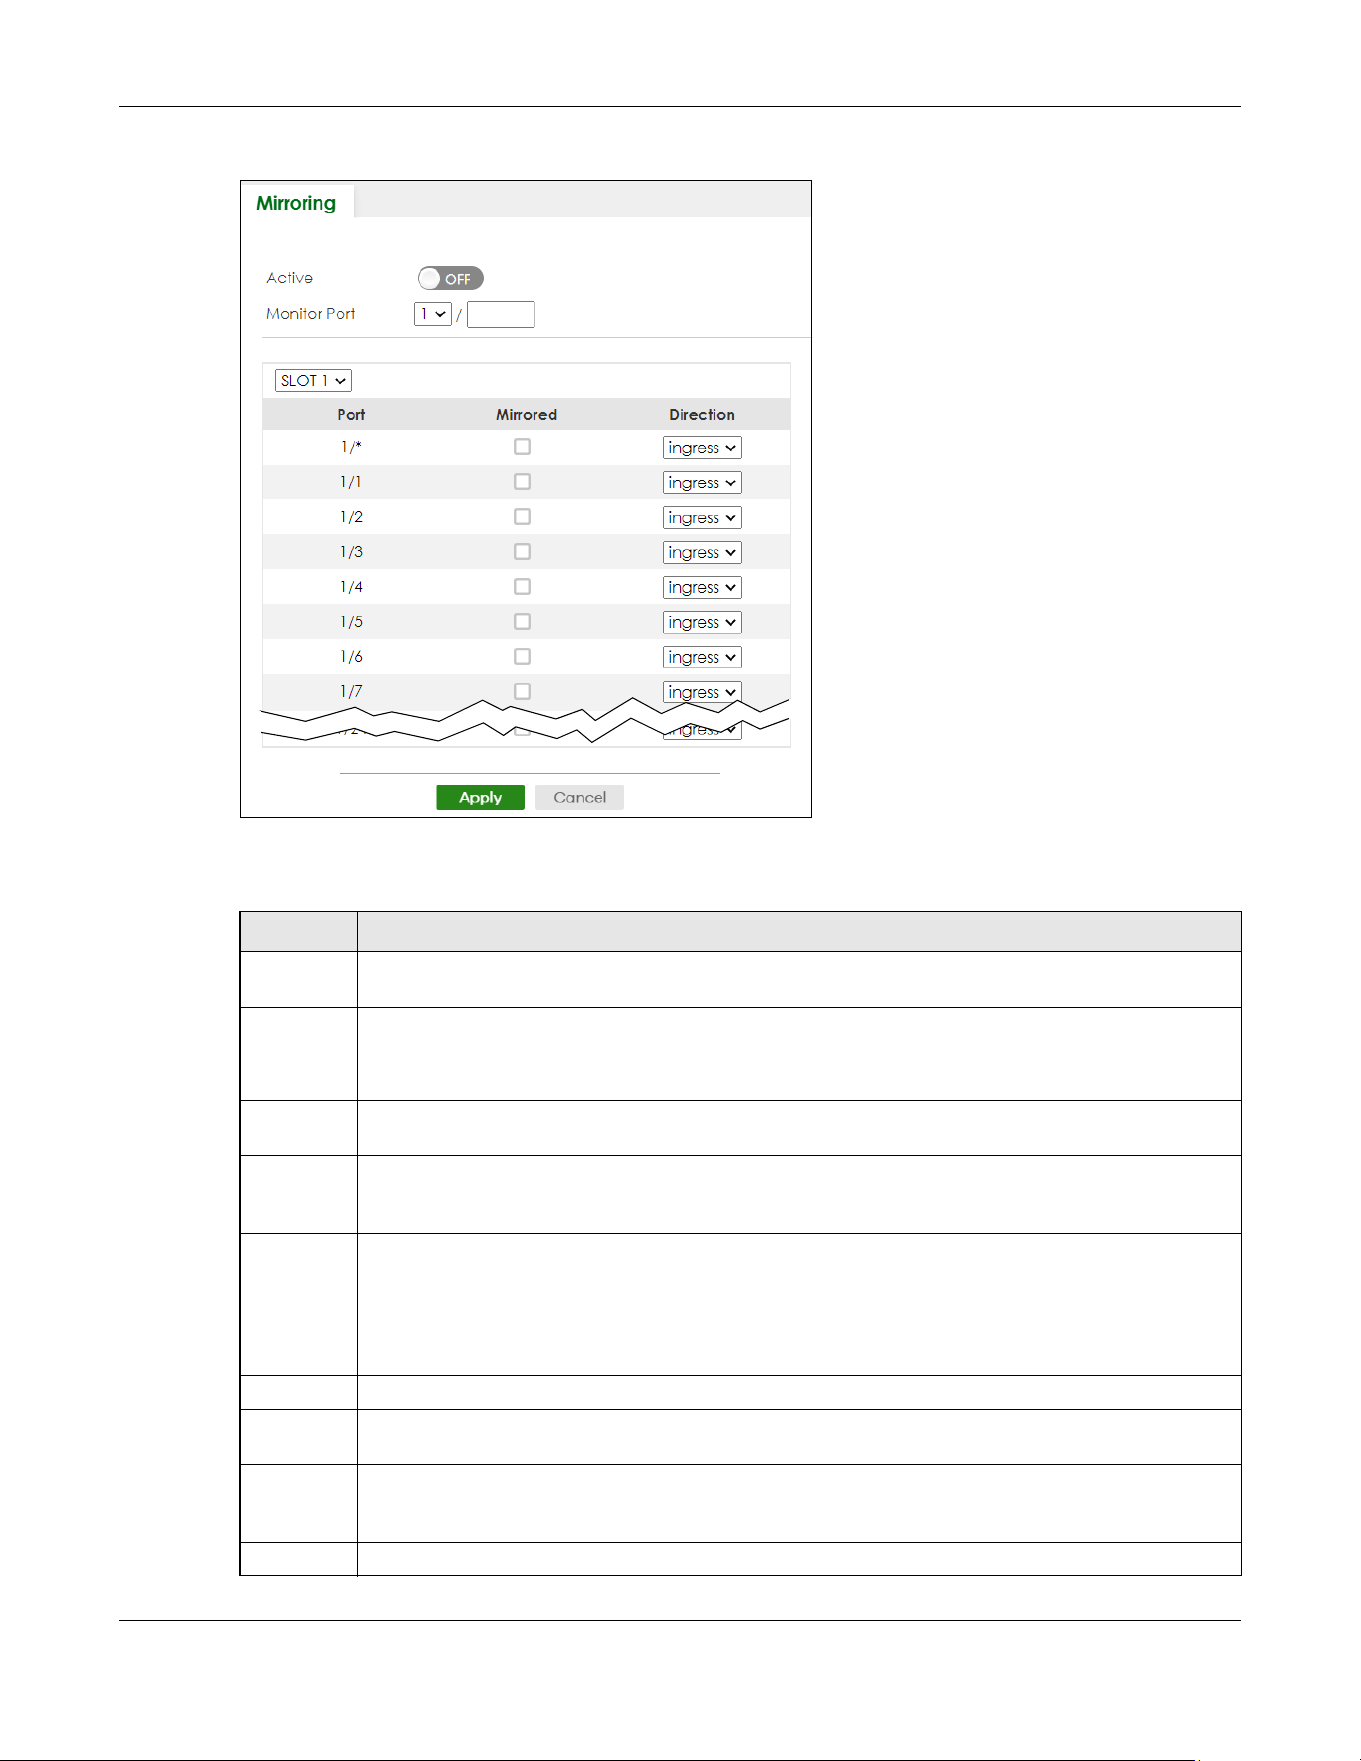
Figure 237 SWITCHING > Mirroring > Mirroring (Stacking Mode)
The following table describes the labels in this screen.
Table 142 SWITCHING > Mirroring > Mirroring
LABEL DESCRIPTION
Active Enable the switch button to activate port mirroring on the Switch. Disable the switch to disable the
feature.
Monitor
Port
The monitor port is the port you copy the traffic to in order to examine it in more detail without
interfering with the traffic flow on the original ports. Type the port number of the monitor port.
In Stacking mode, the first box field is the slot ID and the second field is the port number.
SLOT This field appears only in Stacking mode. Click the drop-down list to choose the slot number of the
Switch in a stack.
Port This field displays the port number. In Stacking mode, the first number represents the slot ID and the
second is the port number. Please note that the default stacking ports (the last four ports of your
Switch) cannot be configured. They are reserved for stacking only.
* Settings in this row apply to all ports.
Use this row only if you want to make some settings the same for all ports. Use this row first to set the
common settings and then make adjustments on a port-by-port basis.
Note: Changes in this row are copied to all the ports as soon as you make them.
Mirrored Select this option to mirror the traffic on a port.
Direction Specify the direction of the traffic to mirror by selecting from the drop-down list box. Choices are
Egress (outgoing), Ingress (incoming) and Both.
Apply Click Apply to save your changes to the Switch’s run-time memory. The Switch loses these changes if
it is turned off or loses power, so use the Save link on the top navigation panel to save your changes
to the non-volatile memory when you are done configuring.
Cancel Click Cancel to reset the fields.
Loading ...
Loading ...
Loading ...