
Loading ...
Loading ...
Loading ...
Precision Loop Calibrator
Trim, Set, and Zero Menu
29
Trim 20 mA
If the operation mode is Communicator Only, this function is not
available and an error message shows.
A warning to change the loop to MANUAL before you proceed
shows. Push the selection knob to proceed. Push
to go to the
Trim, Set and Zero menu.
While the HART device is changed to fixed output mode, an error
shows if the HART device rejects the mode change command.
When the mode change is successful, the screen in Figure 40
shows.
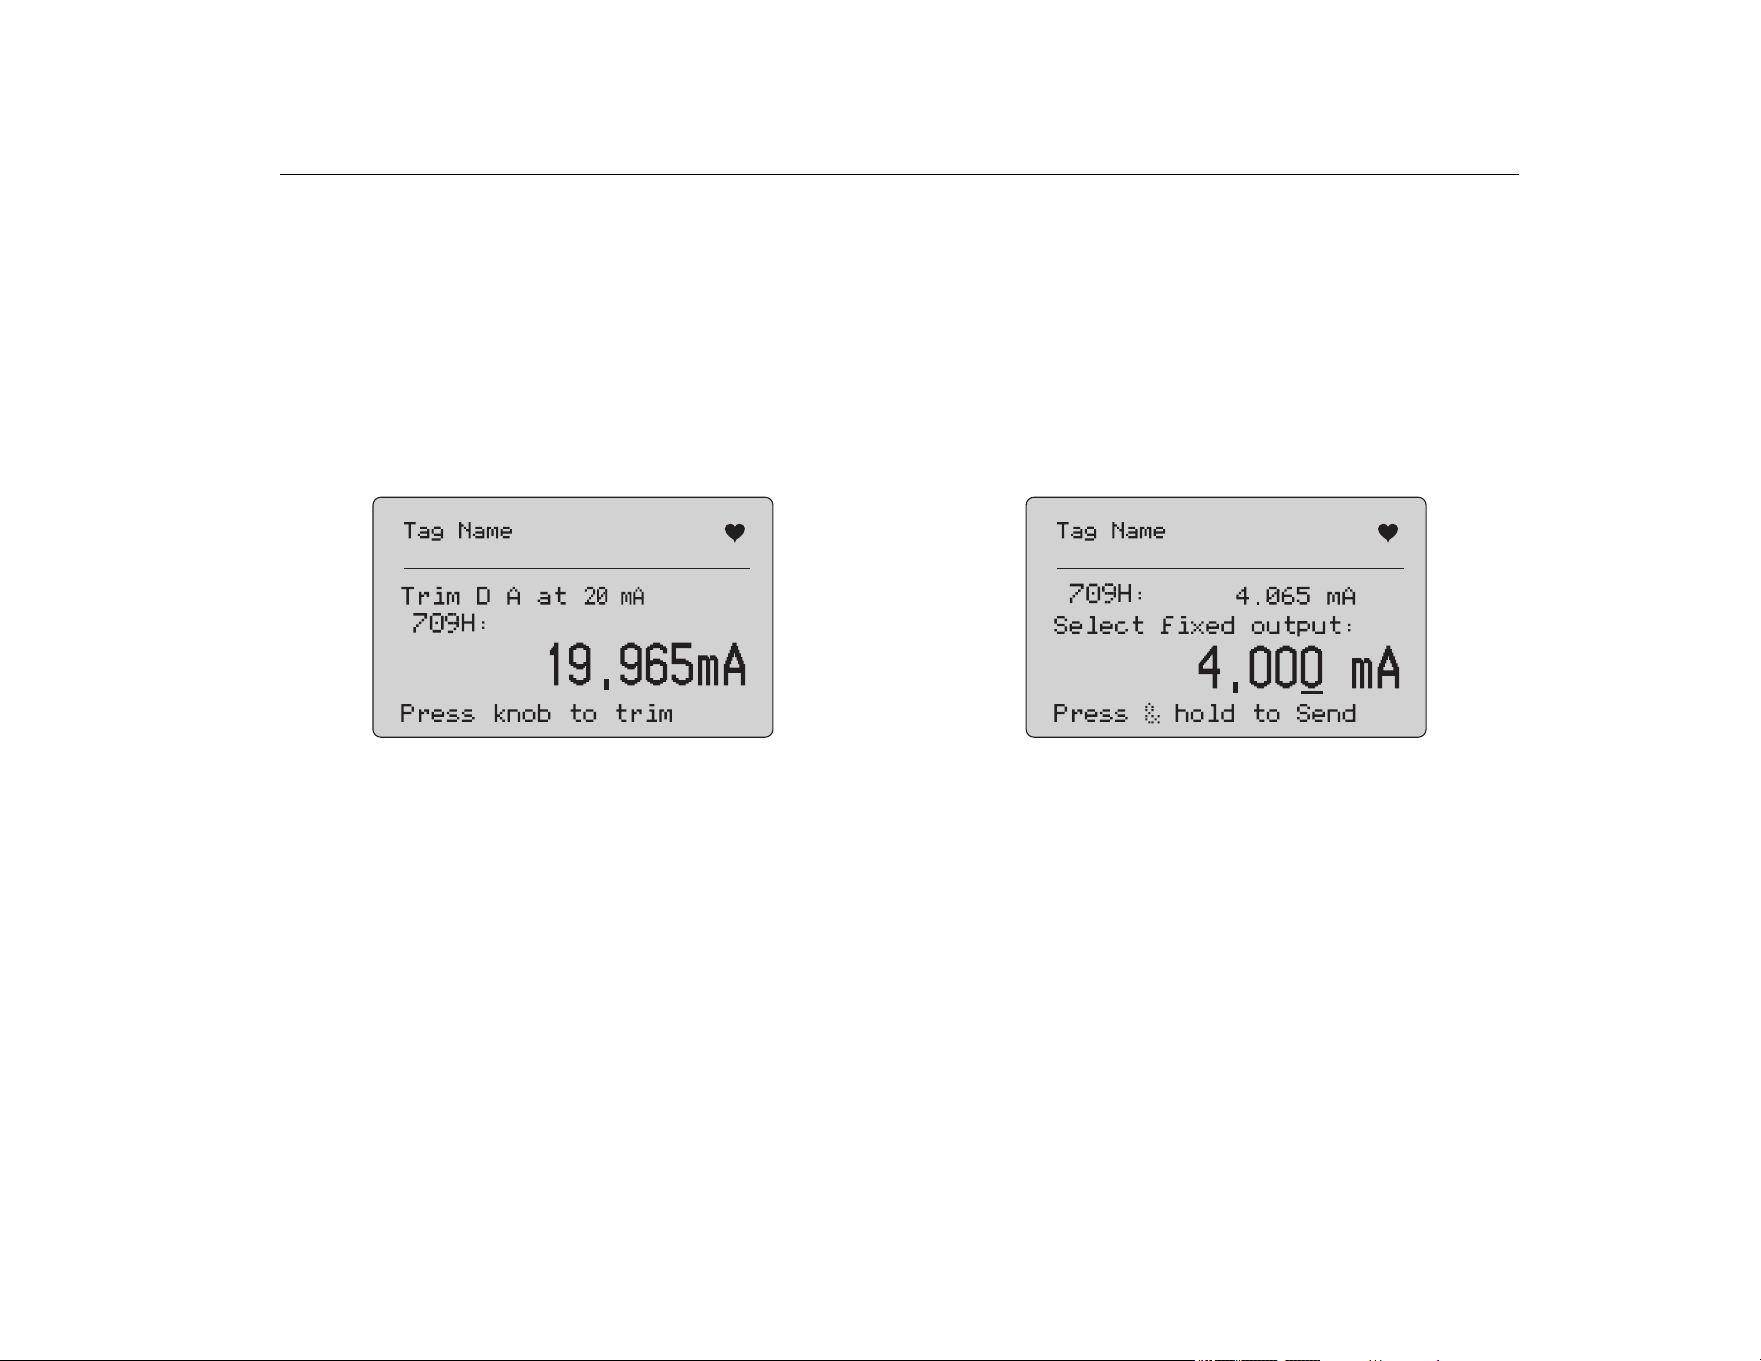
Figure 40. Trim 20 mA Screen
As the output to settles at 20 mA, the screen shows the Product
measurement. The measurement is updated once a second.
1. Push the selection knob to trim the HART device. Stay on this
screen to evaluate the result. An error shows if the HART
device rejects the trim command.
2. Push
to change the HART device to normal output mode
and go to the Trim, Set, and Zero menu. A prompt to change
the loop to AUTOMATIC shows first. An error shows if the
device rejects the mode change command.
Set Fixed mA Output
If the operation mode is Communicator Only, this function is not
available and an error message shows.
A warning to change the loop to MANUAL before you proceed
shows. Push the selection knob to proceed. Push
to go to the
Trim, Set and Zero menu.
As the HART device is changed to fixed output mode, an
information screen shows. An error shows if the HART device
rejects the mode change command. When the mode change is
successful, the screen in Figure 41 shows.
Figure 41. Set Fixed mA Output Screen
This screen is used to set a fixed output and monitor the result with
the Product measurement. The measurement is updated once a
second.
The range of values that can be set is 3.0 mA to 21.0 mA.
1. Use the selection knob to select and increment or decrement
the value in steps shown by the selected decade.
2. Push and hold the selection knob to send the new value to the
HART device and stay on this screen. An error shows if the
HART device rejects the value.
3. Push
to change the HART device to normal output mode
and go to the Trim, Set, and Zero menu. A warning to change
the loop to AUTOMATIC shows first. An error shows if the
device rejects the mode change command.
1.888.610.7664 sales@GlobalTestSupply.com
Fluke-Direct.com
Loading ...
Loading ...
Loading ...