
Loading ...
Loading ...
Loading ...
18 OPERATION
NOTE
• Avoid opening the oven door more than
necessary during use. This helps the oven
maintain temperature, prevents unnecessary
heat loss, and saves on energy use.
Oven Vent
Areas near the vent may become hot during
operation and may cause burns. Avoid placing
plastics near the vent as heat may distort or melt
the plastic.
It is normal for steam to be visible when cooking
foods with high moisture content.
WARNING
• Do not block the vent opening at the bottom of
the oven.
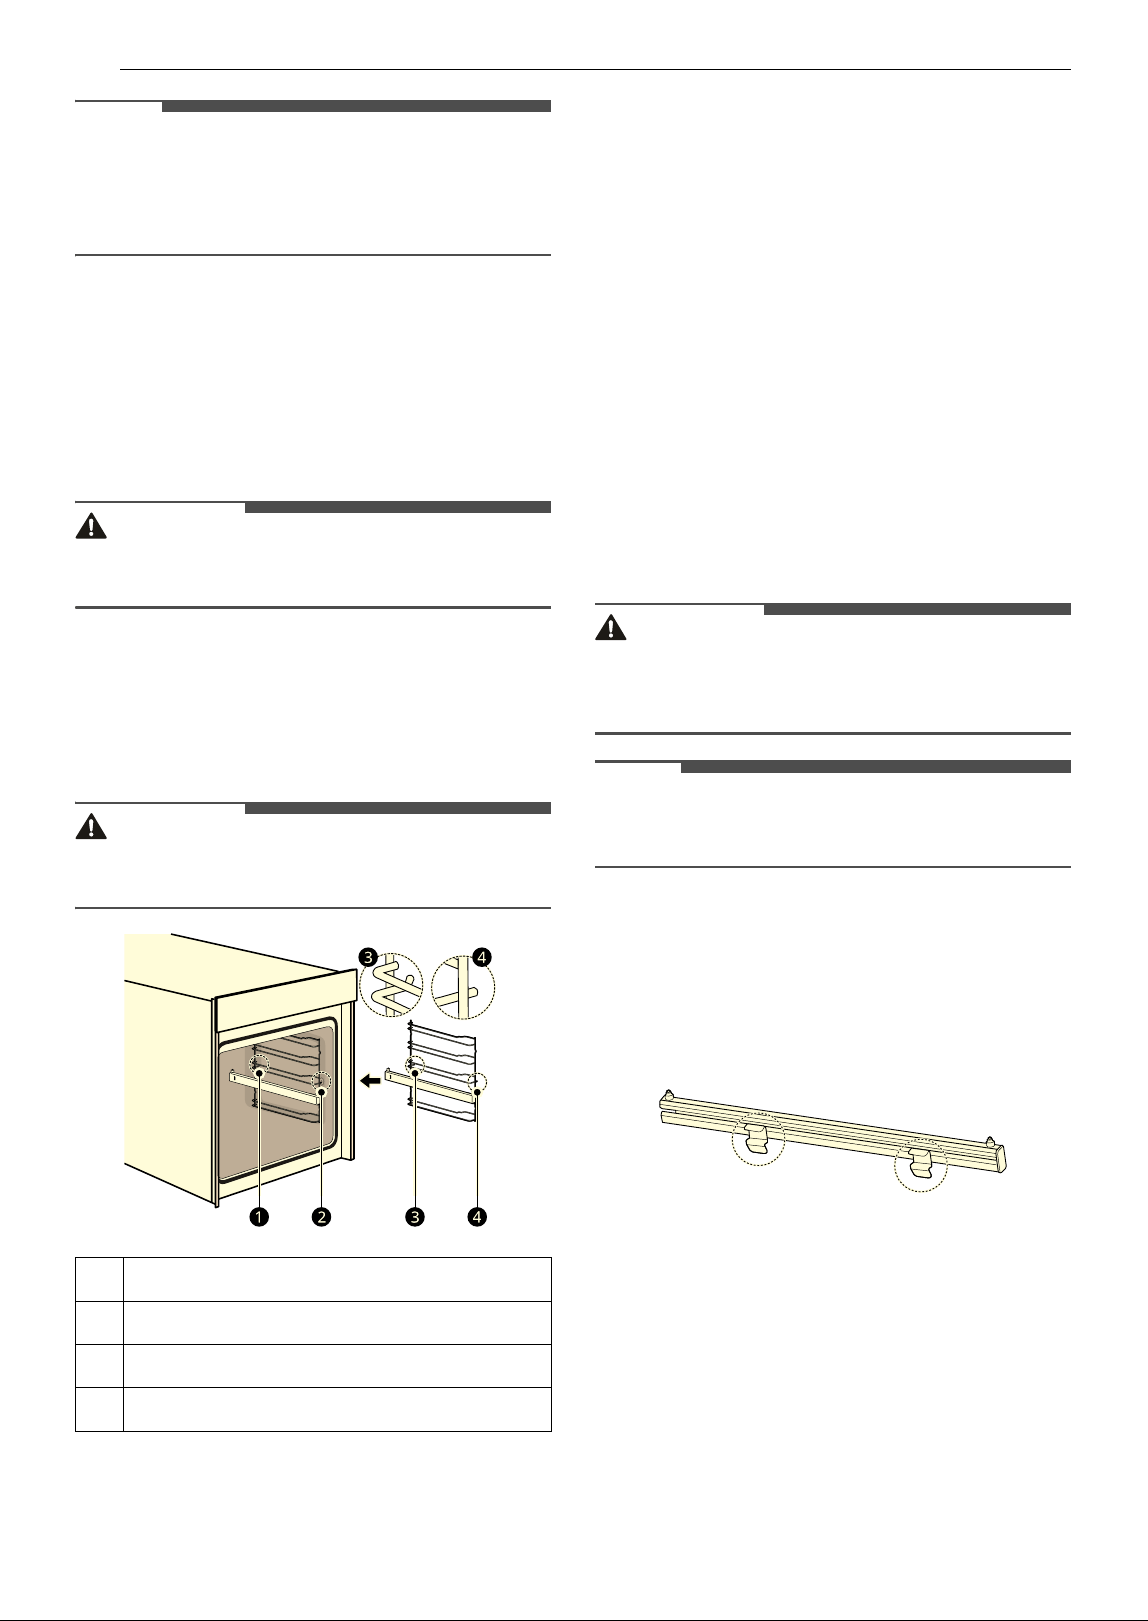
Assembling Rack Guides
Assemble the rack guides on both sides of the
oven cavity before operating the oven for the first
time. This keeps the oven racks in position.
WARNING
• Remove the protective film from all telescopic
runners.
1 Place the rack inside the oven cavity so that
the curved end of the rack is at the back of the
oven.
2 Insert the rear rack guide hook c into the
oven cavity opening a.
3 Insert the front rack guide hook d into the
oven cavity opening
band press down to
secure it in place.
4 Repeat steps 1-3 to install the second rack
guide on the other side of the oven cavity.
Using the Telescopic Runners
Installing the Telescopic Runners
Install the telescopic runners before operating the
oven for the first time.
WARNING
• Allow the oven to cool before installing or
removing the telescopic runners to prevent
burns.
NOTE
• Place a soft cloth on the floor to avoid damaging
the parts.
1 Hold the telescopic runner with the longer tab
on the clips facing down and the pins facing
up.
2 Align the telescopic runner horizontally with
the rack guide.
a
Rear Opening
b
Front Opening
c
Rear Rack Guide Hook (curved)
d
Front Rack Guide Hook (straight)
Loading ...
Loading ...
Loading ...