Loading ...
Loading ...
Loading ...

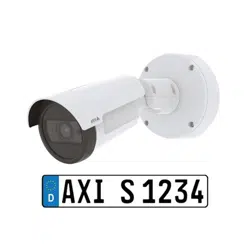
AXIS P1465-LE-3 License Plate Verifier Kit
The device interface
• Flicker-free 60 Hz : The camera adjusts the aperture and gain automatically, and uses the shutter speed 1/60 s.
• Flicker-reduced
: This is the same as icker-free, but the camera might use shutter speeds faster than
1/100 s (50 Hz) and 1/120 s (60 Hz) for brighter scenes.
• Flicker-reduced 50 Hz
: This is the same as icker-free, but the camera might use shutter speeds faster
than 1/100 s for brighter scenes.
• Flicker-reduced 60 Hz
: This is the same as icker-free, but the camera might use shutter speeds faster
than 1/120 s for brighter scenes.
• Manual
: The aperture, gain and shutter are xed.
Exposure zone: Use exposure zones to optimize the exposure in a selected part of the scene, for example, the area in front
of an entrance door.
Note
The exposure zones are related to the original image (unrotated), and the names of the zones apply to the original image.
This means, for example, that if the video stream is rotated 90°, then the Upper zone becomes the Right zone in the
stream, and Left becomes Lower.
• Automatic: Suitable for most situations.
• Center: Uses a xed area in the center of the image to calculate the exposure. The area has a xed size and
position in the live view.
• Full
: Uses the entire live view to calculate the exposure.
• Upper
: Uses an area with a xed size and position in the upper part of the image to calculate the exposure.
• Lower
: Uses an area with a xed size and position in the lower part of the image to calculate the exposure.
• Left
: Uses an area with a xed size and position in the left part of the image to calculate the exposure.
• Right
: Uses an area with a xed size and position in the right part of the image to calculate the exposure.
• Spot: Uses an area with a xed size and position in the live view to calculate the exposure.
• Custom: Uses an area in the live view to calculate the exposure. You can adjust the size and position of the area.
Max shutter: Select the shutter speed to provide the best image. Low shutter speeds (longer exposure) might cause motion blur
when there is movement, and a too high shutter speed might affect the image quality. Max shutter works with max gain to
improve the image.
Max gain: Select the suitable max gain. If you increase the max gain, it improves the visible level of detail in dark images, but
also increases the noise level. More noise can also result in increased use of bandwidth and storage. If you set the max gain
to a high value, images can differ a lot if the light conditions are very different from day to night. Max gain works with max
shutter to improve the image.
Motion-adaptive exposure
: Select to reduce motion blur in low-light conditions.
Blur-noise trade-off: Use the slider to adjust the priority between motion blur and noise. If you want to prioritize low bandwidth
and have less noise at the expense of details in moving objects, move the slider towards Low noise. If you want to prioritize the
preservation of details in moving objects at the expense of noise and bandwidth, move the slider towards Low motion blur.
Note
You can change the exposure either by adjusting the exposure time or by adjusting the gain. If you increase the exposure
time, it results in more motion blur, and if you increase the gain it results in more noise. If you adjust the Blur-noise
trade-off towards Low noise, the automatic exposure will prioritize longer exposure times over increasing gain, and the
opposite if you adjust the trade-off towards Low motion blur. Both the gain and exposure time will eventually reach
their maximum values in low-light conditions, regardless of the priority set.
43
Loading ...
Loading ...
Loading ...