Loading ...
Loading ...
Loading ...
EN-69
You can edit a built-in tone to create a user tone, and save up
to 100 user tones for later recall.
■ Saving to an External Device
User tones can be saved to a USB flash drive or a computer.
For details, see “To save Digital Keyboard data to a USB flash
drive” (page EN-116) and “Transferring Data Between the
Digital Keyboard and a Computer” (page EN-120).
1.
Select the tone you want to edit.
• Be sure to select the UPPER 1 part tone (page
EN-19). The UPPER 1 part tone will be the tone being
edited.
• You cannot select a drum set tone for editing.
2.
Long-press bk FUNCTION until the [EDIT]
indicator appears.
• This enters the Tone Editing Mode and displays the
tone editing screen.
• For details about editable parameters, see the “Tone
Editing Item List” (page EN-72).
3.
Use the [1] (V) and [3] (W) bm number keys
to display the editing item you want to modify.
• If the [ENTER] indicator is displayed, press [6]
(ENTER) to enter the sub-menu and then use the [1]
(V) and [3] (W) keys to display the editing item you
want to modify.
• To return to a main menu from a sub-menu, press the
[4] (EXIT) bm number key.
• Using the “DSP Edit” editing item, you can configure
precise DSP effects for a tone using a wide variety of
parameters. For details about the configuration of
Digital Keyboard DSP effects and an overview of DSP
editing, see “DSP Editing” (page EN-70). For details
about the DSP editing operation, see “To use DSP
editing to edit an effect” (page EN-70).
4.
Use bn [–] and [+] or the bl dial to change the
setting value.
5.
Repeat steps 3 and 4 above for each of the
editing items you want to change.
• You can sound the tone you are editing by playing
something on the keyboard. This means you can
immediately check to see how your edits are affecting
the tone.
6.
To save the edited tone, press the [7] (WRITE)
bm number key.
• If the tone you are editing is a user tone, the message
“Replace?” will appear here. Press bn [+] (YES) to
replace the original tone data with the new data, or bn
[–] (NO) to save the new data without replacing the
original data.
• If there are already 100 user tones stored in memory,
the error message “Data Full” will appear when you
press bn [–] (NO) to indicate that you cannot save the
new tone.
• The message “Wait...” remains on the display while
the tone save operation is being performed. Do not
perform any operation while this message is on the
display. “Complete” appears on the display after the
operation is complete.
7.
To exit the Tone Editing Mode, long-press the
[4] (EXIT) bm number key.
• If you did not perform any editing after executing the
operation in step 6, the Tone Editing Mode will be
exited and the [EDIT] indicator will disappear from the
display.
• If you performed any editing after executing the
operation in step 6, the message “Exit?” will be
displayed here. Perform one of the operations below.
• If you are saving the data as a new user tone, the save
destination tone number will be the lowest one in memory
that currently does not have any data stored. The newly
saved user tone will be selected after this operation is
complete.
• If there is no data stored for a user tone number, “No Data”
will be displayed for the tone name. If there is data stored,
“No Name” will be displayed. For information about
renaming, see “To rename a user tone” (page EN-71).
Editing a Tone (User Tones)
Creating a User Tone
To edit a tone
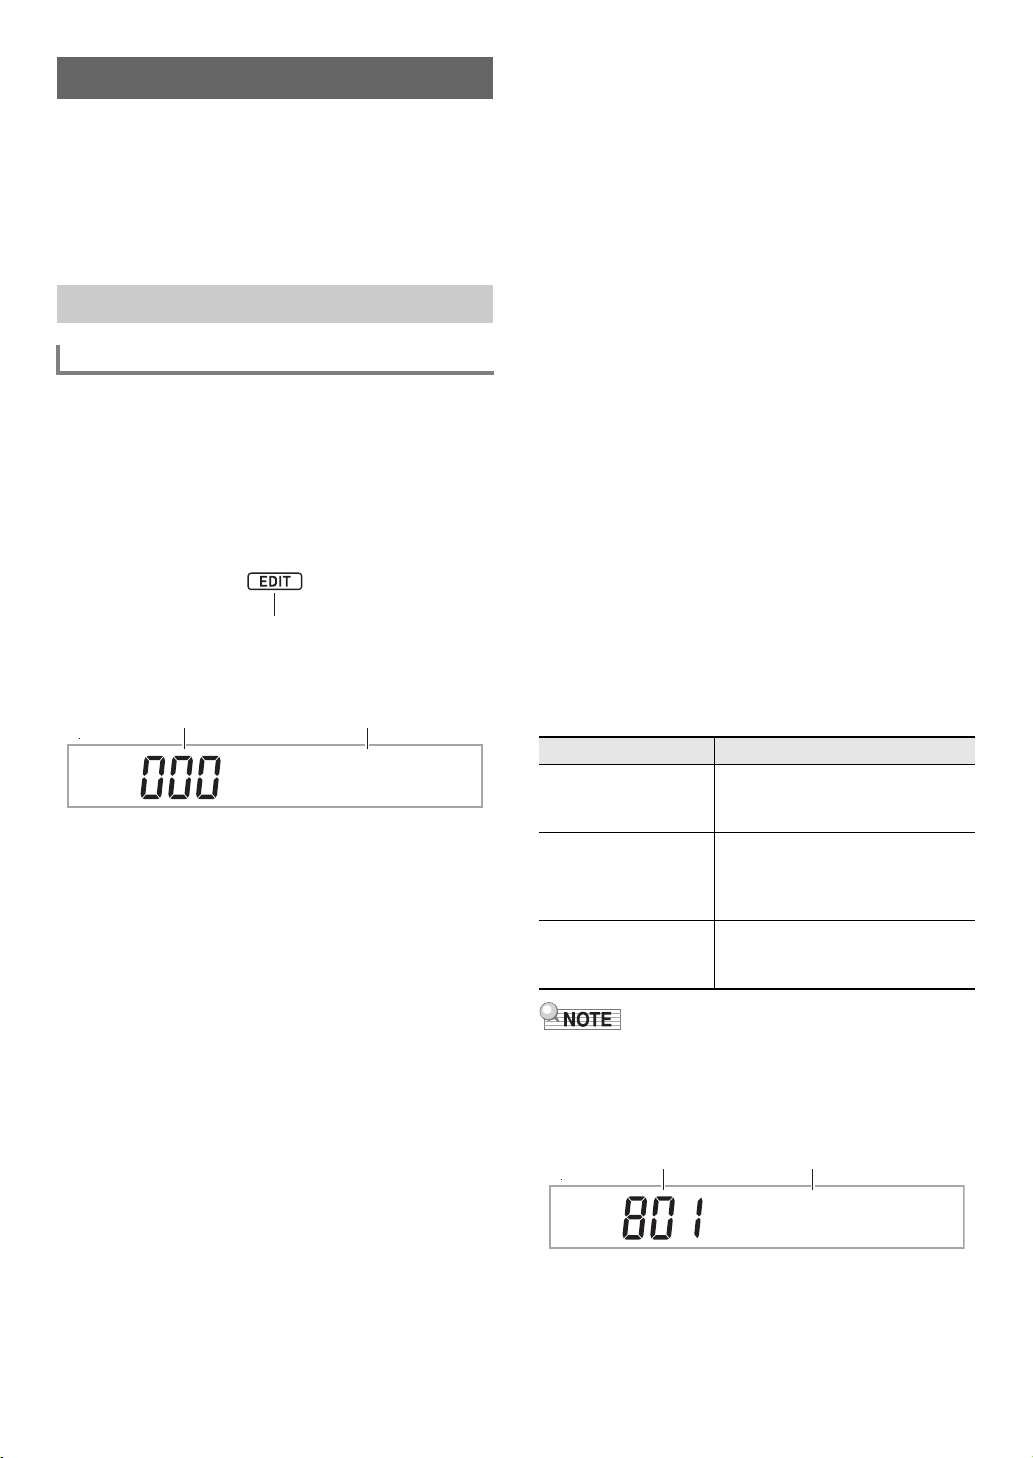
Displayed
Atk.Ti
m
e
Current setting value Editing item name
To do this: Perform this operation:
Continue editing
without exiting the
Tone Editing Mode
Press bn [–] (NO).
Save edited data and
exit the Tone Editing
Mode
(1) Press bn [+] (YES).
(2) When “Write?” appears on the
display, press bn [+] (YES)
again.
Discard edited data
and exit the Tone
Editing Mode
(1) Press bn [+] (YES).
(2) When “Write?” appears on the
display, press bn [–] (NO).
No Na
m
e
Tone number Tone name
CT-X9000_8000IN_EN.book 69 ページ 2018年4月12日 木曜日 午後1時8分
Loading ...
Loading ...
Loading ...