Loading ...
Loading ...
Loading ...
• If the server is in a rack, remove it from the rack. See “Remove the server from the rails” on page 138.
• Remove any locking device that secures the server, such as a Kensington lock or a padlock.
• Place the server on its side with the cover up.
Watch the procedure
A video of this procedure is available at YouTube:
https://www.youtube.com/playlist?list=PLYV5R7hVcs-
AU3iY3F7lq3qfqr5caGbIu
.
Procedure
Step 1. Make preparation for this task.
a. Remove the server cover, see
“Remove the server cover” on page 144.
Note: The heat sink and processor could be very hot. To avoid burning yourself, wait for a few
minutes after turning off the server before you remove the server cover.
b. If applicable, remove the optical drive, see
“Remove an optical drive” on page 70.
c. Remove the optical drive cage from the chassis, see
“Remove the optical drive cage” on page
76
.
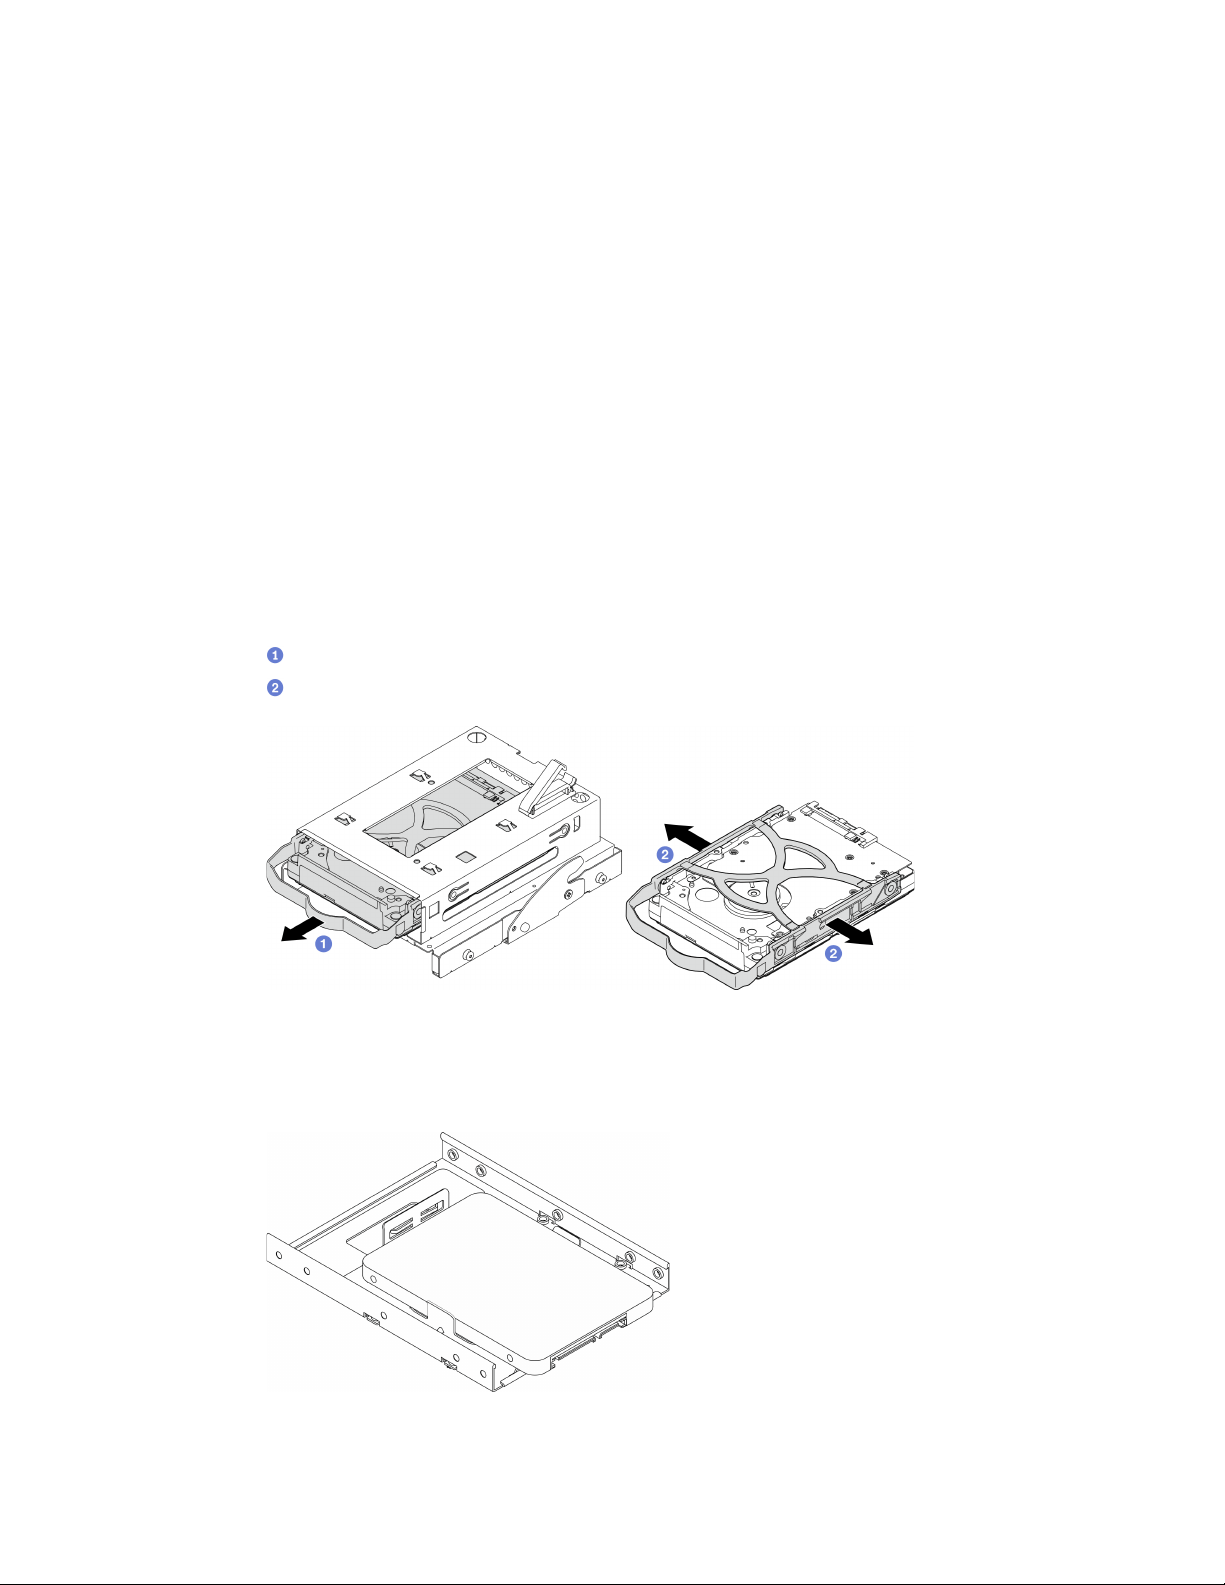
Step 2. Remove the 3.5-inch drive.
a.
Slide the drive retainer out from the drive cage.
b.
Tear both sides of the retainer apart and remove the drive from the retainer.
Figure 46. Removing the 3.5-inch drive
Note: Depending on the configuration, the 3.5-inch drive may be the model in the illustration
below.
After you finish
Chapter 3. Hardware replacement procedures 63
Loading ...
Loading ...
Loading ...